Overview
In this article we will discuss how to connect a Trino database to Preset. So let's get started!
Allowlist Preset IPs
Preset Cloud currently runs on four regions with the IPs listed below.
Before starting, we recommend that you allowlist the Preset IP addresses to ensure the connection with Trino.
| us-west-2 (us1a) | us-east-1 (us2a) | eu-north-1 (eu5a) | ap-northeast-1 (ap1a) |
|---|---|---|---|
| 35.161.45.11 | 44.193.153.196 | 13.48.95.3 | 35.74.159.67 |
| 54.244.23.85 | 52.70.123.52 | 13.51.212.165 | 35.75.171.157 |
| 52.32.136.34 | 54.83.88.93 | 16.170.49.24 | 52.193.196.211 |
If you are not sure where your Preset workspace is located, you can refer to the URL on your browser when accessing Preset. It should look like this: https://xxxxxxxx.us2a.app.preset.io/superset..., where us2a means it is in us-east-1.
Connect Database to Preset
Let's start by selecting + Database - have a look at Connecting your Data if you need help wth this step.
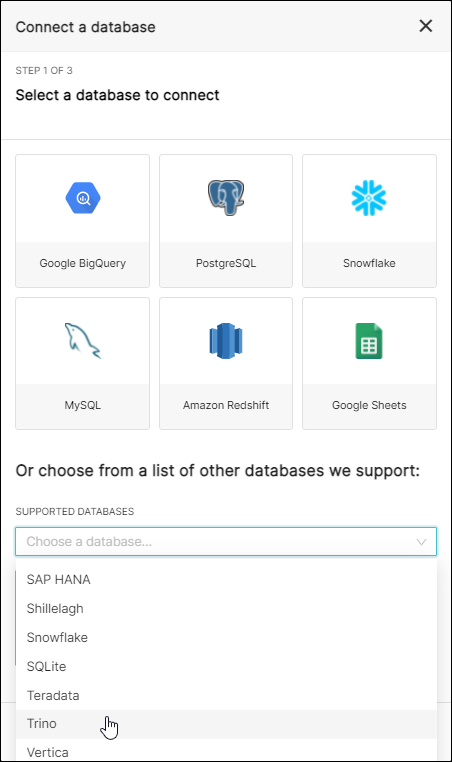
After this, in the Connect a database window, scroll down and select the Supported Databases field.
In the drop-down list, select Trino.
Configure the Connection
The Connect a database panel appears.
Please note that all fields below are required.
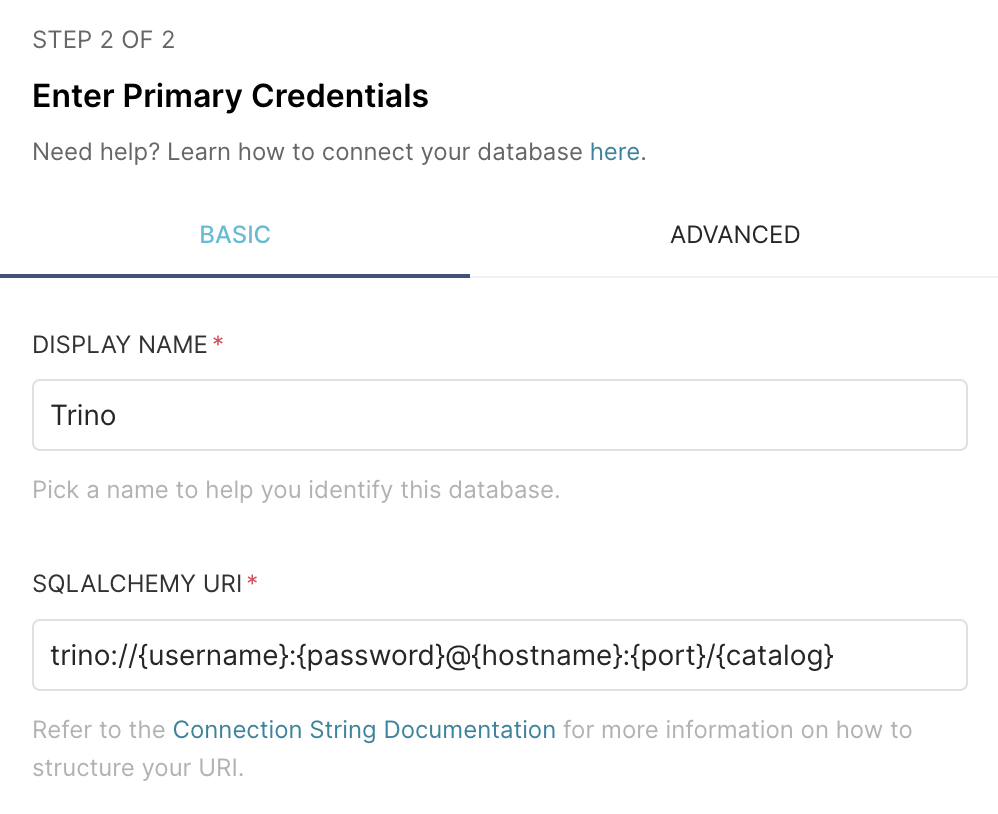
- In the Display Name field, enter a database nickname for display in the Preset environment.
- In the SQLAlchemy URI field, enter the unique URI based on the following syntax, being careful to enter the relevant token, host, and database name details.
trino://{username}:{password}@{hostname}:{port}/{catalog}
The screen should be similar to the following:
Provide Warehouse Parameters
At this stage, you want to configure Advanced options. To learn more, please see Advanced Connection Settings.
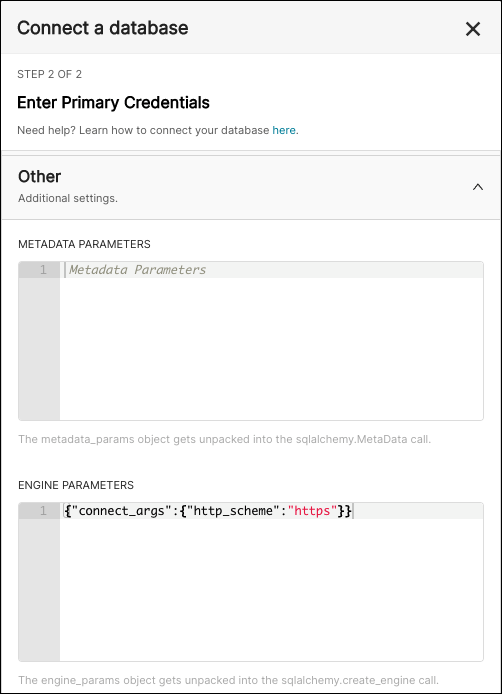
Select the Advanced tab and expand the Other panel.
In the Engine Parameters text-entry field, enter the following; be sure to enter the relevant http path retrieved earlier.
{"connect_args":{"http_scheme":"https"}}
The screen should look similar to the following:
Test and Connect
To test your connection, select Test Connection. If successful, a notification message appears:

After a successful test, go ahead and select Connect to finalize the connection.
Congratulations, your Trino database is now connected to Preset!
Alternative: Authenticating with a JWT (Bearer Token)
Some Trino and Presto clusters are configured to authenticate clients with a JWT (JSON Web Token), sometimes called a bearer token, instead of a username and password. If your cluster requires this, use the steps below instead of the Configure the Connection and Provide Warehouse Parameters steps above.
Requirements
- A Trino or Presto cluster configured to accept JWT/bearer token authentication.
- A valid, unexpired JWT issued by your identity provider or your cluster's own token issuer.
Configure the Connection URI
In the SQLAlchemy URI field, use:
trino+pyhive://{username}@{hostname}:{port}/{catalog}
⚠️ The
+pyhivesuffix is required. The standardtrino://dialect does not support attaching a bearer token to requests. Thetrino+pyhive://dialect does.
There's no password to enter in the URI itself, the JWT you provide in the next step is the credential.
Provide the JWT in Secure Extra
Select the Advanced tab and expand the Security panel. In the Secure Extra field, enter:
{"connect_args": {"protocol": "https", "requests_kwargs": {"jwt": "<YOUR_JWT_TOKEN>"}}}
Replace <YOUR_JWT_TOKEN> with a valid, unexpired JWT. Preset translates this into an Authorization: Bearer <token> header on every request sent to your cluster. Secure Extra is the recommended field for sensitive configuration like this, since its contents are encrypted and never displayed in plain text.
- Masked display: Because Secure Extra is encrypted, the token will appear as
XXXXXXXXXXif you return to edit this connection later. This is expected; it doesn't mean the token was cleared or the connection is broken. - Token expiration: JWTs typically expire after a set period. Because the token is stored as a static string, Preset does not automatically refresh it; once it expires, the connection will begin failing until someone manually updates this field with a new, valid token.
- If the connection test fails: you'll see a generic database error indicating an unexpected
401status code. The specific reason inside that error, for instance, an expired or malformed token, is generated by your cluster's JWT validator, not by Preset, so the exact wording will vary depending on how your Trino/Presto administrator has configured authentication. If you're unsure how to interpret it, check with them directly. - If you also need to pass Trino query context options: add those separately in the Engine Parameters field of the Other section, as described in provide warehouse parameters above. The context block is not sensitive, so it does not need to go in Secure Extra.
After this, you can test the connection to check that everything is working as expected.