- 14 May 2024
- 1 Minute to read
- Print
- DarkLight
- PDF
Step 1: Preparation
- Updated on 14 May 2024
- 1 Minute to read
- Print
- DarkLight
- PDF
Dashboard Embedding is an add-on available on the Enterprise and Professional plans. The feature is included in a trial of the Professional plan. Existing customers interested in trying out Dashboard Embedding can also contact us.
Overview
Before embedding any dashboard, the first step is to collect required information needed for Step 2: Deployment. This articles discusses how to retrieve the required information to properly embed a dashboard into your application.
Collect the information
What permissions is required to embed a dashboard?
The following steps require Workspace Admin role access in the Workspace.
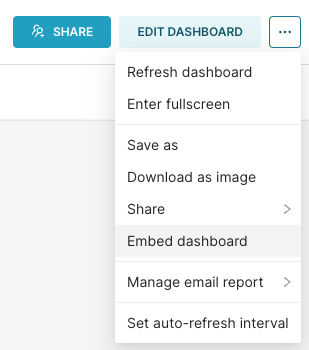
Access your Workspace, and navigate to the dashboard that you want to embed. Select the options menu icon (horizontal ellipsis) and choose Embed dashboard.

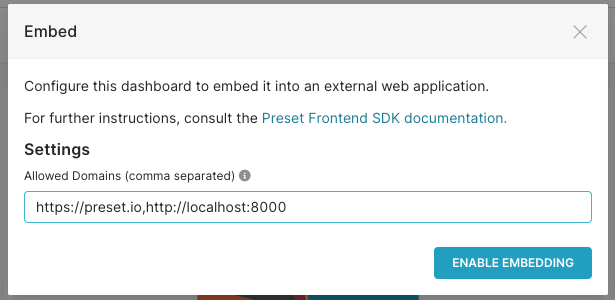
The Embed dialog appears. In the Allowed Domains field, enter one or more domains in which the dashboard will be embedded to (your application URL). Make sure to also include the domain for any development environment (separate multiple values with a comma).

Tips
- Wildcard is not supported.
- If adding domains, make sure to include the protocol (
https://orhttp://). - Leave the Allowed Domains field empty to allow embedding the dahsboard into any destination.
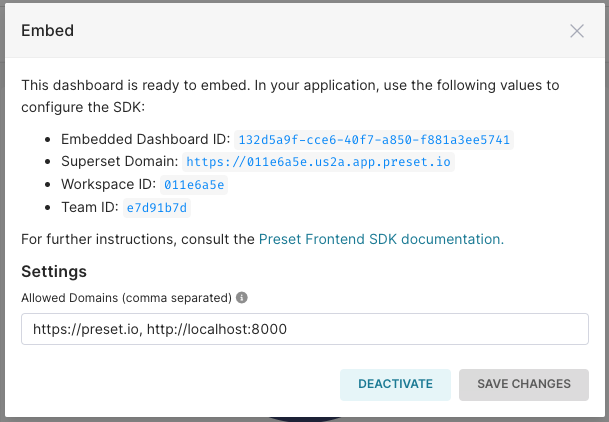
When done, select Enable Embedding. A dialog containing all required information to configure the integration in your application is displayed:

- The Embedded Dashboard ID and Superset Domain are used with the Preset SDK to embed the dashboard in your application.
- The Workspace ID, Team ID and Embedded Dashboard ID are used to generate a new embedded guest token.
The Embed dashboard option in the dashboard ellipsis menu can be used to launch this dialog at any time, to modify allowed domains settings, validate the information or even disable embedded.
Next Steps
Proceed to Step 2: Deployment.
