Overview
In this article we will discuss how to connect a Snowflake database to Preset. So let's get started!
Allowlist Preset IPs
Before starting, validate your Snowflake Network Policies configuration, to ensure that Preset IP addresses are allowed to access Snowflake. The following IPs should be allowed (according to the workspace region):
| us-west-2 (us1a) | us-east-1 (us2a) | eu-north-1 (eu5a) | ap-northeast-1 (ap1a) |
|---|---|---|---|
| 35.161.45.11 | 44.193.153.196 | 13.48.95.3 | 35.74.159.67 |
| 54.244.23.85 | 52.70.123.52 | 13.51.212.165 | 35.75.171.157 |
| 52.32.136.34 | 54.83.88.93 | 16.170.49.24 | 52.193.196.211 |
If you are not sure where your Preset workspace is located, you can refer to the URL on your browser when accessing Preset. It should look like this: https://xxxxxxxx.us2a.app.preset.io/superset..., where us2a means it is in us-east-1.
Connect Database to Preset
Let's start by selecting + Database — have a look at Connecting your Data if you need help with this step.
Select Snowflake.
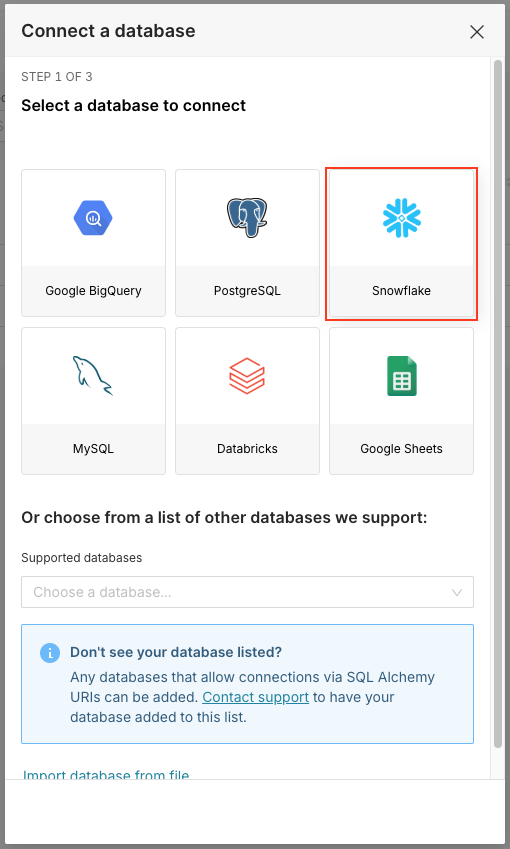
The Connect a database panel appears. There are three supported authentication methods to connect to Snowflake:
Connect using username and password
When a new user is created on Snowflake, a password reset might be required on the initial login or use. Make sure the account that will be used to create the connection has a definitive password (it is not pending a password update).
Fill the form with information from Snowflake:
- Database Name with name of the database that you are connecting to
- Username and Password with the credentials for the user
- Display Name with the name to be used on Preset for this connection
- Account with the account identifier. Refer to the Snowflake documentation to identify the structure to your Cloud Provider and Region.
- Warehouse and Role with the relevant warehouse (e.g.,
COMPUTE_WH) and role (e.g.,ACCOUNTADMIN) that should be used when running queries.
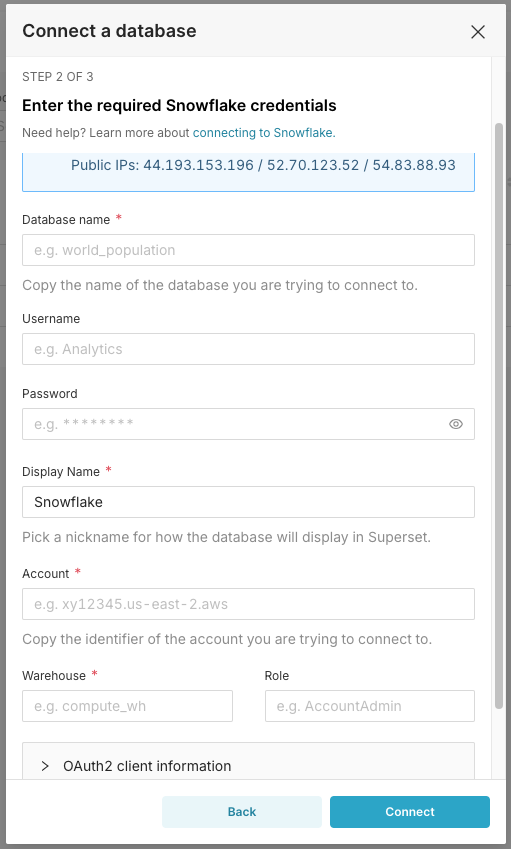
Click on Connect to create the connection.
At this stage, you can optionally configure Advanced options, if needed. To learn more, please see Advanced Connection Settings.
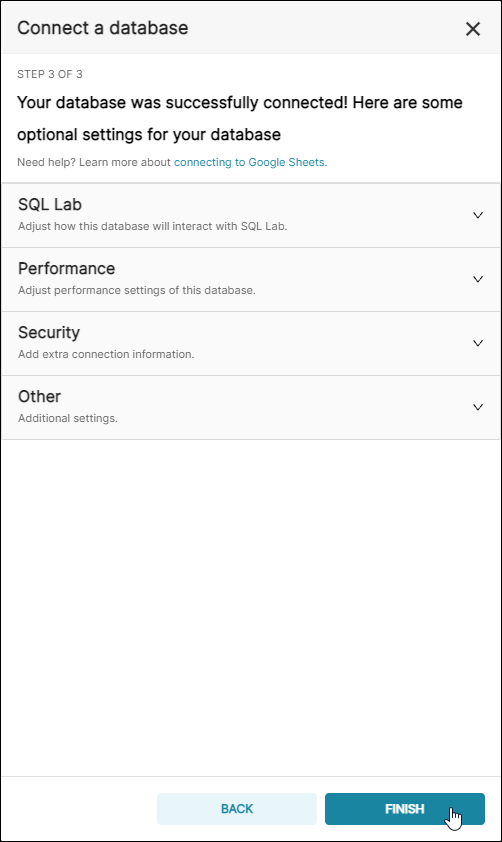
To finalize the connection, select Finish. Great job!
Connect using an encrypted key pair
It's also possible to connect to Snowflake authenticating with an encrypted key pair instead of a password, using a SQLAlchemy String URI.
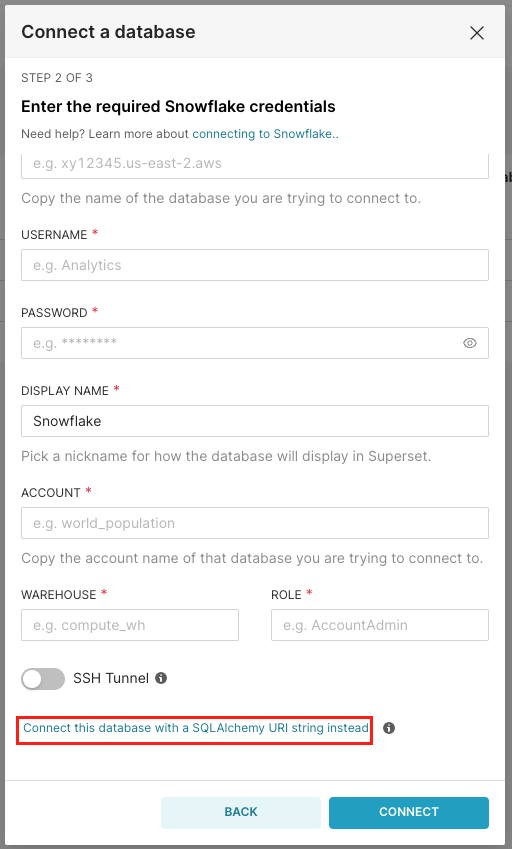
In the Display Name field, enter a meaningful name for the new connection to Snowflake.
In the SQLAlchemy URI field, customize your URI connection string using the following syntax:
snowflake://<Username>@<Account>/<Database>?role=<Role>&warehouse=<Warehouse>
If you have a need to configure the Snowflake database connection with MFA caching. You will just need to add the following two parameters into the URI.
- authenticator=username_password_mfa
- client_request_mfa_token=True
The example SQLAlchemy URI would look something like this
snowflake://<Username>@<Account>/<Database>?authenticator=username_password_mfa&client_request_mfa_token=True&role=<Role>&warehouse=<Warehouse>
By doing so this enables MFA authentication with support for token caching, useful for environments requiring enhanced security without re-authentication on every session.
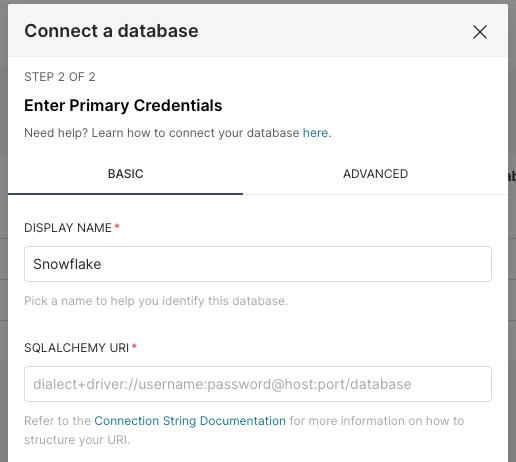
Then, navigate to the ADVANCED tab, expand the Security section and use add below JSON structure to the SECURE EXTRA field:
{
    "auth_method": "keypair",
    "auth_params": {
        "privatekey_body": "Your Private Key",
        "privatekey_pass":"Your Private Key Password"
    }
}
Note that the privatekey_body should receive a single line value, so replace line breaks with \n. For example:
{
     "auth_method": "keypair",
     "auth_params": {
         "privatekey_body": "-----BEGIN ENCRYPTED PRIVATE KEY-----\n...\n...\n-----END ENCRYPTED PRIVATE KEY-----",
         "privatekey_pass":"my_password"
    }
 }
Navigate back to the Basic tab, and click on Test Connection to validate the information is correct. Lastly, click on Connect to save the connection.
Updating the connection method from username password to encrypted keypair
Sometimes you might want to update the existing Snowflake connection from the username password method to the encrypted keypair method.
You can do so by just following a few easy steps below:
- Edit the existing Snowflake database connection you want to make changes to.
- Clear the Password field.
- Switch to the Advanced > Security tab.
- Insert the Keypair JSON structure to the Secure extra field.
- Click Finish.
There you have it, you have successfully updated the connection method from username password to encrypted keypair.
Connect using OAuth
The OAuth integration allows Preset to run queries while impersonating users. When implemented, users are prompted to grant consent to the integration, which generates a token to be used for each user. Refer to the Snowflake documentation for additional context.
Setting up the OAuth integration in Snowflake
Below SQL query can be used to set up an OAuth integration in Snowflake named PRESET:
CREATE SECURITY INTEGRATION PRESET
    TYPE = OAUTH
    ENABLED = TRUE
    OAUTH_CLIENT = CUSTOM
    OAUTH_CLIENT_TYPE = 'CONFIDENTIAL'
    OAUTH_USE_SECONDARY_ROLES = 'IMPLICIT'
    OAUTH_ALLOW_NON_TLS_REDIRECT_URI = FALSE
    OAUTH_REDIRECT_URI = 'https://${WORKSPACE}/api/v1/database/oauth2/';
Replace ${WORKSPACE} with the Workspace domain URL you'll connect to Snowflake. The structure is https://${WorkspaceSlug}.${WorkspaceRegion}.app.preset.io.
Once the integration is created, run below SQL query to get the required information:
SELECT
JSON_EXTRACT_PATH_TEXT(SYSTEM$SHOW_OAUTH_CLIENT_SECRETS('PRESET'), 'OAUTH_CLIENT_ID') as "Client ID",
JSON_EXTRACT_PATH_TEXT(SYSTEM$SHOW_OAUTH_CLIENT_SECRETS('PRESET'), 'OAUTH_CLIENT_SECRET') as "Client Secret";
Fill the Snowflake connection form in Preset:
- Database Name with name of the database that you are connecting to
- Display Name with the name to be used on Preset for this connection
- Account with the account identifier. Refer to the Snowflake documentation to identify the structure to your Cloud Provider and Region.
- Warehouse with the warehouse that should be used for the connection.
Then, expand the OAuth2 client information section and provide:
- The Client ID and Client Secret values retrieved with the SQL query
- Use
https://${ACCOUNT-URL}/oauth/authorizeas the Authorization Request URI - Use
https://${ACCOUNT-URL}/oauth/token-requestas the Token Request URI - Use
refresh_tokenin the Scope field. Note that you can also optionally limit the role that's used by the integration.
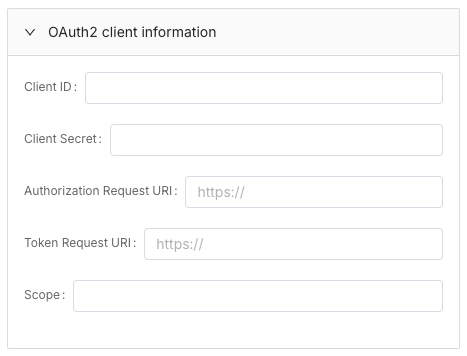
Click on the Connect button. If the information is correct, the connection is created and you are redirected to the Advanced tab. Expand the Security section and enable the Impersonate logged in user option, and finally click on FINISH.
To test the integration:
- Navigate to SQL > SQL Lab.
- Select the Snowflake connection in the Database dropdown.
- You should see an Authorization needed error. Click on See more.
- Click on the provide authorization hyperlink to be redirected to Snowflake. Authenticate using your Snowflake credentials and grant consent for the integration.
- After authentication, you're redirected back to Preset. Refresh the page.
Queries should now be properly authenticated with your OAuth token. Note that this Authorization needed prompt will be displayed to all users the first time they interact with this database (either in SQL Lab or via charts).
Snowflake Identifier Case Sensitivity and Metric Naming Best Practices
After connecting a Snowflake database to Preset, it is also crucial to understand how identifier case sensitivity in Snowflake works to avoid frustrating SQL errors.
Snowflake’s Case Sensitivity Behavior
Snowflake automatically converts all unquoted identifiers (such as column names, table names, and aliases) to uppercase.
For example, using sales_amount in a query is interpreted as SALES_AMOUNT. However, when using double quotes, Snowflake preserves the exact casing.
So "sales_amount" and "SALES_AMOUNT" are treated as two different identifiers. This distinction becomes critical when referencing metrics or calculated fields that were created with specific casing.
Guidance on Metric Definitions
To avoid issues, try adopting one of two approaches when defining and referencing metrics:
- Use uppercase consistently (e.g., TOTAL_REVENUE) so Snowflake’s default behavior works correctly.
- Use double quotes for mixed/lowercase names (e.g., "totalRevenue"), especially when referencing them in calculated columns or custom SQL metrics.
Failing to do so often results in queries that cannot find the intended column or metric.
Common SQL Errors and How to Fix Them
The following are common errors users encounter:
SQL compilation error: invalid identifier 'totalRevenue'
This happens because Snowflake interprets totalRevenue as TOTALREVENUE, which does not match the actual identifier.
Wrap the identifier in double quotes:
SELECT "totalRevenue" FROM my_table;
- Defining a metric as "NetProfit" but later referencing it as NetProfit (unquoted)
→ Snowflake looks for NETPROFIT instead.
Always match the exact case with quotes:
SELECT "NetProfit" / "Revenue" FROM my_table;
Best Practices for Preset and Snowflake
- Use consistent naming conventions (preferably all uppercase with underscores, e.g., NET_PROFIT).
- Avoid mixed-case identifiers unless necessary.
- If you must use mixed case, always use double quotes consistently in every SQL reference.
- Align naming conventions across datasets, metrics, and aliases to reduce confusion.
Test custom SQL expressions early to catch identifier mismatches before building charts or dashboards on top of them.
These practices will minimize case-sensitivity issues and ensure smoother development of metrics, charts, and dashboards in Preset.