- 11 Jul 2024
- 3 Minutes to read
- Print
- DarkLight
- PDF
Managing Filters
- Updated on 11 Jul 2024
- 3 Minutes to read
- Print
- DarkLight
- PDF
Overview
In this article we will look at some filter management features available in Preset.
These topics include:
- How to Add a Filter and Divider
- How to Delete a Filter
- How to View Applied Filters (via chart icon)
- How to View Filter Configuration & Scoping
- How to Clear All Filters
- Active Filter Highlight
- Filter Out of Scope
How to Add a Filter and Divider
In the Add and edit filters window, select + Add filters and dividers and then, in the sub-menu, select Filter. A new filter with the placeholder text "[untitled]" appears in the Filters panel.
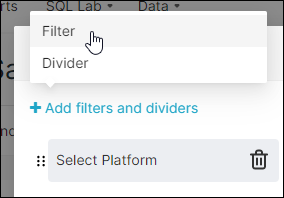
A divider is a header text field, and an optional description, that can be used to introduce sets of filters or simply divide filters.
How to Delete a Filter
To delete a filter, in the Filters panel, select the trash bin icon for a filter.
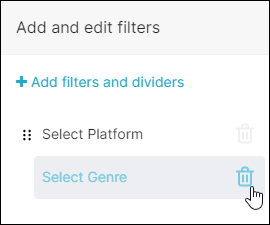
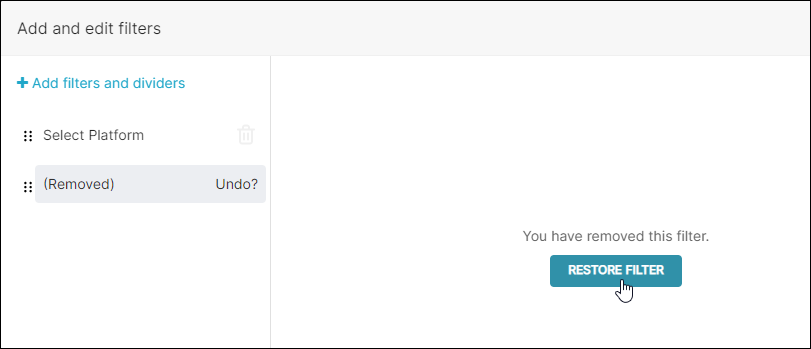
After the bin icon is selected, Preset will ask if you'd like to restore the deletion (i.e., undo your action). If so, select Restore Filter; otherwise, the deletion will proceed accordingly. Alternatively, you can select Undo?.
Note: The Undo? and Restore Filter options appear on a 5-second timer, after which the filter will be deleted.
How to View Applied Filters (via chart icon)
To see which filters have been applied to a specific chart, you can select the filter icon on the chart itself.
This is located on the top right of each chart and displays a number — this is the number of filters that have been applied to the chart.
![]()
When you select this icon, a tooltip appears displaying the applied filters. In the graphic below, our two defined filters ('Game Genre' and 'Platform') were applied as well as a Time range filter, giving us a total of 3 applied filters.
![]()
How to View Filter Configuration & Scoping
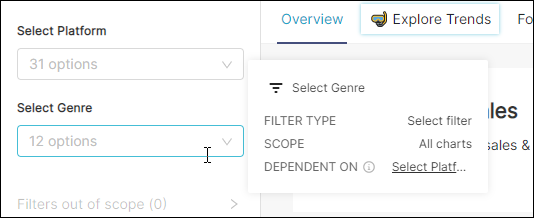
To view information about a filter's configuration and scoping details, simply hover your cursor over a filter field. A pop-up appears displaying these details.
How to Clear All Filters
Clearing all filters removes your filter selections, but not the filters themselves.
To clear all filters, on the dashboard, select Clear All.
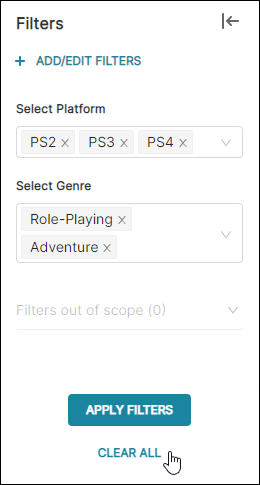
After doing so, all selections made within the filters are removed.
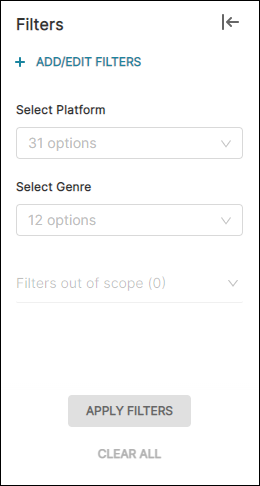
Please note that this is different than permanently removing a filter. To do that, just select + Add/Edit Filters to launch the Add and edit filters window, and then proceed with deleting a filter as described above.
Active Filter Highlight
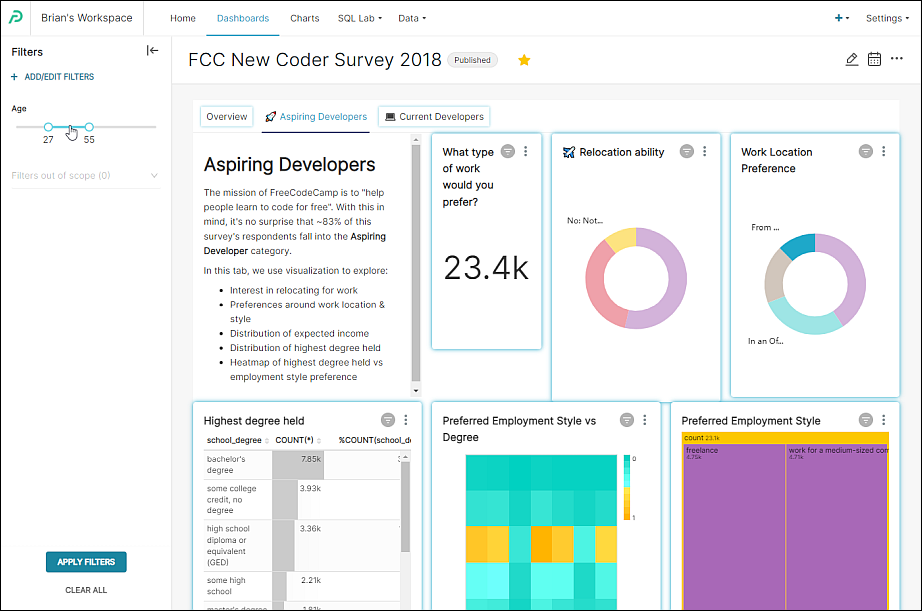
In order to quickly correlate filters with charts and tabs, Preset automatically applies a blue border glow to charts & tabs that include data from a selected filter.
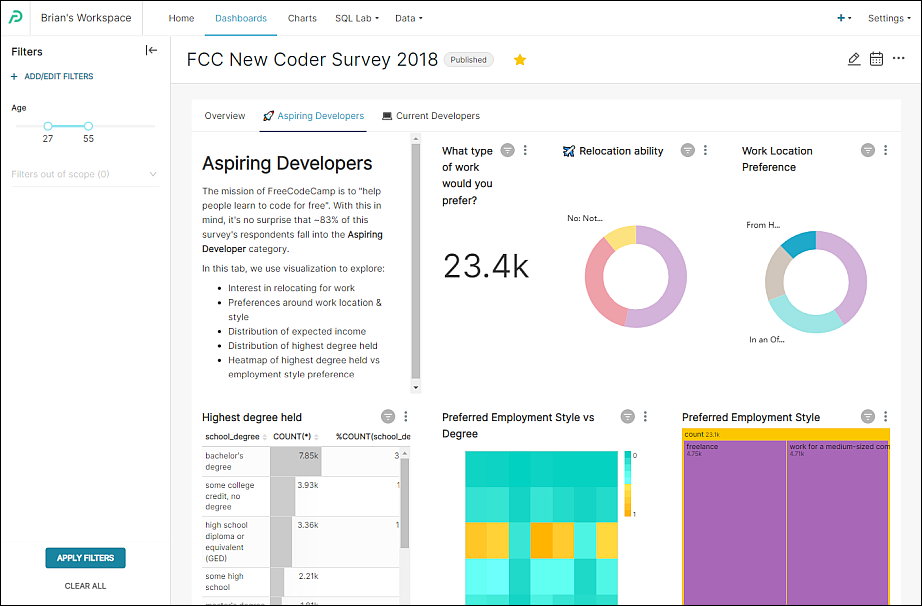
As an example, we will look at this feature in the FCC New Coder Survey dashboard. There is one numerical range filter labelled as "Age".
Here is the dashboard without a selected filter (i.e., cursor is not actively highlighting the Age numerical range flter) — note that there are no blue glowing borders.
...and after we place the cursor over the range slider (or click within a value filter), you will notice that charts and tabs are highlighted with a glowing blue border:
Filter Out of Scope
If all data from a filter is displayed on a tab other than the active tab, then that filter is considered out of scope and is displayed in the Filters out of scope expandable section.
Let's return to our Video Game Sales dashboard.
In the example below, we have three filters that have data featured in the Overview and Explore Trends tabs. To illustrate, we have created a third, empty tab called Focus on US Games.
If we select the Focus on US Games tab, we can see that the Filters out of scope panel appears. Expanding this reveals the filters with data in the other non-active tabs.
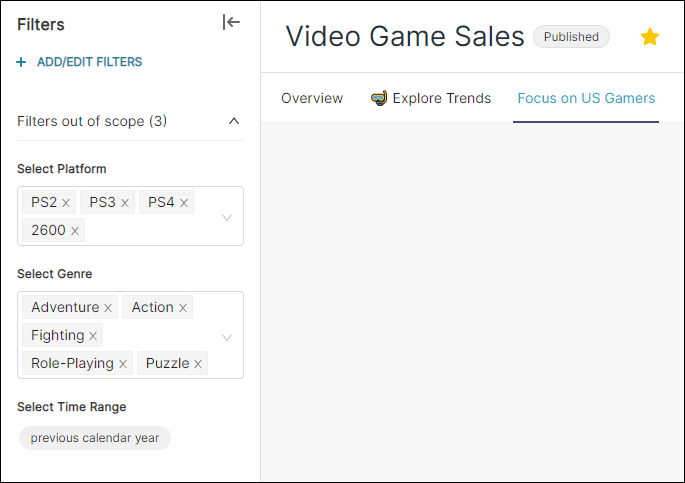
In short, the Filters out of scope section is an indicator that filtered data exists in a different tab(s).
Related Topics
Dashboard Filtering
Filter Types
Parent-child Filter
Pre-filter Data
Sort Filter Values
Single Value Range
Filter Tooltip
Managing Values
Scoping a Filter
Cross-filtering
Managing Filters
