Overview
In this article we will discuss how to connect to a privately-shared restricted Google Sheet, with a focus on sharing a Google Sheet at the organizational level. To learn how to connect Preset to a publicly-shared unrestricted Google Sheet, please see Google Sheets (Public) Connection.
The process of connecting Preset to a private Google Sheet is broadly categorized into two parts:
Configuring Google (Steps 1 - 4)
Configuring Preset (Steps 5 - 6)
Note
The Google Sheets Connector is built on top of SQLite and there is support for all SQLite commands.
Step 1: Associate a Google Project
What is a Google Project?
A project organizes all your Google Cloud resources. A project consists of a set of users; a set of APIs; and billing, authentication, and monitoring settings for those APIs. So, for example, all of your Cloud Storage buckets and objects, along with user permissions for accessing them, reside in a project (source ).
The first step is to select an existing Google Project or create a new Google Project. You can do this by navigating to the Google Cloud Platform Console.
If this is your first time visiting the Platform Console, be sure to select your country and accept the Terms of Service.
Reminder
On the Google Cloud Platform Console, ensure that you are logged on the Google Account associated with the relevant Google Sheet.
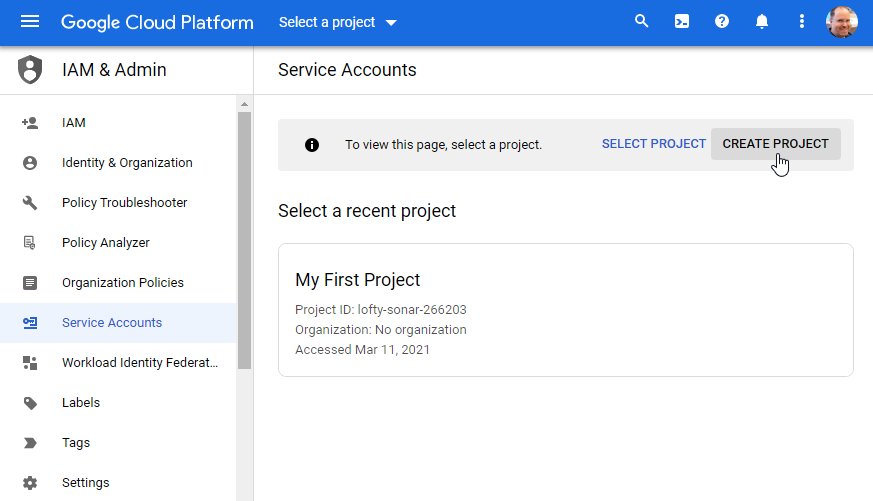
The Platform Console will display any existing projects — feel free to select an existing project if desired.
To create a project, select Create Project.
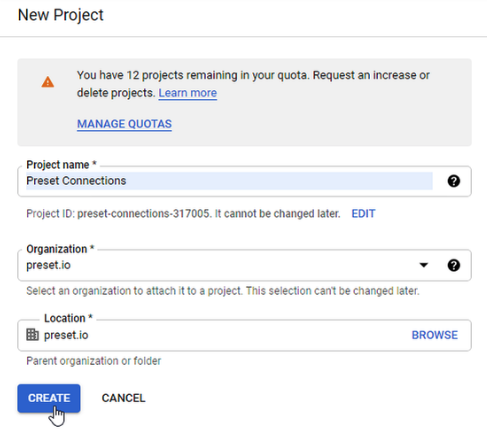
In the Project name field, enter a name for your project — this will become your project ID.
If the Google account you are logged in under belongs to an organization (i.e., non-gmail.com), then an Organization field appears and the domain of your organization appears by default.
If needed, select a location in the Location field. When done, select Create.
Post-creation, the Service Accounts screen appears.
Step 2: Create & Configure a Google Service Account
In this step we will create and configure a new Google Service Account.
What is a Google Service Account?
A service account is a special type of Google account intended to represent a non-human user that needs to authenticate and be authorized to access data in Google APIs (source).
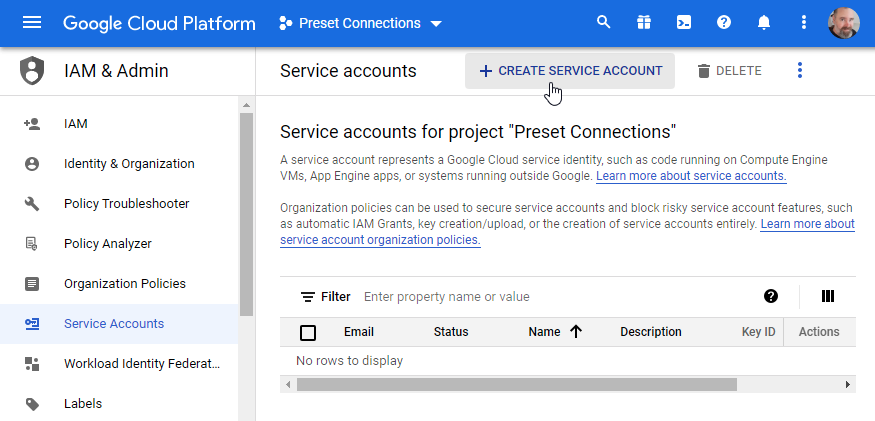
Create a Service Account
Let's start by selecting + Create Service Account.
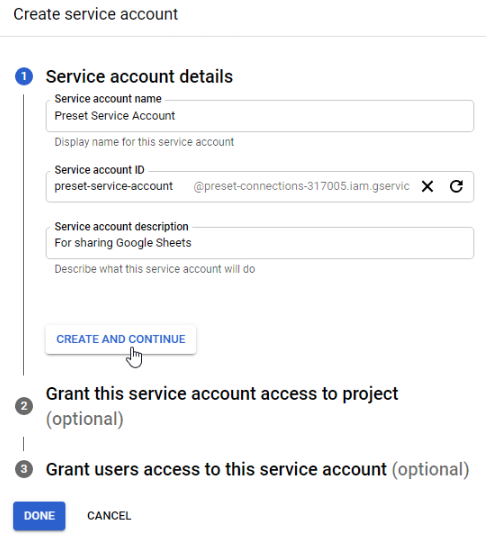
In the Service account name field, enter a memorable name for the service account. The Service account ID field will automatically populate based on the defined account name.
In the Service account description field, enter a brief description of the service account.
When done, select Create and Continue.
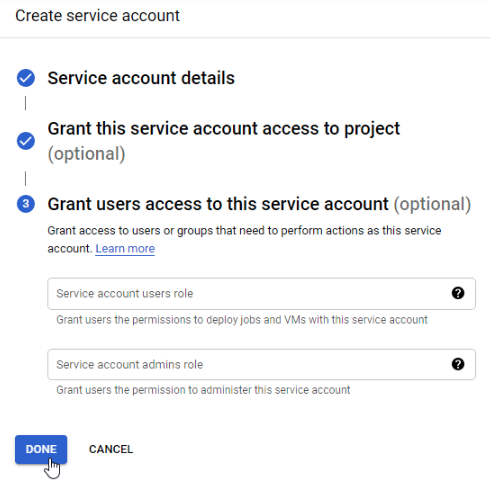
In this step, you need to grant service account access.
In the Select a role field, please select one of the following options:
Editor: Edit access to all service account resources.
Owner: Full access to all service account resources.
Viewer: View access to all service account resources. If Viewer is selected, then please note that you will be unable to perform a CSV file upload.
When ready, select Done.

The last step—granting access to users—is not required, so feel free to complete the process by selecting Done.
Create & Save a JSON Key
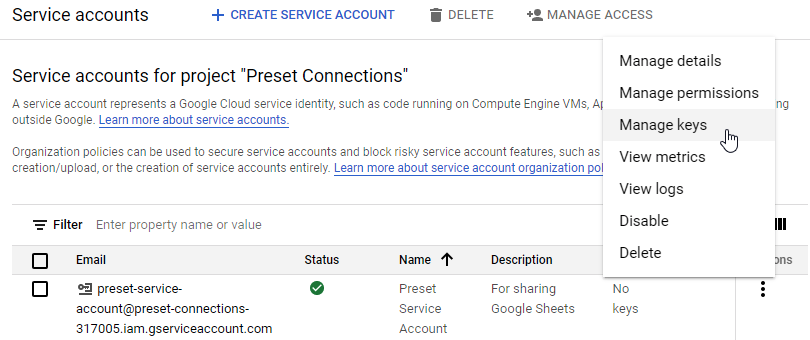
A table displaying your new Google Service Account—which we've called Preset Connections—appears.
Our next step is to create a private key in JSON that will be downloaded to your local system. This will be used later on when we configure the database connection in Preset.
In the table, under the Actions column header, select the vertical ellipsis icon and then choose Manage keys.
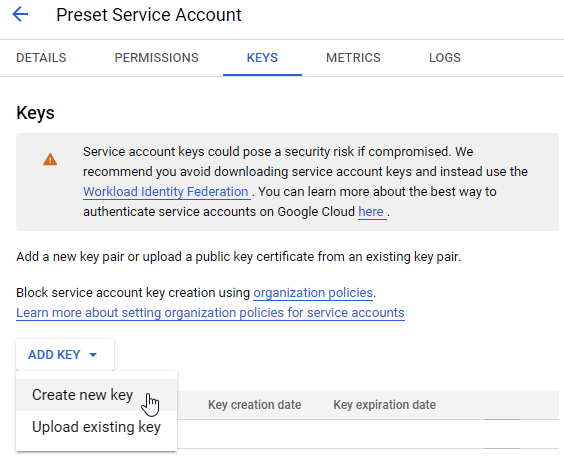
The Service Account details screen appears with the Keys tab selected. In the Add Key drop-down menu, select Create new key.
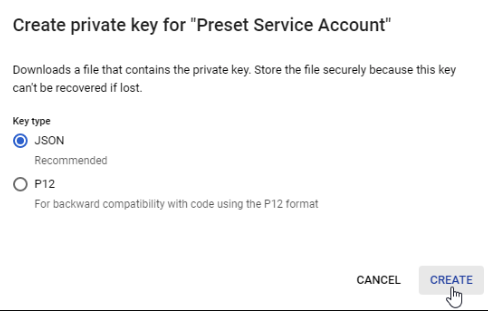
The Create private key window appears. By default, the JSON key type is selected. Ensure that this is indeed the case and then select Create.
The key, in JSON file format, will download to your local system. Be sure to save this file.
Alright! So we've created a project, a service account, and now have a JSON key! In the next step we'll assign domain-wide authority to the service account.
Step 3: Delegate Domain-wide Authority
Super Administrator permission required
Only a Google Super Administrator account is able to follow these steps.
In this step, we will delegate domain-wide authority (i.e., auto-authorize the service account to access user data on the Google Workspace domain) and setup Open Authorization (OAuth) in terms of the scope of access to Google services.
Enable Domain-wide Delegation
Open a new tab on the browser and access this link to manage Domain-wide Delegation on your Google tenant. Click on Add new next to API clients:

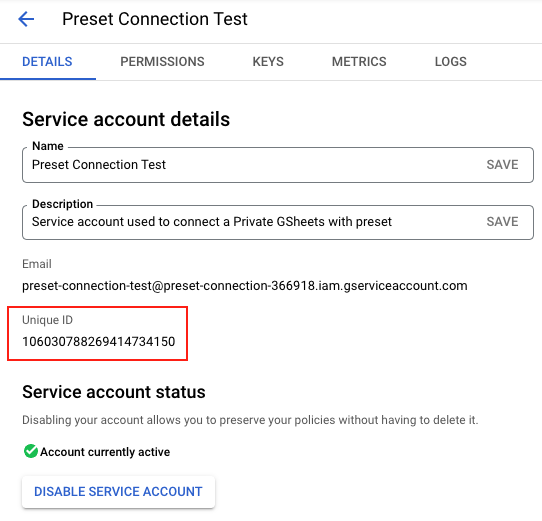
On the Client ID field, paste the Unique ID from your Service Account:
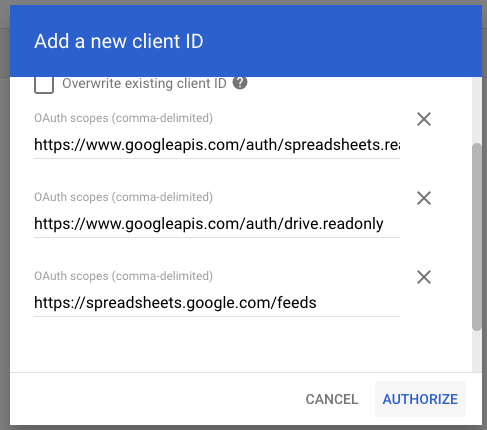
Add below OAuth scopes in order to grant access to these Google services:
https://www.googleapis.com/auth/spreadsheets.readonlyhttps://www.googleapis.com/auth/drive.readonlyhttps://spreadsheets.google.com/feeds
Click on Authorize.
Step 4: Enable APIs
Good news, we're nearly all done with our configurations on the Google side! The last step is to enable APIs for Google Sheets and Google Drive.
First, ensure that you are logged into the correct Google account.
Navigate to the Google Sheets API screen on the Google Cloud Platform Console and then select Enable.

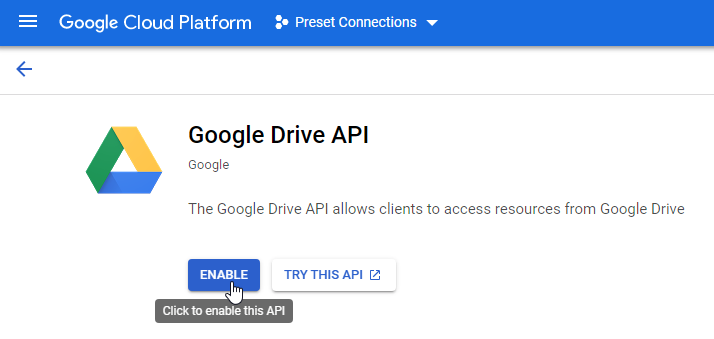
Next, navigate to the Google Drive API  and select Enable.
Now let's turn our attention to setting up the database and dataset on Preset.
Step 5: Set up Database Connection in Preset
Connect the Database
To start, we need to connect a database to Preset.
In the Toolbar, hover your cursor over the plus + icon, then Data, and then select Connect Google Sheet.

The Connect a database window appears.
Configure the Google Sheet Connection
Make sure your account has access to the file
In order to create the connection, it is required that the email address associated with your Preset account has access to the Google Sheets file.
In the Display Name field, enter a meaningful name for the new connection to your private Google Sheet. By default, the field is populated with the name Google Sheets (for this example, we used the display name "Space Data").
.png)
Next, we will provide Preset with the JSON authentication credentials you downloaded earlier in Create & Save a JSON Key from Step 2.
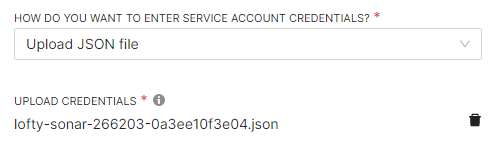
Option 1: Upload JSON File
In the How do you want to enter service account credentials? field, select Upload JSON file and then select Choose File.
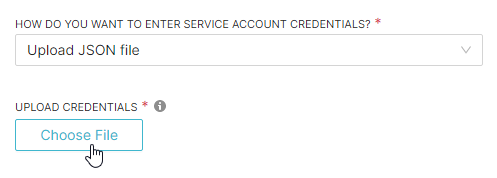
Navigate to the JSON file you downloaded earlier and select it for upload to Preset. The JSON filename will appear — select the trash bin icon to remove the file, if needed.
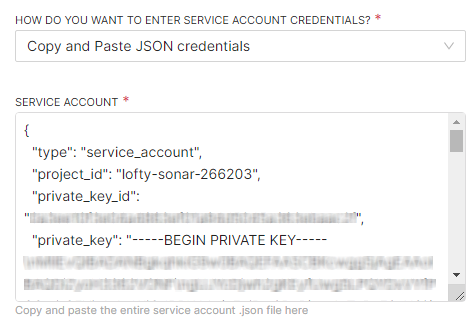
Option 2: Copy & Paste JSON Code
Alternatively, you can directly paste your JSON code.
In the How do you want to enter service account credentials? field, select Copy and Paste JSON credentials. The Service Account text-entry field appears.
Copy your JSON code in its entirety and then paste the contents into the Service Account field.
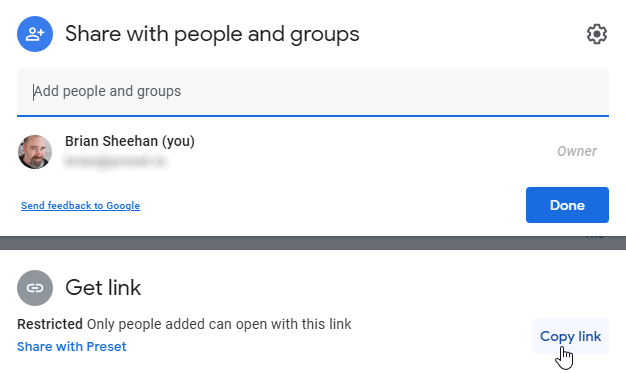
Copy the Private Google Sheet URL to Clipboard
Take a moment to open a new tab and navigate to your private Google Sheet. Copy the link for your restricted Google Sheet to your clipboard.
Connect Google Sheet as Table
Our next step is to connect the Google Sheet as a table to the database.
In the Google Sheet name field, enter a name for a table — in this example, we called our table "T4".
In the URL field, paste the Google Sheet URL from your clipboard.
To create additional tables, then select + Add Sheet and repeat the process.
When done, select Connect.
.png)
Step 3 of 3 will appear. At this stage, you can optionally configure Advanced options, if needed. To learn more, please see Optional Settings.
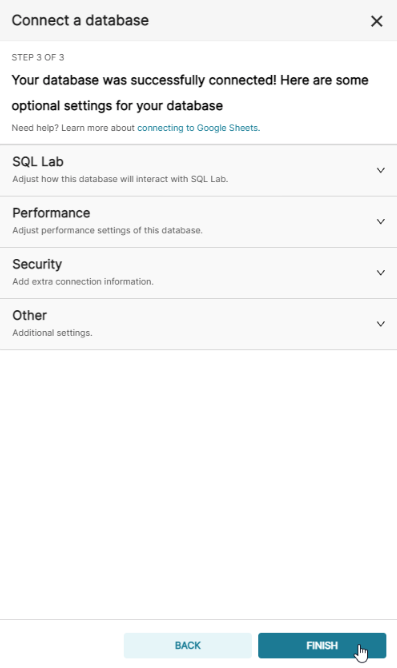
To finalize the connection, select Finish. Great job!
Step 6: Add a Dataset to Preset
Our final step is to add the table/dataset to Preset. This enables you to create new charts using the dataset.
Start by navigating to Datasets. From the Data screen, simply select the Datasets tab.

Then select + Dataset.
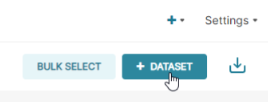
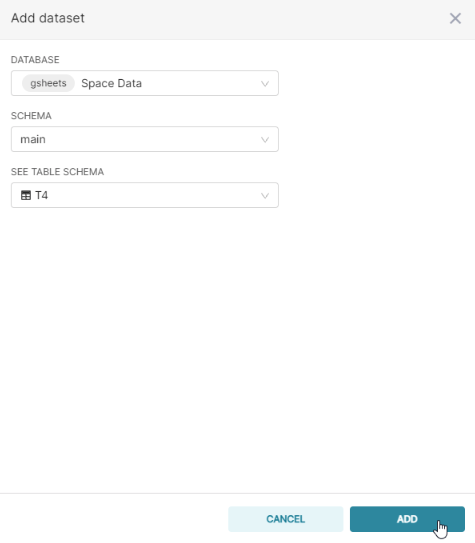
The Add dataset panel appears.
In the Database field, select the database name that you defined earlier in the Display Name field (e.g., "Space Data").
In the Schema field, select a schema (if applicable).
In the See Table Schema field, select a table that you created above (e.g., "T4").
Select Add.
Great, you are now ready to start creating charts using your Google Sheet data!
Conclusion
Great work! You have now connected Preset to a private Google Sheet.
Ready to create a chart? See Create a Chart to learn about selecting a chart.
After you've selected your preferred visualization, we recommend that you have a look at Configure a Chart and The Explore Interface to learn more.