Overview
In this article we will discuss how to connect a Google BigQuery database to Preset. There are two methods that we support to do this:
Allowlist Preset IPs
Access to your BigQuery instance might be limited via VPC Service Controls with IP restrictions. In this case, you need to allow Preset IPs to interact with BigQuery for a successful connection.
Preset Cloud runs on four regions. Below IPs should be allowed (according to the workspace region):
us-west-2 (us1a) | us-east-1 (us2a) | eu-north-1 (eu5a) | ap-northeast-1 (ap1a) |
|---|---|---|---|
35.161.45.11 | 44.193.153.196 | 13.48.95.3 | 35.74.159.67 |
54.244.23.85 | 52.70.123.52 | 13.51.212.165 | 35.75.171.157 |
52.32.136.34 | 54.83.88.93 | 16.170.49.24 | 52.193.196.211 |
If you are not sure where your Preset workspace is located, you can refer to the URL on your browser when accessing Preset. It should look like this: https://xxxxxxxx.us2a.app.preset.io/superset..., where us2a means it is in us-east-1.
Connect using a Service Account
It's possible to use a Service Account to connect BigQuery to Preset. Let's go through this process:
Create & Configure a Google Service Account
What is a Google Service Account?
A service account is a special type of Google account intended to represent a non-human user that needs to authenticate and be authorized to access data in Google APIs.
Access Google Cloud Platform Console, and select the Project that contains the BigQuery instance you're looking to connect to Preset. Copy the Project ID, as you will need this information to set up the connection in Preset.
You'll be redirected to the Service Accounts menu.
Click on the + CREATE SERVICE ACCOUNT button.

Provide a name for the service account, and optionally a description.
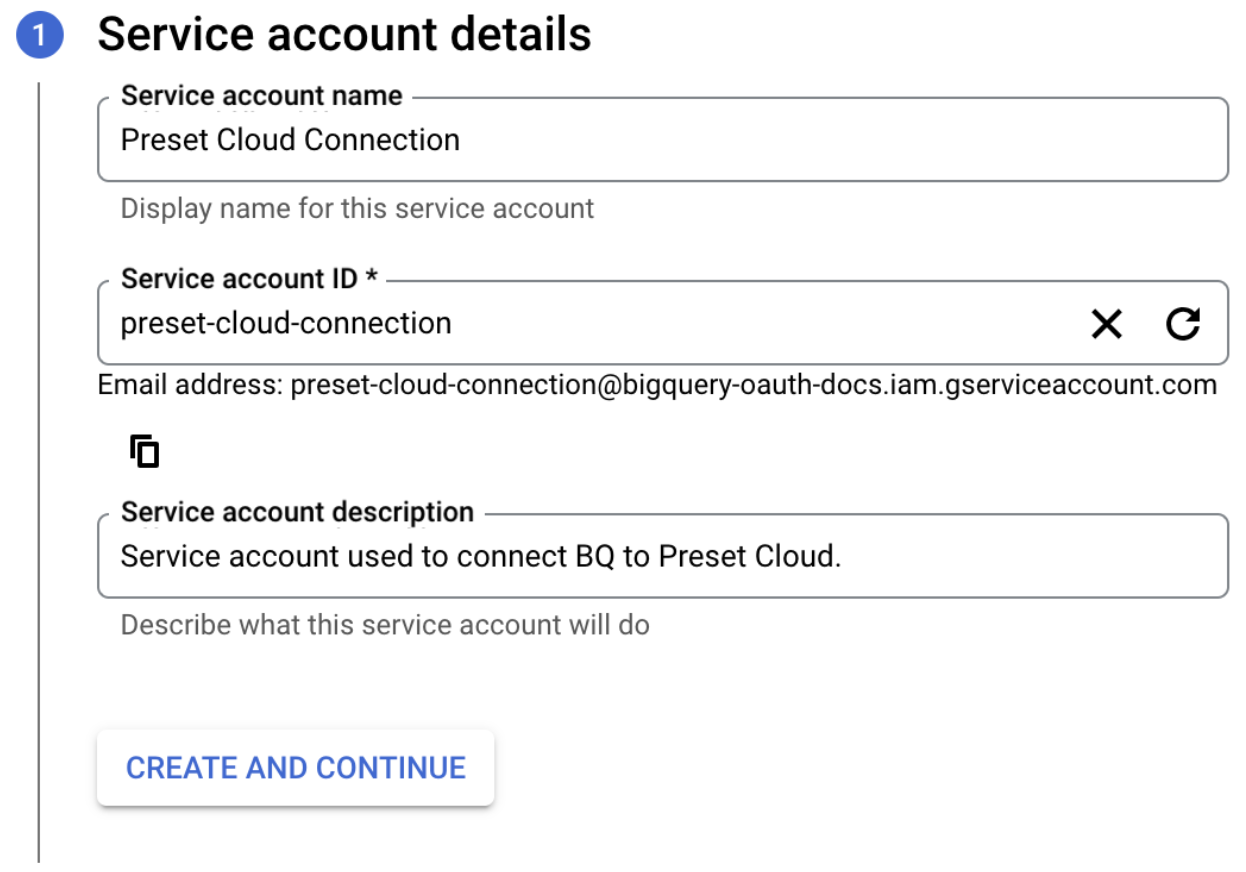
Click on CREATE AND CONTINUE.
In the Select a role dropdown, grant the desired permissions to the service account, according to your needs:
If you plan to use Preset for read-only access, granting BigQuery Data Viewer, BigQuery Metadata Viewer, BigQuery Read Session User and BigQuery Job User roles should be sufficient.
If you also want to execute DML queries in Preset, grant the BigQuery Data Editor role as well.
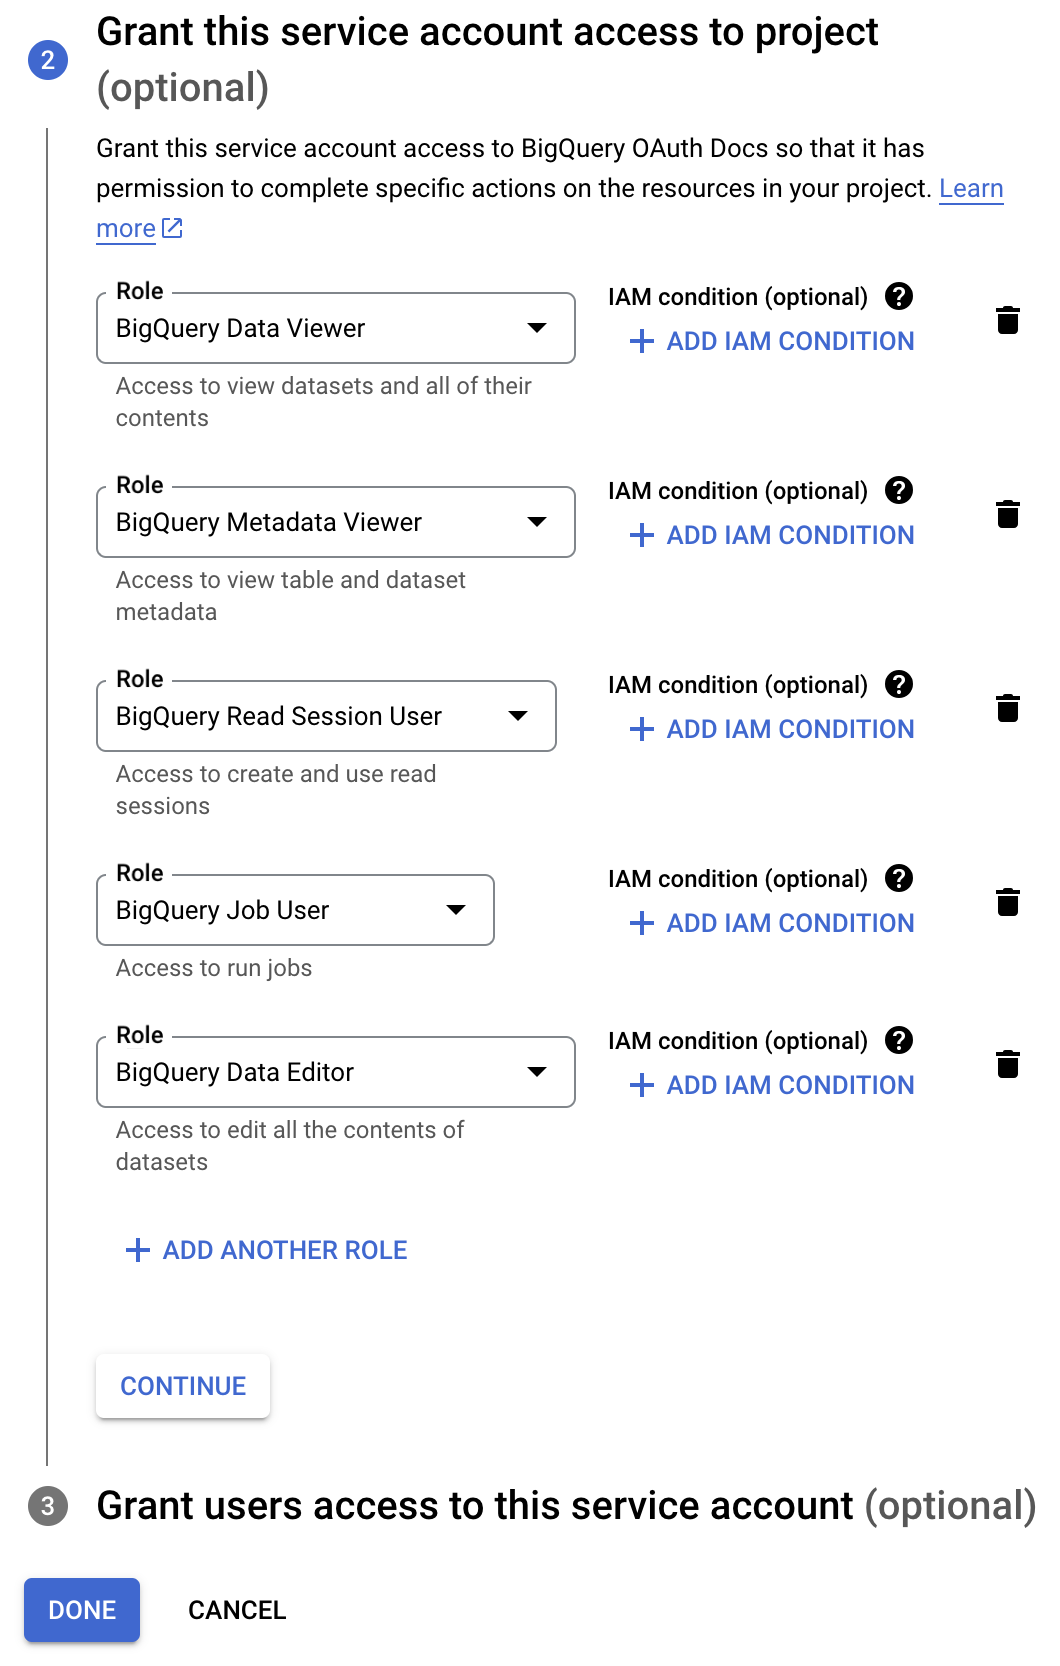
Click on DONE.
You'll be redirected to the Service Accounts list.
Create & Save a JSON Key
Our next step is to create and download a private JSON key. This will be used later on when we configure the database connection in Preset.
In the list of accounts, click on the service account email.
Navigate to the KEYS tab.
Click on the ADD KEY dropdown and select Create new key.
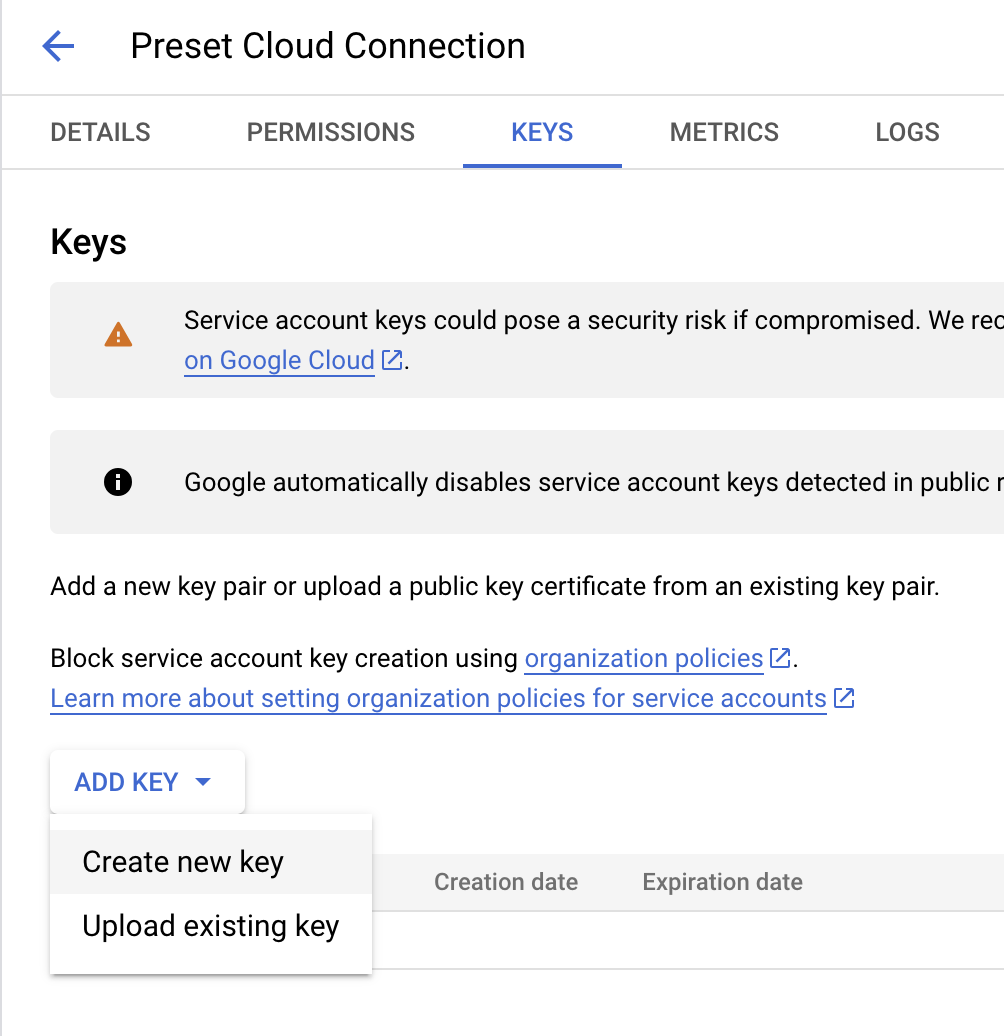
The Create private key dialog appears. By default, the JSON key type is selected. Click on CREATE to download the file to your computer.
Alright! It's time to connect your BigQuery database to Preset.
Setting up the connection In Preset
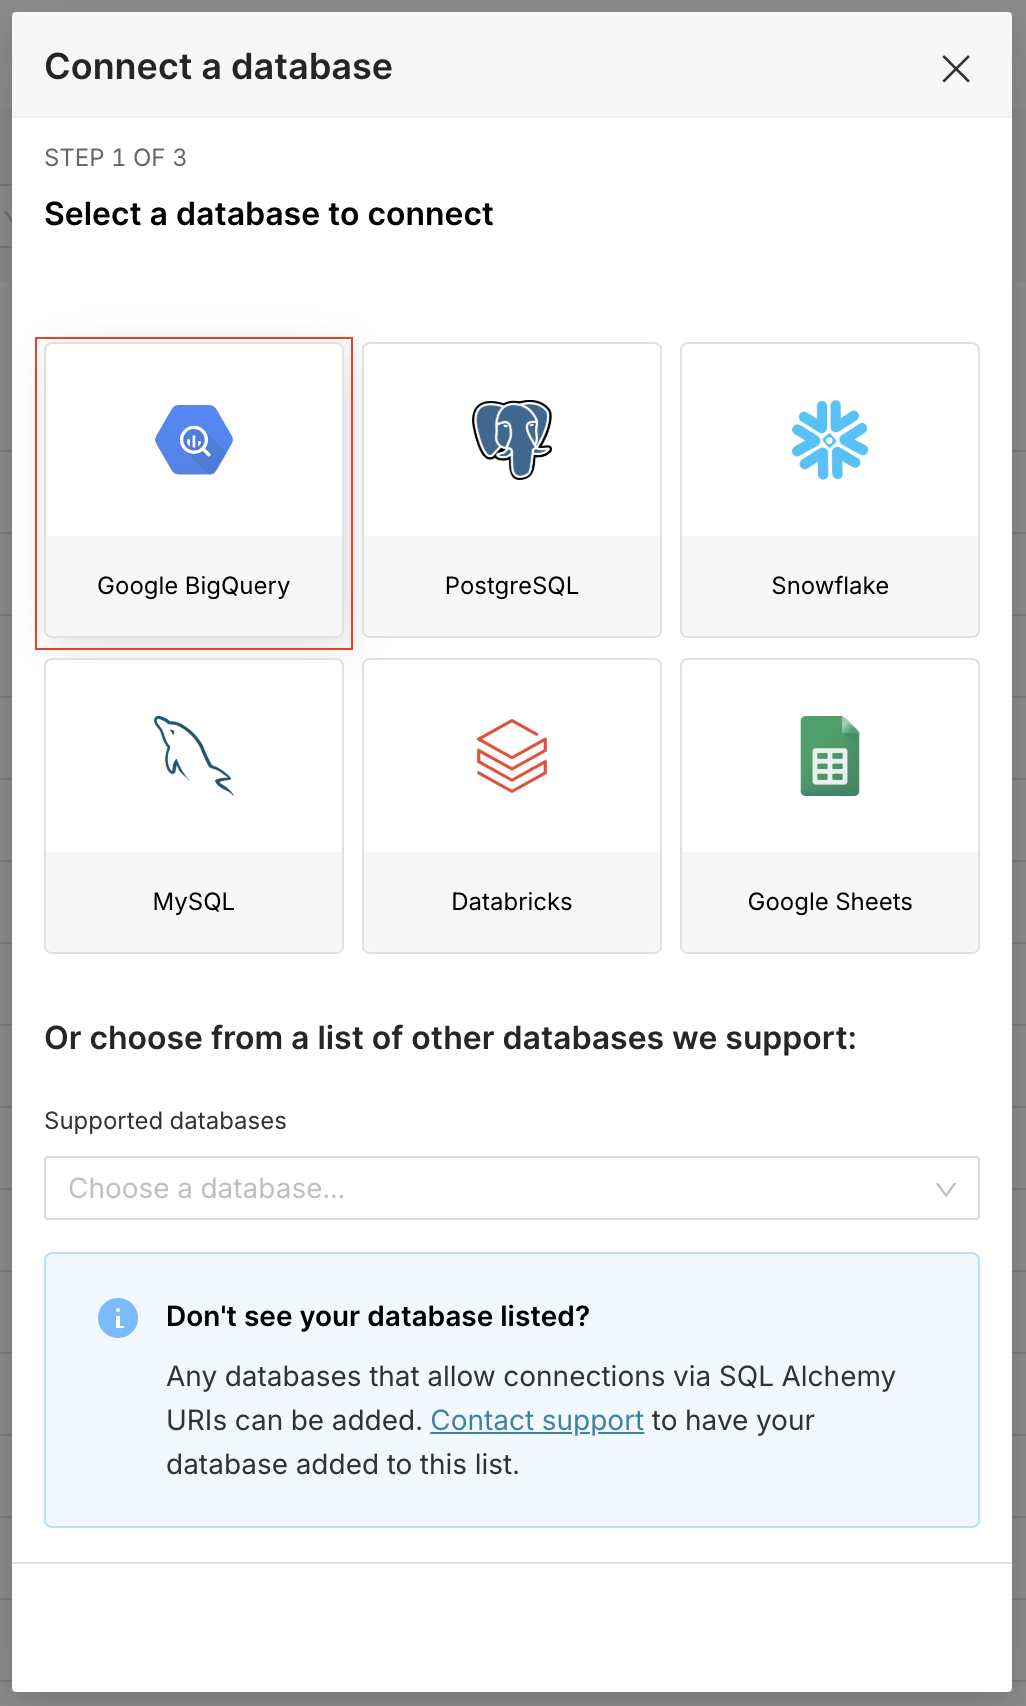
Let's start by selecting + Database — have a look at Connecting your Data if you need help wth this step.
Select Google BigQuery.
There are two ways to provide the Service Account credentials:
Method One: Using the dynamic form
In the Display Name field, enter a nickname for your database for display in the Preset environment.
Provide the Project ID previously copied from Google:
.png)
In the How do you want to enter service account credentials? field, select:
Upload JSON file and then click on Choose File to upload the JSON key downloaded earlier; or
Copy and Paste JSON credentials and then paste the JSON key content in the Service Account text field.
(optional) Additional connection parameters can be provided in the Additional Parameters field.
Click on Connect.
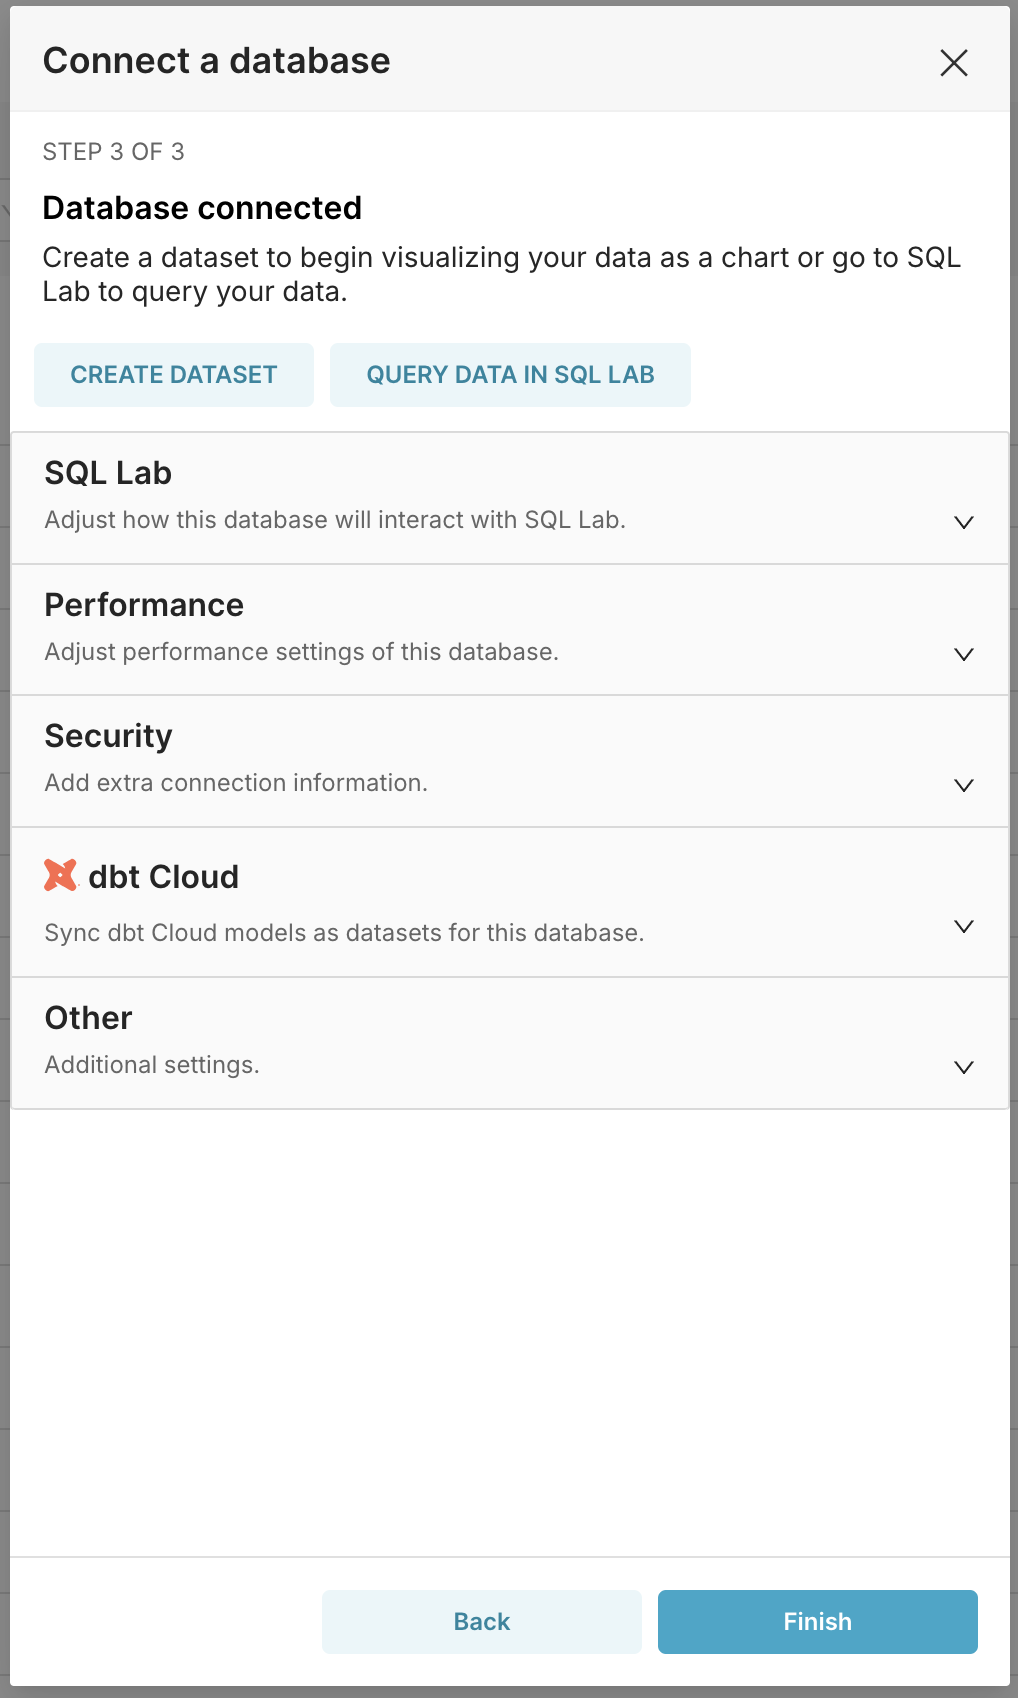
Great work! You can now make additional configurations to your database, if needed. To learn how to do this, please visit the Advanced Connection Settings article. When ready, click on Finish.
Method Two: Connect via a SQLAlchemy URI
Like the previous method, start by selecting the Google BigQuery icon, then scroll to the bottom of the Connect a Database panel.
Click on Connect this database with a SQLAlchemy URI string instead.
.png)
The dialog is now organized into two tabs: Basic and Advanced.
In the SQLAlchemy URI field, enter your URI using the following syntax (replace
${Project_ID}with the actual Project ID):
bigquery://${Project_ID}
Navigate to the Advanced tab and expand the Security section.
Paste below content in the Secure Extra field:
{
  "credentials_info":  ${JSON_KEY}
}
Open the JSON key downloaded earlier with a text editor, and copy its entire content.
Replace
${JSON_KEY}in the Secure Extra field with the copied key.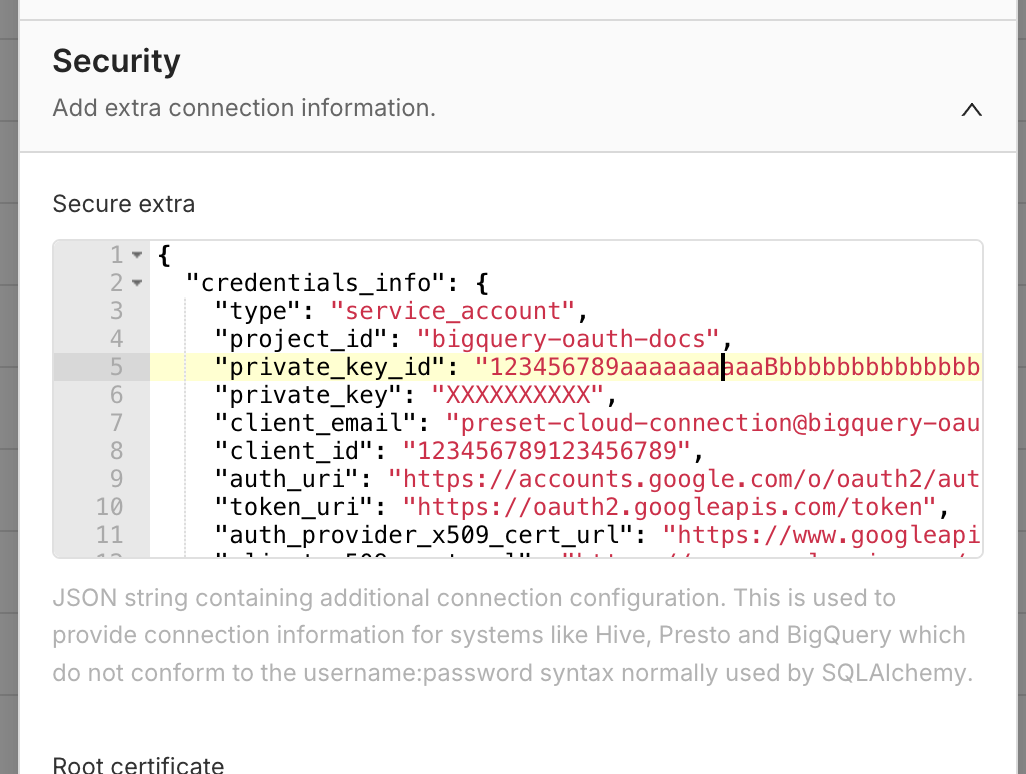
Other configurations can be applied in the Advanced tab. If you want to explore them, refer to Advanced Connection Settings.
Navigate back to the Basic tab and then select Test Connection.
Great work! The connection is now created.
Connect using an OAuth2 integration
It's possible to connect to BigQuery via OAuth2 to apply individual user permissions from BigQuery to the queries that users run in Preset. This approach requires setting up the integration in the Google Cloud Console.
Let's go through this process.
Select the Google Project
Access Google Cloud Platform Console, and select the Project that contains the BigQuery instance you're looking to connect to Preset. Copy the Project ID, as you will need this information to set up the connection in Preset.
Setting up API & Services
Navigate to the API & Services menu. Then follow these steps:
Creating an OAuth consent screen
Select OAuth consent screen, and then Clients in the sidebar menu.
If you don’t have any client created yet, click on Get started to set up the app details:
Provide an App name and User support email and click on Next.
Set the audience to Internal and click on Next.
Add Contact information for the app and click on Next.
Agree to the Google API services and click on Create.
You’ll be redirected to the Overview tab. Navigate back to the Clients tab.
Click on + Create client.
Set Application type to Web application, and provide a name to the client.
Click on + Add URI under the Authorized redirect URIs section. Replace
${WORKSPACE_DOMAIN}in the link below and use it as the URI:https://${WORKSPACE_DOMAIN}/api/v1/database/oauth2/If you plan on using this OAuth connection with multiple Workspaces, repeat step 5 for every Workspace.
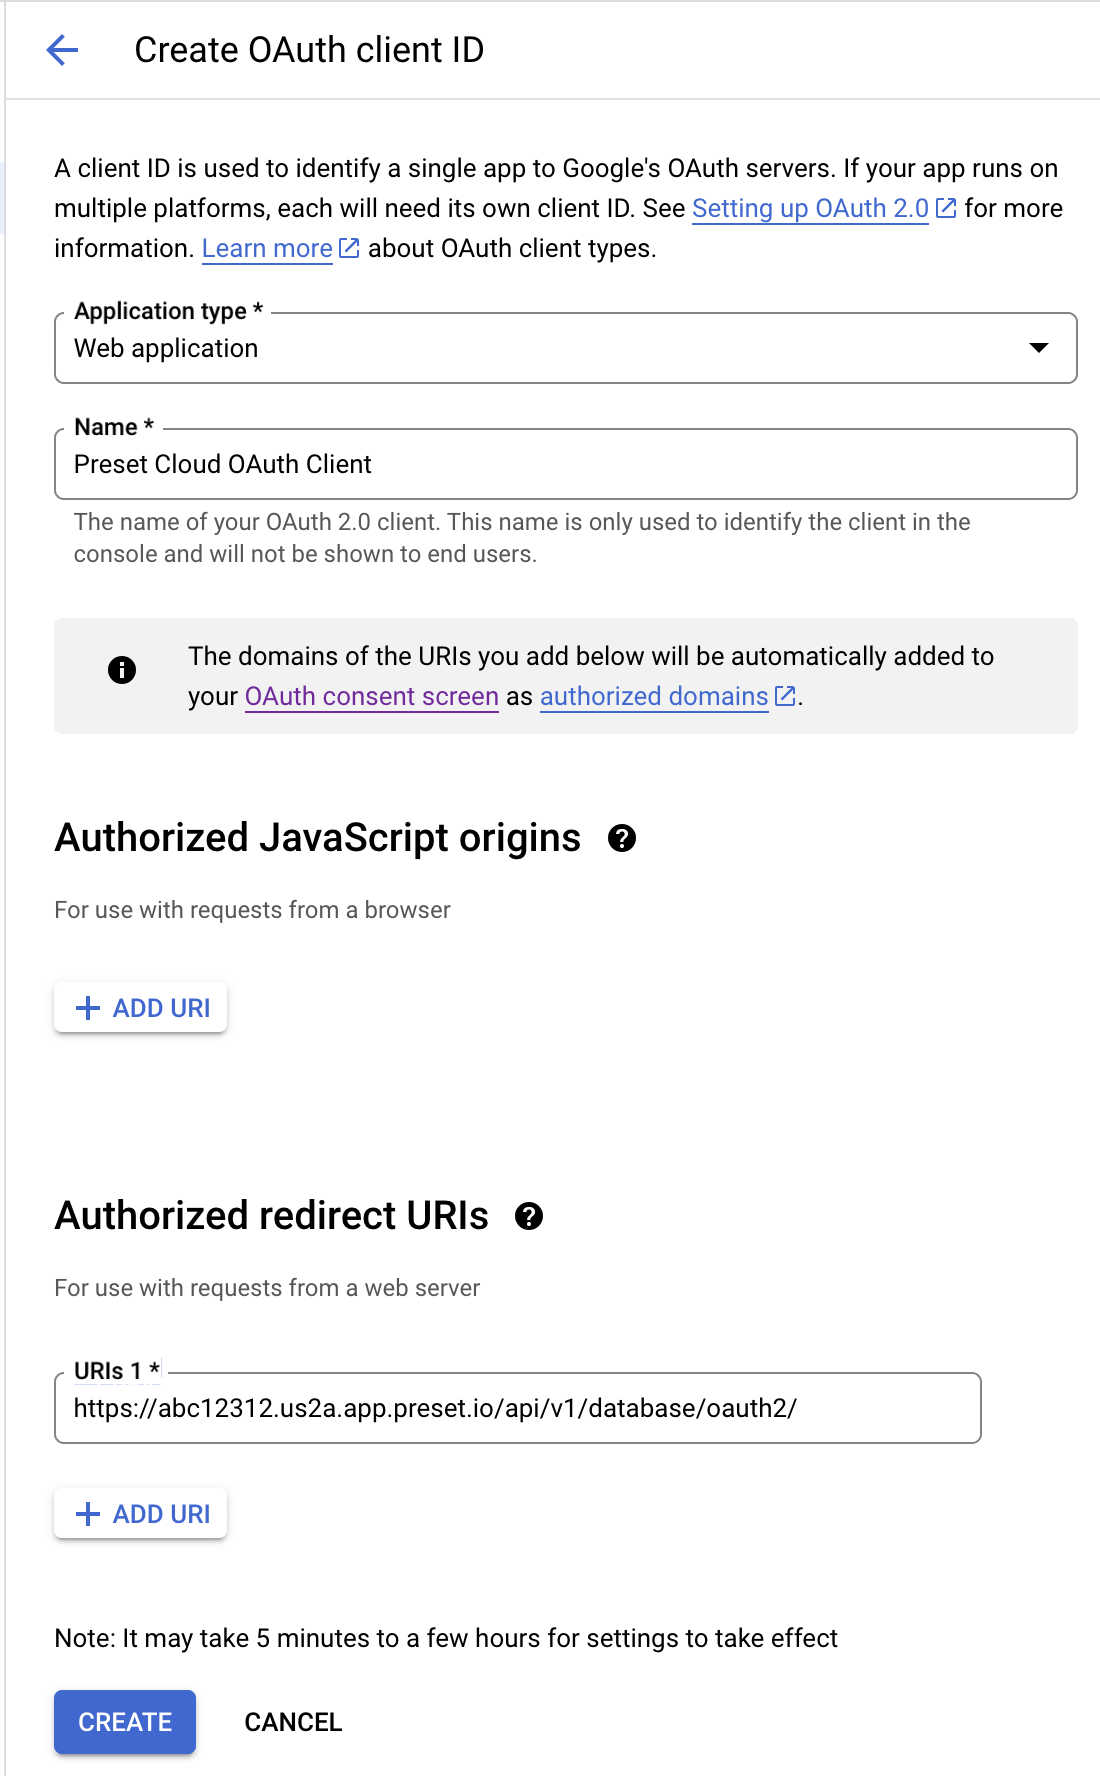
Click on Create.
In the confirmation dialog, click on Download JSON to retrieve the OAuth credentials. This will be used to set up the OAuth authentication in Preset.
It's time to set up the connection in Preset.
Setting up the connection In Preset
Let's start by selecting + Database — have a look at Connecting your Data if you need help wth this step.
Select Google BigQuery.
In the Display Name field, enter a nickname for your database for display in the Preset environment.
Change the Connection method to OAuth2
.png)
Provide the Project ID previously copied from Google.
Open the OAuth2 credentials JSON file downloaded earlier in a text editor to fill the OAuth2 form. Fill the:
Client ID field with the
"client_id"value.Client Secret field with the
"client_secret"value.Authorization Request URI field with the
"auth_uri"value.Token Request URI field with the
"token_uri"value.Scope field with
https://www.googleapis.com/auth/bigquery.
Click on Connect.
You'll be redirected to the Advanced tab.
Expand the Security section and enable the Impersonate logged in user checkbox.
Other configurations can be applied in the Advanced tab. If you want to explore them, refer to Advanced Connection Settings.
Click Finish to save your database connection.
To test the integration:
Navigate to SQL > SQL Lab.
Select the BigQuery connection in the Database dropdown.
You should see an Authorization needed error. Click on See more.
Click on the provide authorization hyperlink to be redirected to Google. Authenticate to your Google account and grant consent for the integration.
After authentication, you're redirected back to Preset. Refresh the page.
Queries should now be properly authenticated with your OAuth2 token. Note that this Authorization needed prompt will be displayed to all users the first time they interact with this database (either in SQL Lab or via charts).