Introduction
There may be times when you would like to further configure your database connection.
In addition, some databases require that additional settings be defined in order to finalize the connection, such as:
Let's have a look at how to use the additional settings interface.
Configuring Advanced Settings
Whether you have connected your database by supplying credentials or have used a SQLAlchemy URI, you will be presented with an opportunity to specify additional settings.
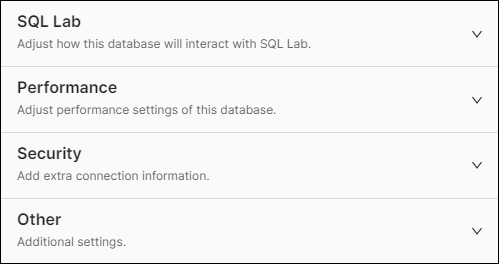
We will look at each panel in detail below.
SQL Lab
To start, select SQL Lab to expand the panel. These options are used to configure how your database will interact with SQL Lab.
The options appear as follows:

- Expose in SQL Lab: Select to ensure that the database is available for selection in the SQL Lab tool. This option is enabled by default and, when selected, provides access to the remaining configuration options.
- Allow CREATE TABLE AS: Enables the creation of new tables based on SQL queries.
- Allow CREATE VIEW AS: Enables the creation of new views based on SQL queries.
- Allow DML: Enables the use of Data Manipulation Language to manipulate the database using non-SELECT statements, such as update, delete, and create table.
- Allow Multi Schema Metadata Fetch: Allow SQL Lab to fetch a list of all tables and all views across all database schemas. For large data warehouses with thousands of tables, this can be expensive and put a strain on the system.
- Enable query cost estimation: For Preso and Postgres, displays a button that enables you to compute the cost of a query before running it.
- Allow this database to be explored: Allows users to visualize SQL Lab results using the Explore interface.
Performance Panel
The next panel, Performance, is used to adjust the performance settings of your database.
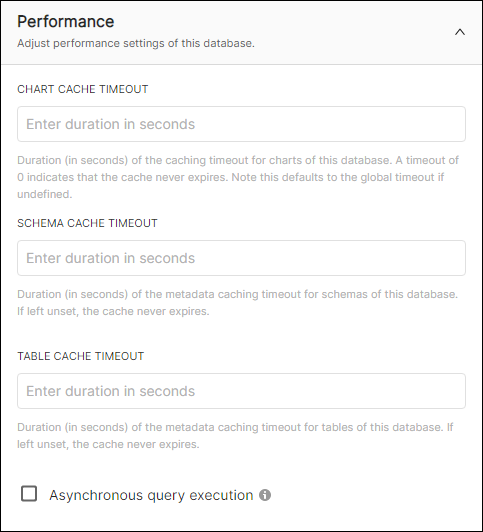
- Chart Cache Timeout: Duration, in seconds, of the caching timeout for charts of this database. A timeout of 0 indicates that the cache never expires. Note this defaults to the global timeout if undefined.
- Schema Cache Timeout: Duration, in seconds, of the metadata caching timeout for schemas used in this database. If left undefined, then the cache never expires.
- Table Cache Timeout: Duration, in seconds, of the metadata caching timeout for tables used in this database. If left undefined, then the cache never expires.
- Asynchronous Query Execution: Enable to run the database in asynchronous mode — this means that queries are executed on remote workers instead of the web server. When enabled, this feature can prevent 504 Time out errors when running queries in SQL Editor.
Security Panel
The Security panel is used to include additional connection details, as required by your database type.
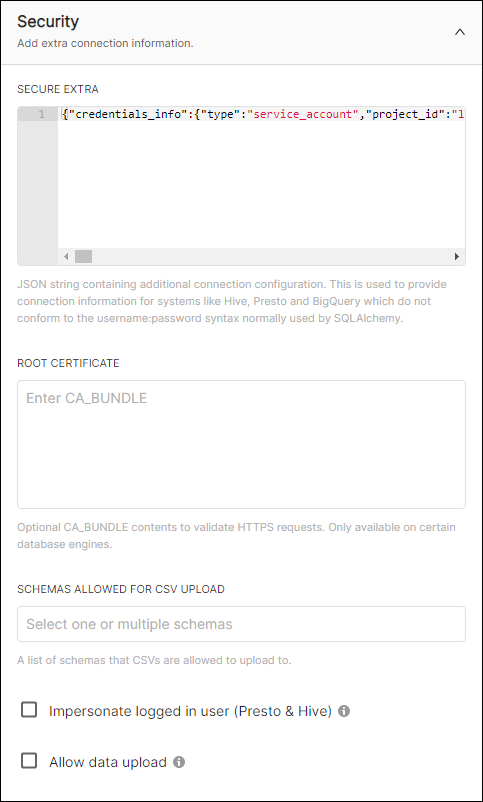
The Secure Extra text-entry box is used to enter a JSON string with any additional connection configurations. This is typically required by other systems that do not conform to the username:password syntax used by a SQLAlchemy URI.
The Root Certificate text-entry box is used to enter any required CA_BUNDLE content needed to validate HTTPS requests. This is only available for certain database engines.
In the Schemas Allowed for CSV Upload field, select one or more schemas that comma-separated value files can be uploaded to.
The Impersonate logged in user (Presto & Hive) option is used to run queries as a service account while impersonating the currently logged in user.
Lastly, selecting the Allow data upload option enables users to upload data to the schemas defined above in the Schemas Allowed for CSV Upload field. In addition, when enabled, database upload options (i.e., Upload a CSV, Upload a Columnar File, and Upload Excel) will be displayed for non-Admin users.
Other Panel
The Other panel is used to specify additional settings (i.e., parameters and versioning), if needed.
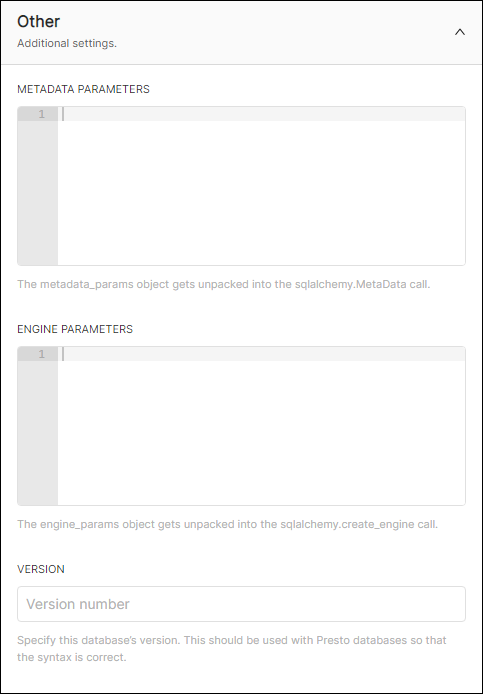
In the Metadata Parameters field, enter a metadata_params object that will be unpacked into the sqlalchemy.MetaData call.
In the Engine Parameters field, enter an engine_params object that will be unpacked into the sqlalchemy.create_engine call.
Last, in the Version field, enter your database's version — this is needed when using a Presto database to ensure that the syntax is correct.