- 20 Oct 2023
- 3 Minutes to read
- Print
- DarkLight
- PDF
Sharing and Collaboration
- Updated on 20 Oct 2023
- 3 Minutes to read
- Print
- DarkLight
- PDF
Sharing a Public Dashboard
Step 1: View a dashboard
Select and view a dashboard.
Step 2: Sharing the dashboard
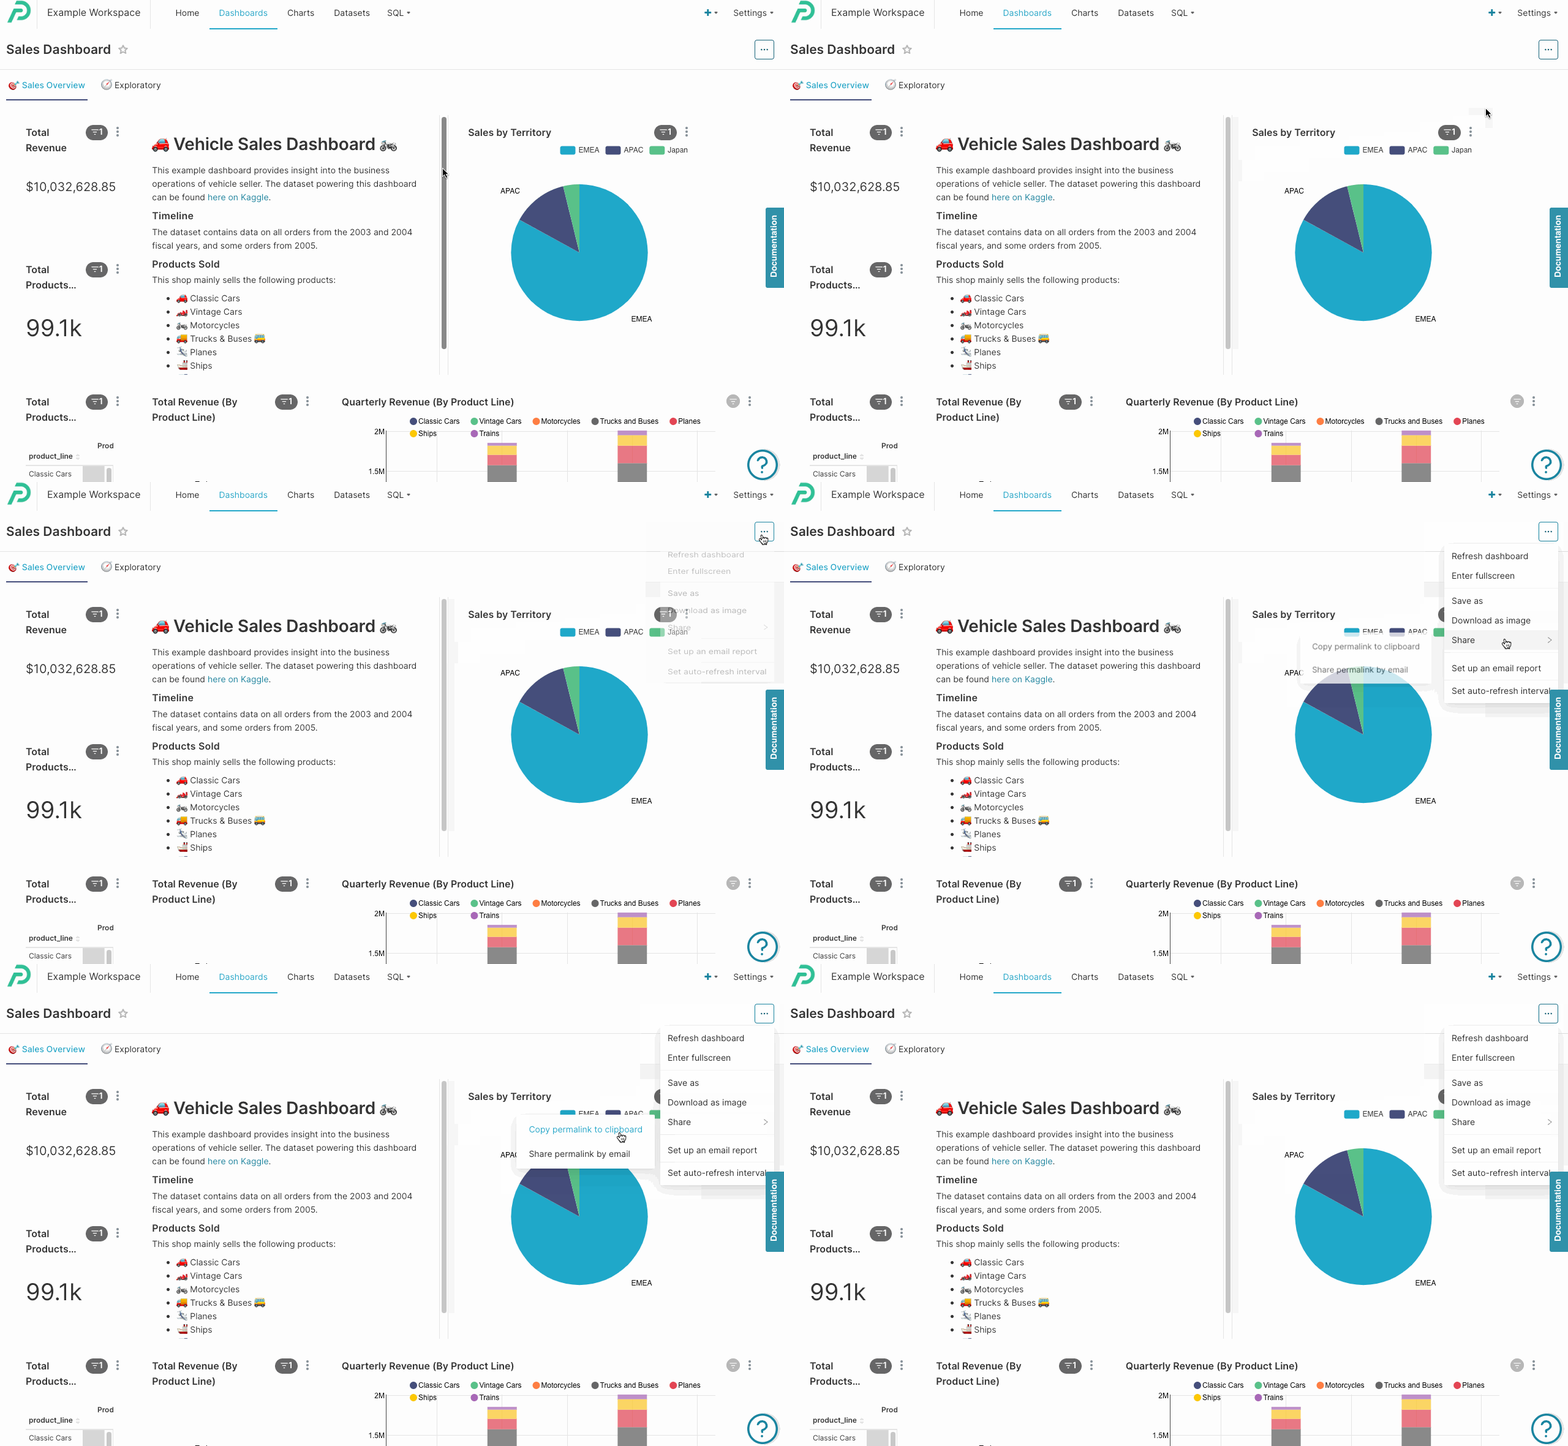
To share a permalink to the dashboard, select the three dots on the top right hand corner of the dashboard and hover over "Share" to see your sharing options.
This link will also include any filters that you have pre-applied to your dashboard, making it easier for you to share a specific view with others.
Send a URL via email
From the dashboard view, below the Toolbar, select the vertical ellipsis icon (⋮) and then select Share permalink by email.
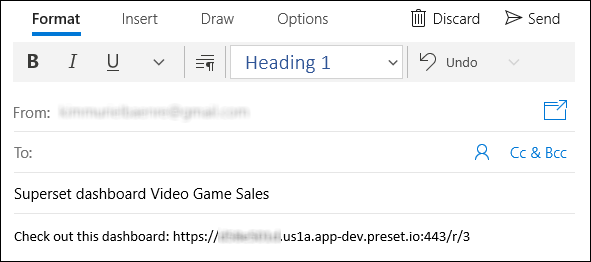
Your system's default email client will automatically open featuring the dashboard's title in the Subject and a URL to the dashboard in the Body.
Copy the dashboard's URL
You can copy a shareable dashboard link to your clipboard by selecting Copy dashboard URL.
The shared permalink will require a user to be logged in to Preset as a member of the same team and workspace with the appropriate Data Access Roles roles to be able to view the dashboard.
Sharing a Draft Dashboard
1. Access the dashboard
Select and view a dashboard that you've created and are looking to share.
2. Access the Share interface
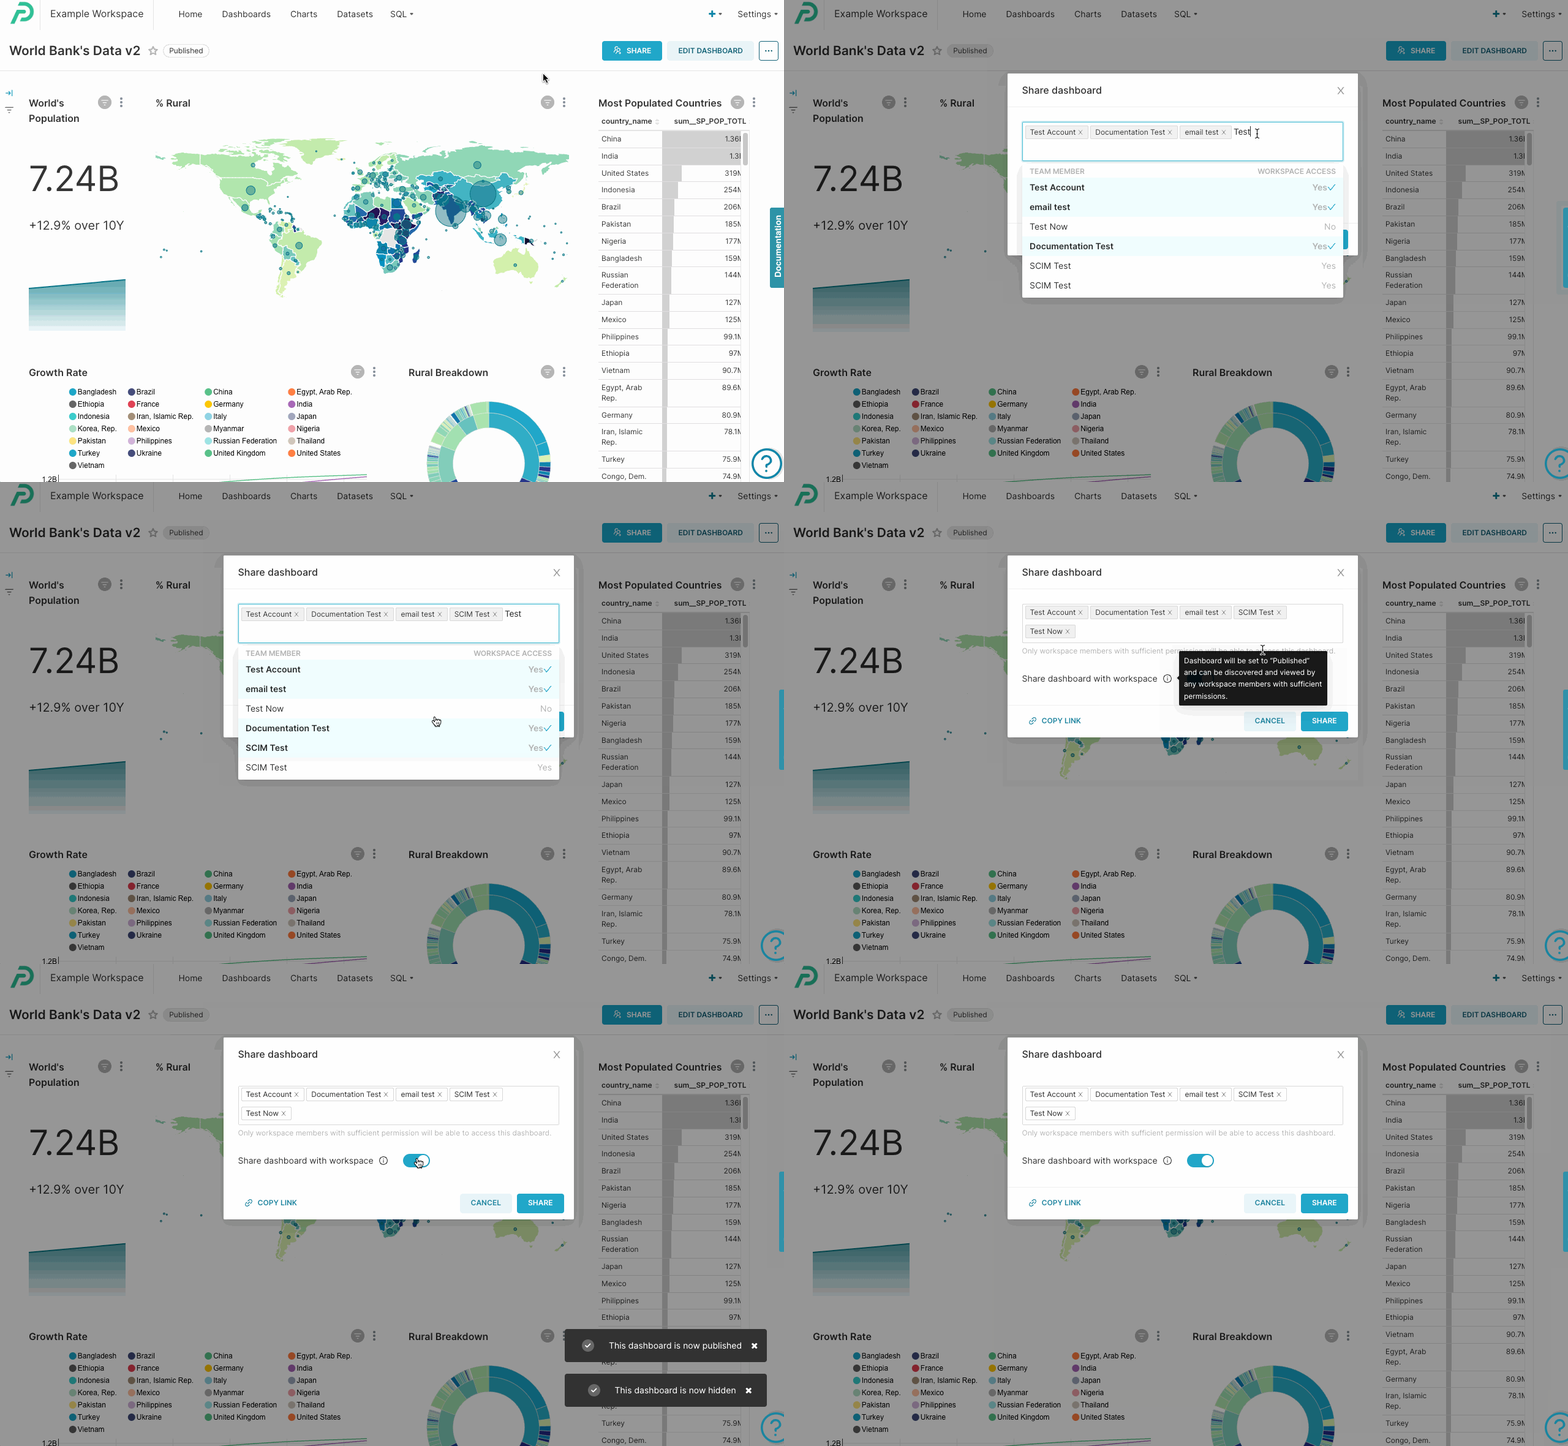
Select the "SHARE" button in the top right hand corner of the dashboard. This will open a window for you to select users.
3. Add user emails
Start typing the name of the user you would like to invite. You can select multiple users from the drop down.
4. Choose whether to publish the dashboard
The "Share Dashboard with Workspace" toggle will publish your dashboard and make it viewable by non-owners. If you turn this toggle off, then the dashboard will remain in the draft state, only visible to the users you've shared it with, owners of the dashboard, and workspace admins.
(Optional) 5. Share dashboard via link
Select "COPY LINK" from the bottom of the share interface. This will allow any workspace members with the appropriateData Access Roles to view the draft dashboard from the provided link.
Share a Dashboard & Invite Users
If you are a Team Admin, you can invite new users directly from the sharing interface.
1. Access the dashboard
Select and view a dashboard that you've created and are looking to share with someone who is not currently a Preset user.
2. Access the Share interface
Select the "SHARE" button in the top right hand corner of the dashboard. This will open a window for you to select users.

3. Add new users
Start typing the name of the user you would like to invite to view the dashboard. If the user is not an existing user, you will be prompted to "INVITE" the user. 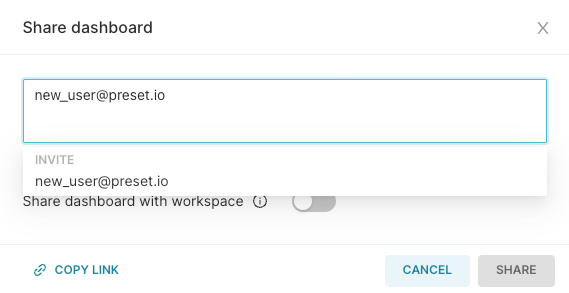
Inviting a new user to view your dashboard, will send them an email prompting them to create an account and view the dashboard. This will automatically grant them Primary Contributor access in the workspace. You can change their role via the Workspace Roles settings.
Sharing a Chart
You can share a chart by selecting the three dots on the top right hand corner of the chart and hovering over "Share" to see your sharing options.
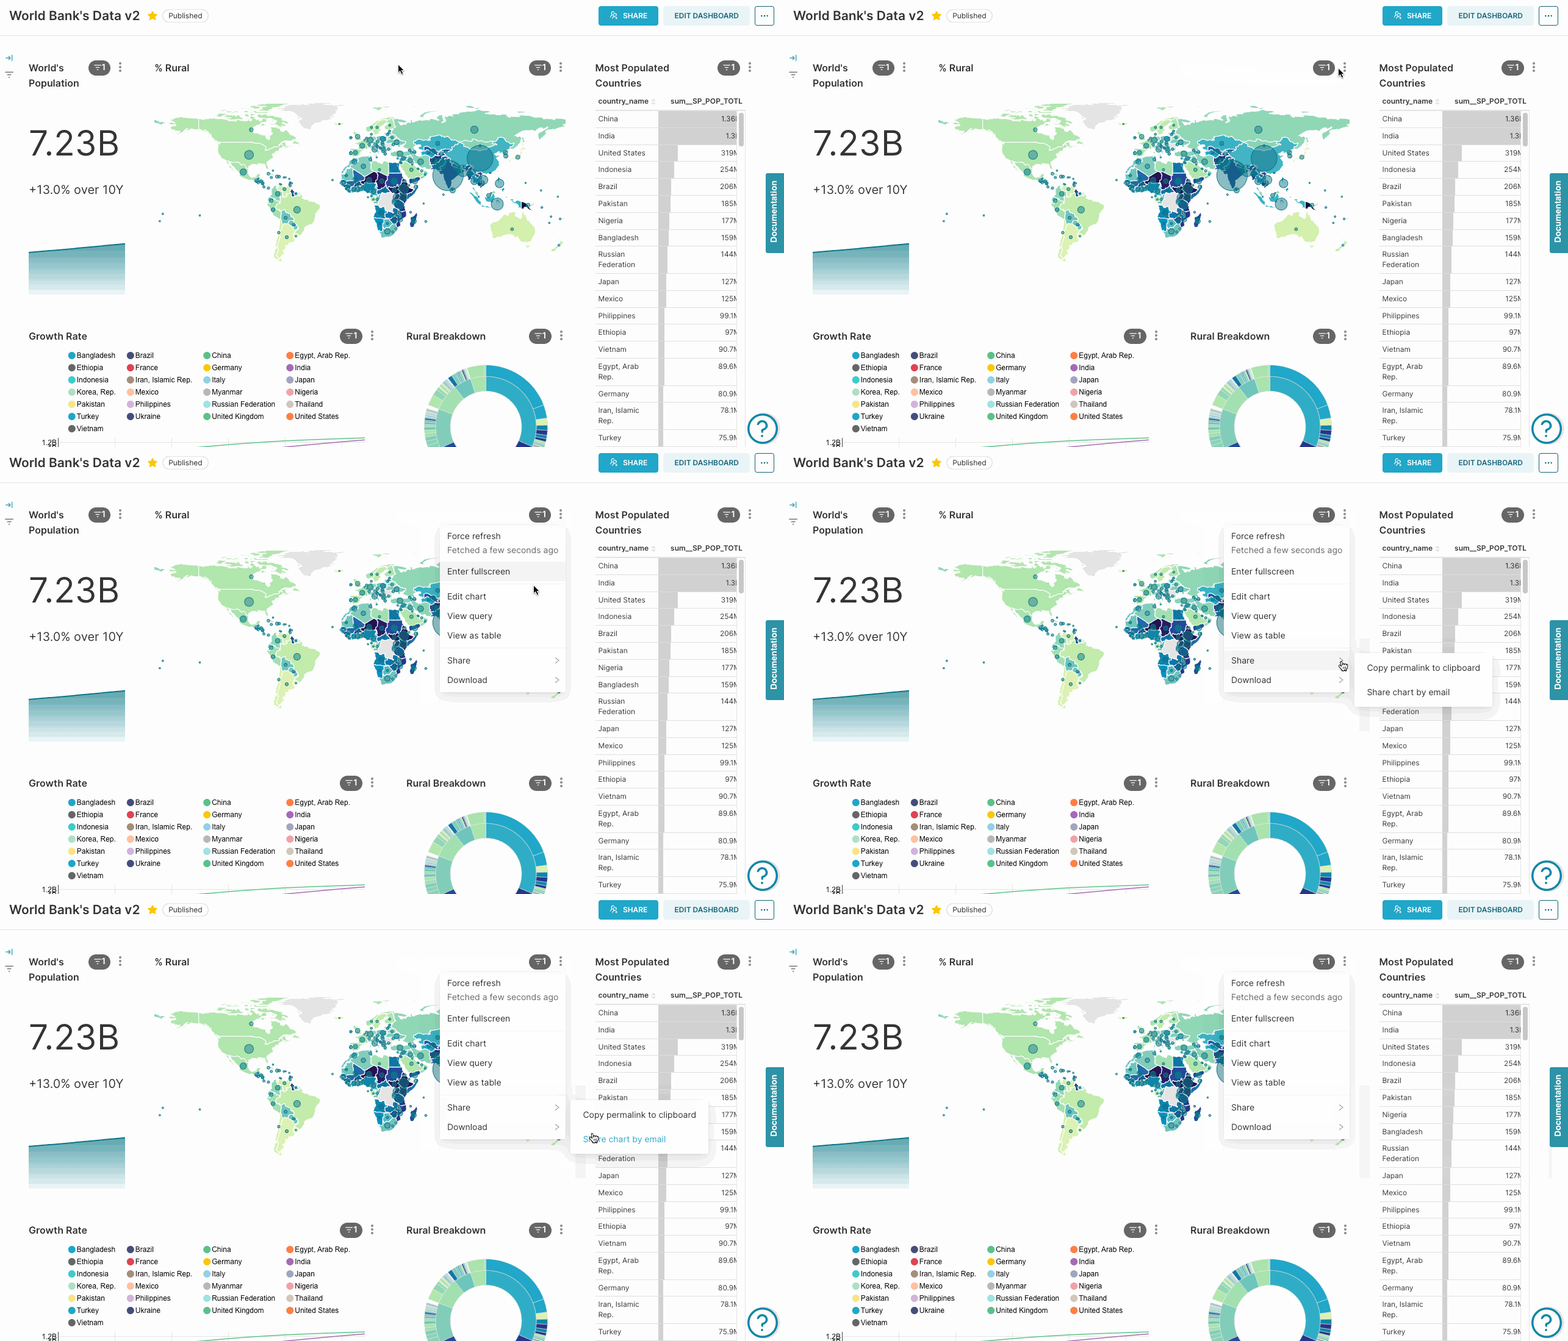
Share a chart via email
Navigate to a chart within a dashboard, select the vertical ellipsis icon(⋮) and then select Share chart by email.
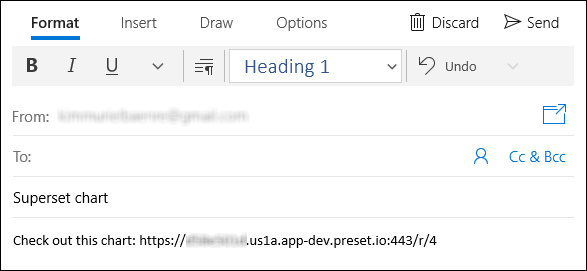
As above, your system's default email client will automatically open. The text "Superset chart" will appear in the Subject and a URL to the chart will appear in the Body.
Sharing from the Chart Builder interface
You can also send a chart via email from the Chart Builder page byselecting thevertical ellipsis icon(⋮) on the top right hand corner of the Chart Builder interface, hovering over "Share" and selecting "Share chart by email".

