The SCIM Integration requires an Enterprise subscription
The User Provisioning (SCIM) integration is available on the Enterprise plan.
This page describes how to create a User Provisioning (SCIM) Integration with Okta. The integration can be used to provision and deprovision users to your Preset team, and also push groups to manage Workspace and Team roles.
The integration uses OAuth 2 for authentication.
Supported features
- Push New Users (Create Users): Assigned users to the app are automatically added to your Preset team.
- De-provision accounts (Deactivate Users): Un-assigned/deactivated accounts are automatically removed from your Preset team.
- Push Profile Updates (Update User Attributes): Attribute updates reflect to Preset accounts.
- Push groups: Pushed groups are created on the Team and Workspace roles.
- Remove groups: Removing a group push deletes the group on Preset side.
Note that deactivated accounts on Okta aren't deactivated on Preset. They are de-provisioned from your Preset team, instead.
Requirements
In order to implement the SCIM integration, you need:
- A Preset Enterprise subscription.
- A SAML SSO integration with Okta.
- An Okta subscription that supports SCIM.
- An account with admin access on Okta and Preset.
Step by step instructions
- Access the Okta Admin panel.
- Navigate to the Preset app created for the SAML SSO integration.
- Create a support ticket on our portal, requesting the SCIM integration enablement. Our team will provide the information required to set up the integration.
- On the Preset app (on Okta), navigate to the Provisioning tab.
- Click on the Configure API Integration button.
- Check the Enable API integration box.
- Fill the Team Slug variable with your Preset Team Slug (our Support team can help providing this information).
- Lastly, click on Authenticate with Preset (make sure you are already logged in to Preset with an admin account in the browser).
- You should see a successful message. Save settings.
- The page reloads and now Provisioning configurations are visible. Click on Edit in the To App tab and enable the desired features for the integration.
- Save changes.
Configuring Group Push
To sync Okta groups to Preset, navigate to the Push Groups tab and specify the groups that should be provisioned to Preset. Pushed groups can be used to manage Team Roles and Workspace Roles:
| Team Role | Workspace Role |
|---|---|
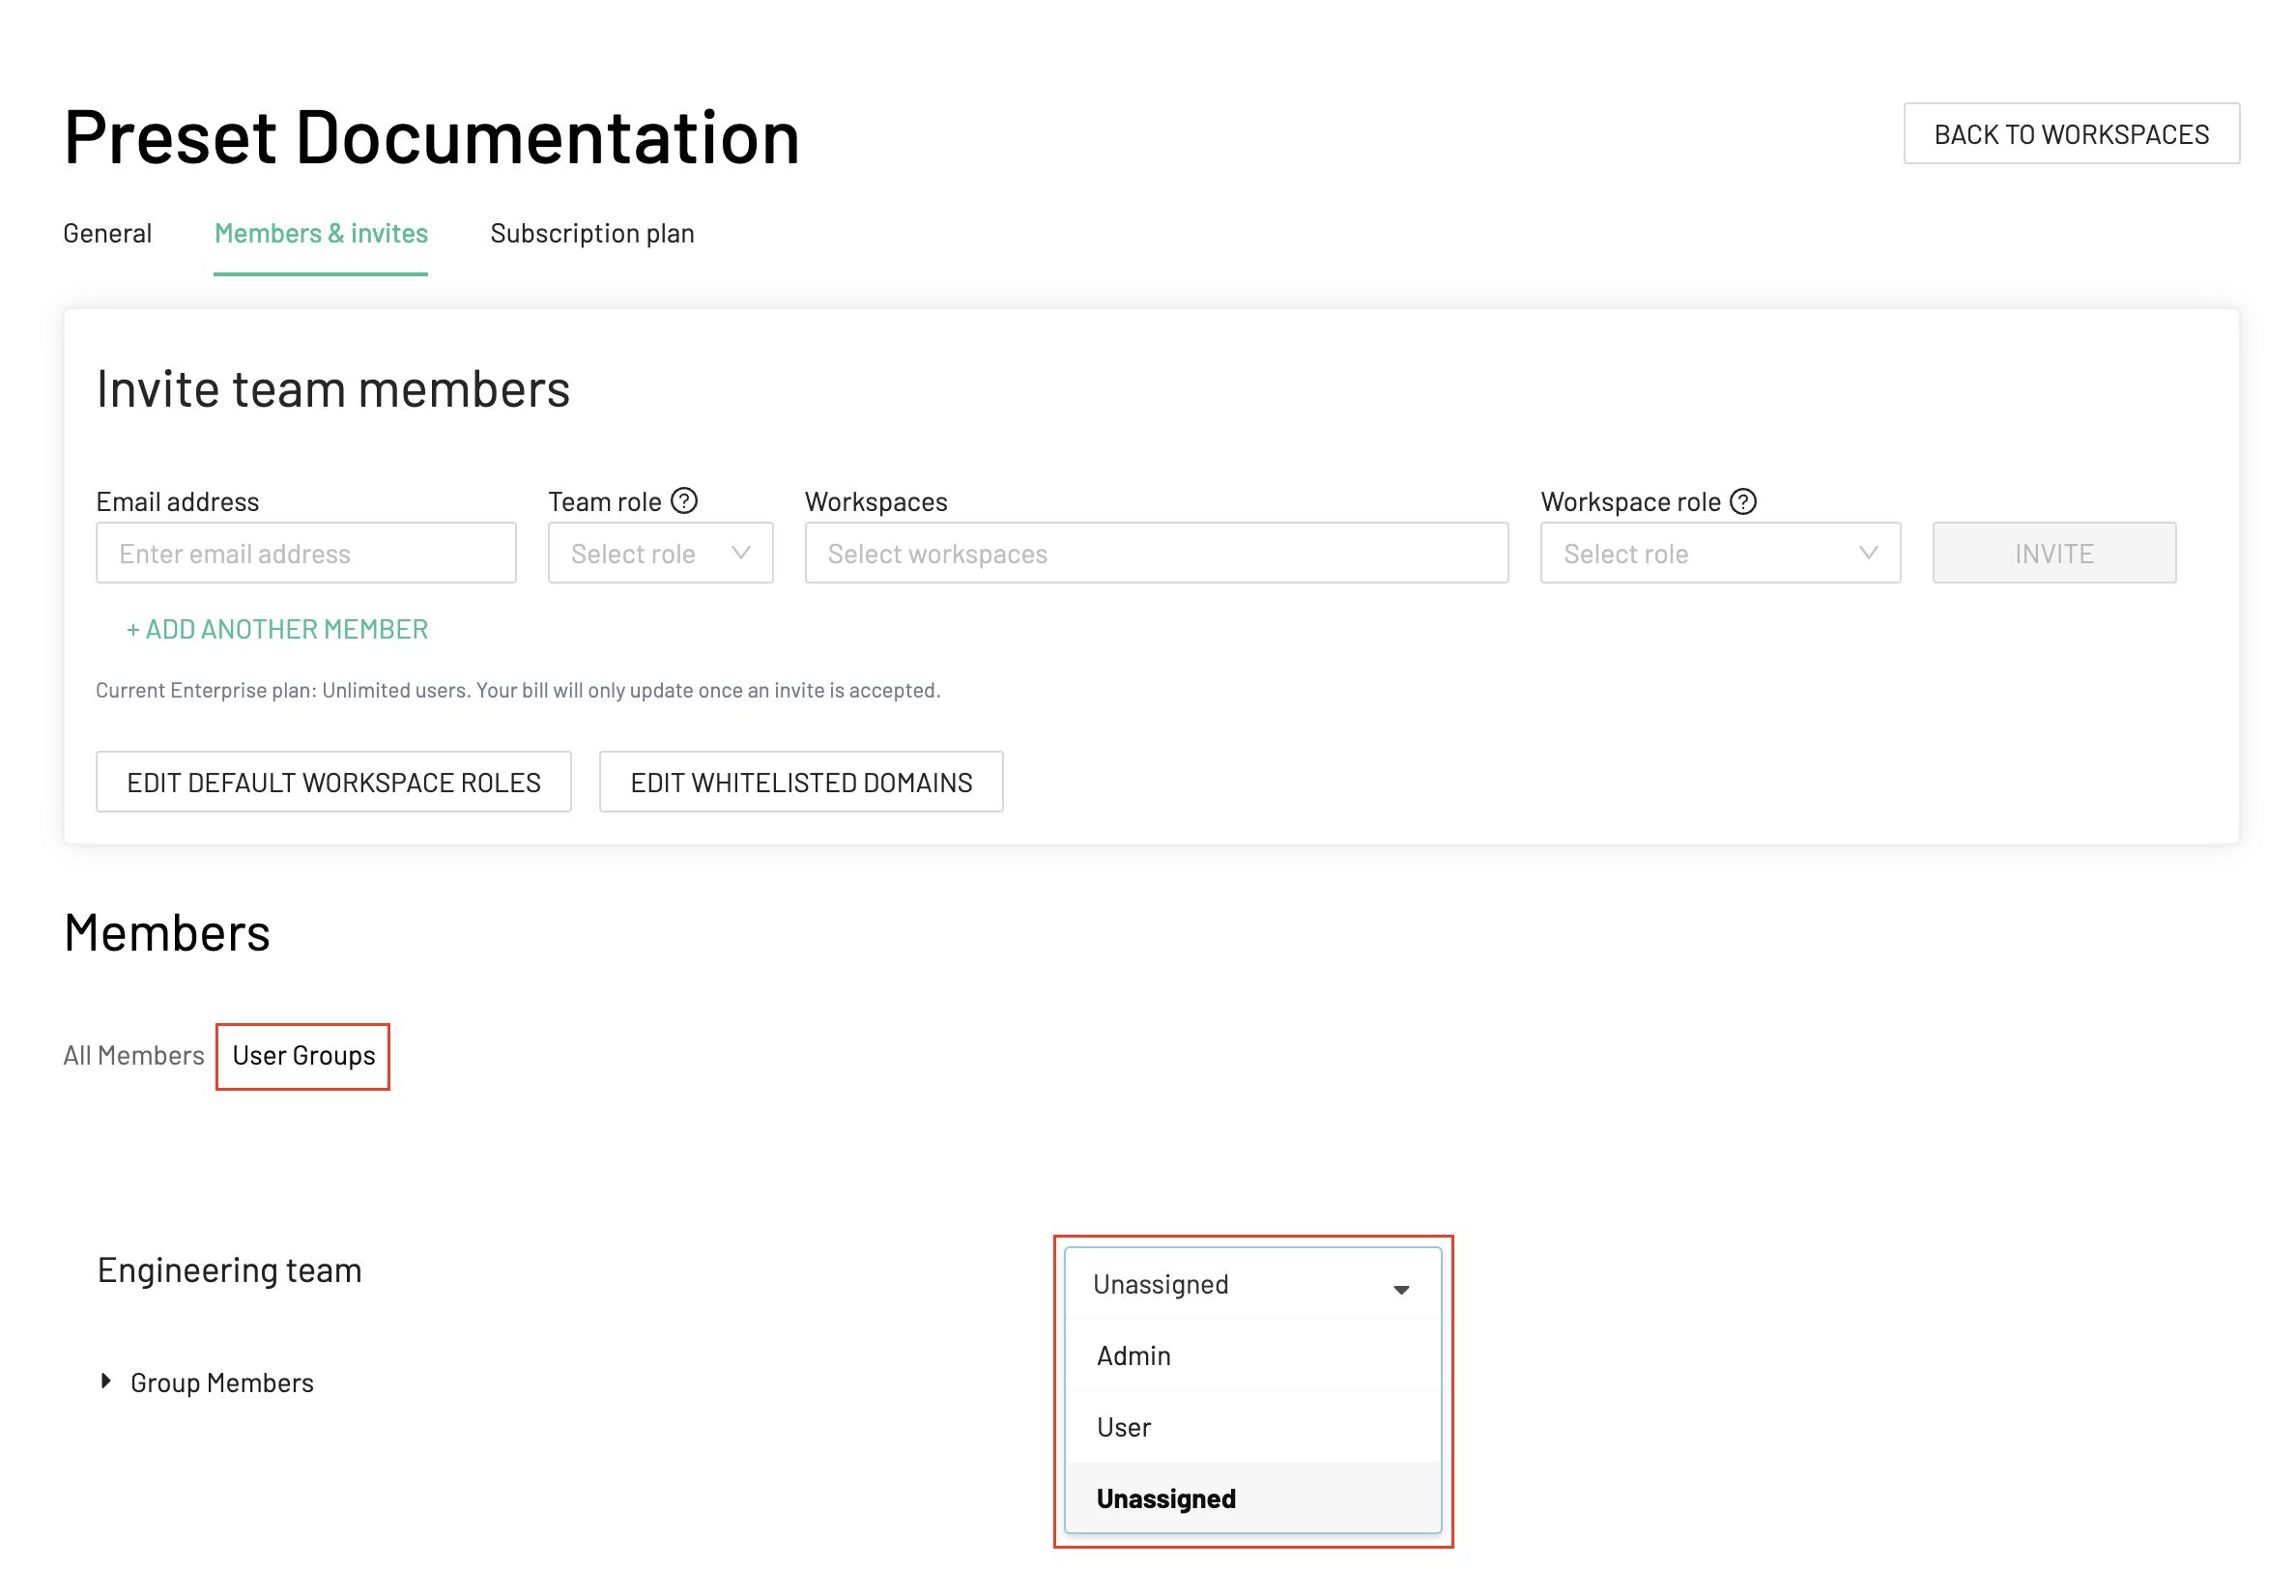 | 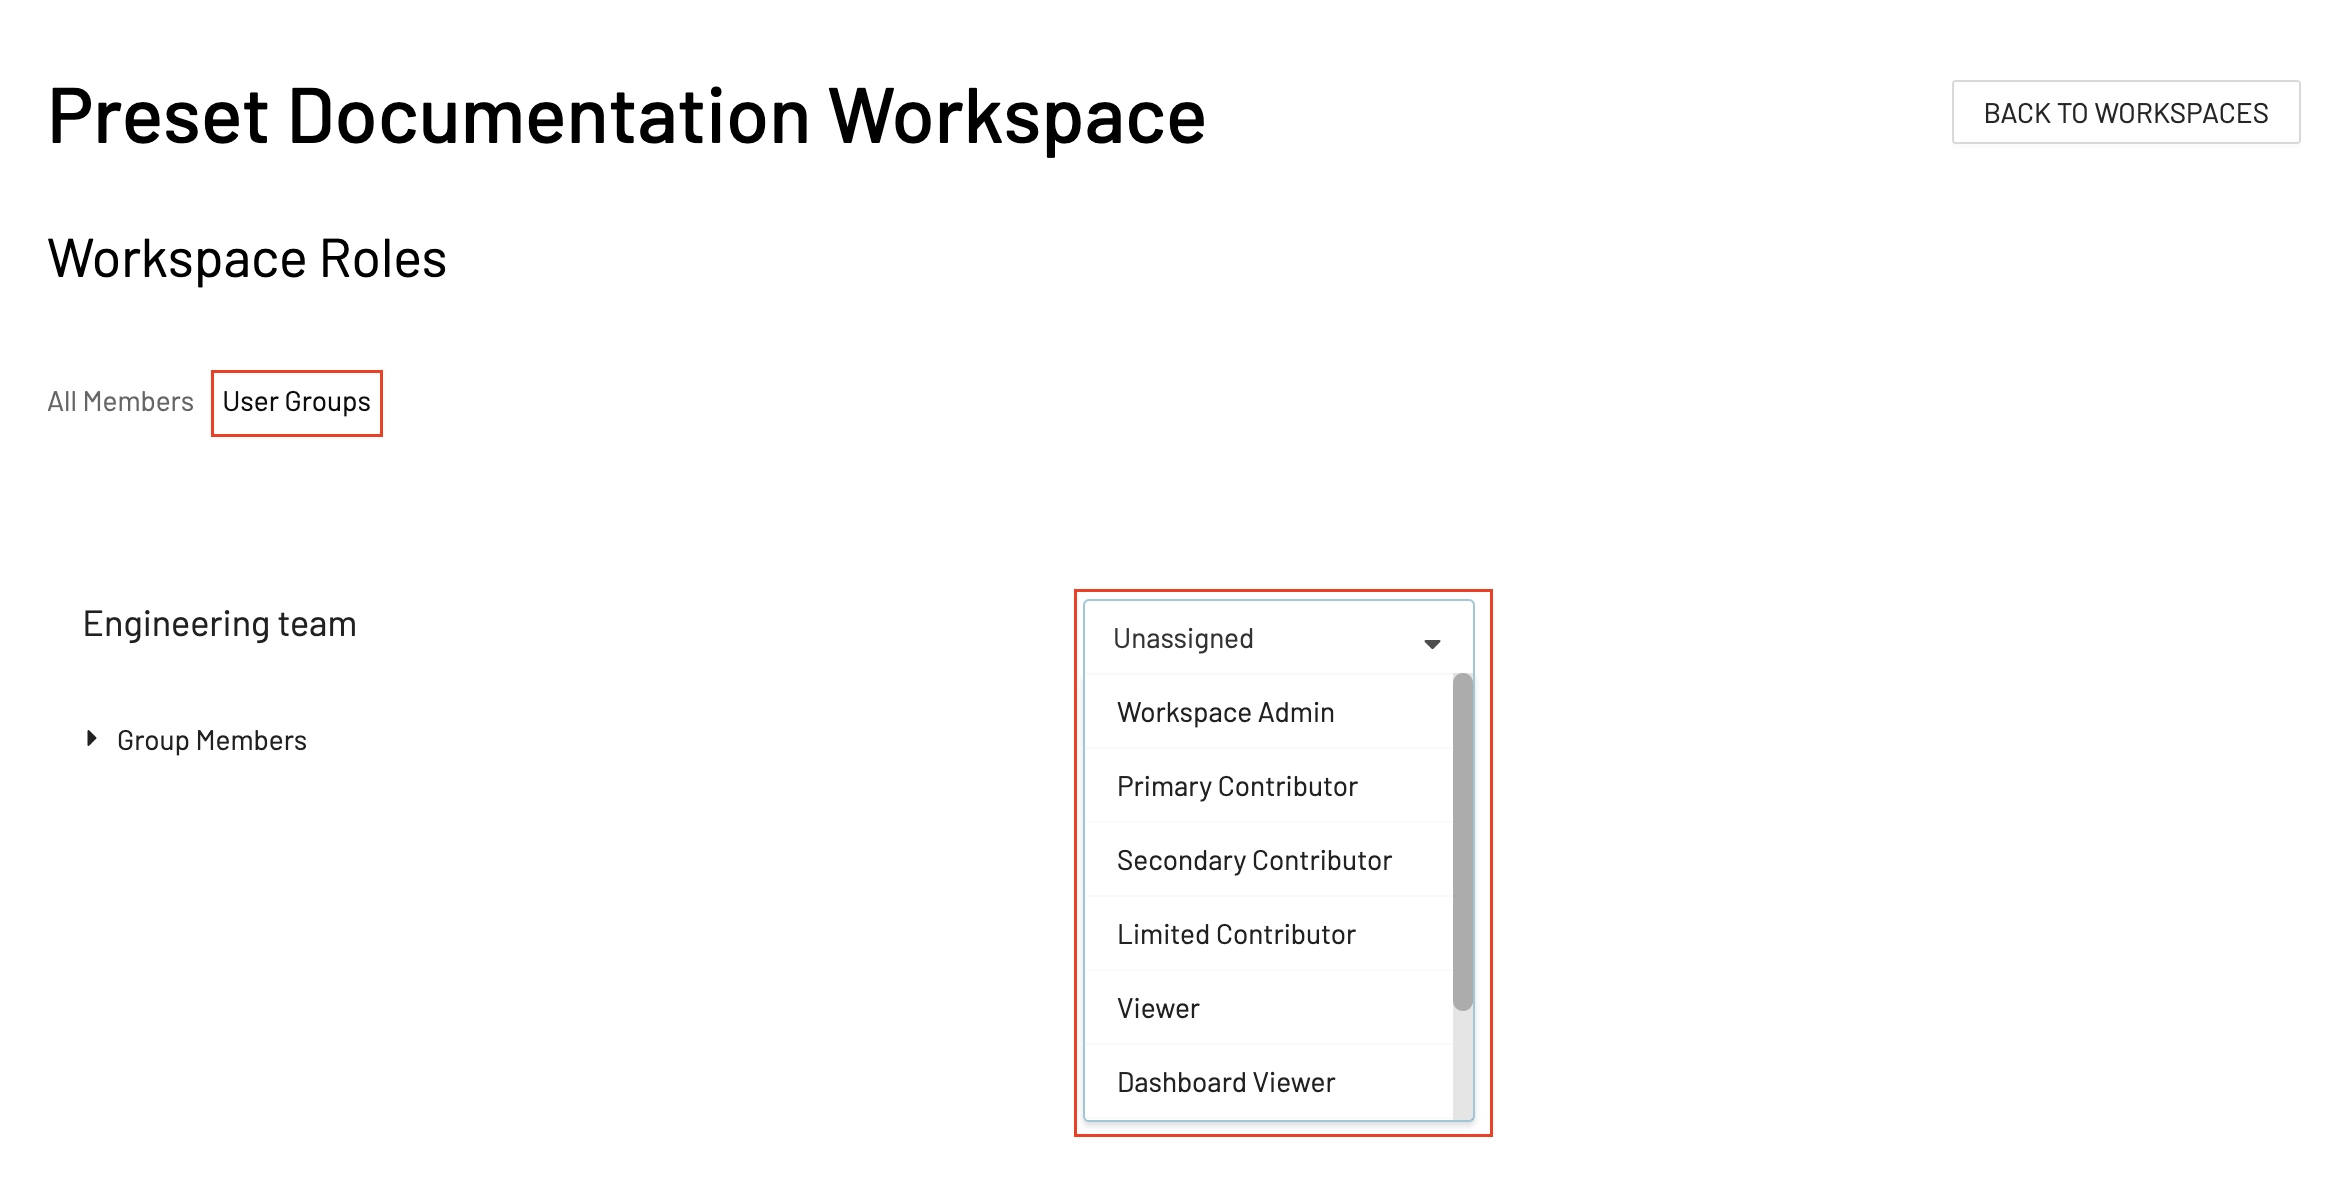 |
Troubleshooting tips
- Accounts that were assigned to this app prior to the SCIM implementation will show an error on the Assignments tab. This is expected, since Okta doesn't know if they are properly provisioned to the Preset team. Click on the Provision Users button in the top to fix the error.
- If admin access is revoked on Okta and/or Preset for the user that created the integration, the OAuth token will be invalidated. Another account with admin access on both applications can access the Preset app and generate a new token, by clicking on Re-authenticate with Preset.
If you face any other issues, please reach out to our Support team.