Role-based Access Control Requirement
Role-based access control is only available for the Professional and Enterprise plans. Managing RBAC also requires the Workspace Admin role.
Workflow for RBAC
To set up Role Based Access Control, you'll follow this flow:
Invite a user to a team
Add them to a workspace
Add them to a data access role; and,
Control data access with row level security (RLS).

Role Details
The available workspace roles are as follows: Workspace Admin, Creators (Primary, Secondary, Limited, and Visualization), Viewer, Dashboard Interactor, and Dashboard Viewer.
Workspace role definitions are as follows:
Feature | Workspace Admin | Primary Creator | Secondary Creator | Limited Creator | Visualization Creator | Viewer | Dashboard Interactor | Dashboard Viewer |
|---|---|---|---|---|---|---|---|---|
Dashboards | Read, Write Access, Embed Access | Read, Write** Access | Restricted Read*, Write** Access | Restricted Read*, Write** Access | Restricted Read*, Write** Access | Restricted Read* Access | Restricted Read* Access | Restricted Read* Access |
Charts | Read, Write Access | Read, Write** Access | Restricted Read*, Write** Access | Restricted Read*, Write** Access | Restricted Read*, Write** Access | Restricted Read* Access | No | No |
Drill to Detail | Yes | Yes | Yes | Yes | Yes | Yes | No | No |
Drill by | Yes | Yes | Yes | Yes | Yes | Yes | Yes | No |
Database Connections | Read, Write Access | Read Access | Read Access | Restricted Read Access | No | No | No | No |
Datasets | Read, Write Access | Read, Write Access | Restricted Read*, Write** Access | Restricted Read Access | Restricted Read Access | No | No | No |
SQL Lab | Read, Write Access | Read, Write Access | Restricted Read*, Write** Access | Restricted Read*, Write** Access | No | No | No | No |
Alerts and Reports | Read, Write Access | Read, Write Access | Read, Write Access | No | No | No | No | No |
Annotation Layers | Read, Write Access | Read, Write Access | No | No | No | No | No | No |
CSS Templates | Read, Write Access | Read, Write Access | No | No | No | No | No | No |
Data Access Management | Read, Write Access | No | No | No | No | No | No | No |
* Restricted read access is controlled by the user's Data Access Role (DAR).
** When creating new content, restricted write access is controlled by the user's DAR. When editing existing content, it is controlled by content ownership.
The sections below describe each workspace role, including what actions users can perform and whether a Data Access Role (DAR) is required to access data:
Workspace Admin
Has full access to all features and data within the workspace, including datasets, charts, dashboards, SQL Lab, alerts, reports, and data access configurations. Does not require a DAR and has unrestricted access to all databases, datasets, and assets by default.
Creator roles
Creator roles vary in the level of access and capabilities they provide. Secondary Creator, Limited Creator, and Visualization Creator have no access to data by default and require a Data Access Role (DAR) to interact with any data. Primary Creator, however, has unrestricted access to all data by default and does not require a DAR. All four roles can export and import assets.
Primary Creator
Users can create and manage datasets, build charts and dashboards, run SQL queries, create alerts and reports, manage annotation layers, and customize CSS templates. Unlike Workspace Admin, this role has read-only access to database connections and cannot manage workspace settings, user roles, or data access configurations.
Secondary Creator
Users can create both physical and virtual datasets from databases or schemas they have access to, edit datasets they own, create and manage alerts and reports, and upload CSVs if CSV upload is enabled on the granted database.
Limited Creator
Users can create virtual datasets and charts/dashboards using that data. Unlike Primary and Secondary Creators, they cannot create physical datasets from databases or schemas, and cannot upload CSVs.
Visualization Creator
Users can build charts and dashboards using pre-configured datasets — without requiring SQL knowledge or access to underlying data sources. Compared to Limited Creator, this role removes all technical data access:
No access to SQL Lab or the ability to view/save SQL queries
Cannot create datasets
No access to the Database Connections menu
Viewer roles
Viewers, Dashboard Interactors, and Dashboard Viewers only have access to published content and are subject to any defined DAR restrictions. None of these roles can import assets.
Viewer
Has access to published charts and dashboards. Can export assets. For example, an external marketing agency given view access to published visualizations from a specified dataset.
Dashboard Interactor
Has access to published dashboards only — no access to charts directly. Unlike Viewer, can interact with filters and drill into chart details. Can only export dashboards. For example, a regional sales manager investigating specific trends using dashboard filters and drill-down.
Dashboard Viewer
Has access to published dashboards only — no access to charts directly. Unlike Dashboard Interactor, cannot interact with filters or drill into data. Can only export dashboards. For example, a business partner given view access to a dashboard used in a presentation.
All of the roles above are assigned to specific users in Preset Manager on the Workspace Roles screen (see Invite Others to your Team to learn more).
Change User Access to a Workspace
Each user's workspace role is set when their invite is sent but can be updated later as needed.
To edit a user's workspace role, select the vertical ellipsis icon in a workspace card and, in the sub-menu, select Edit Workspace Roles.
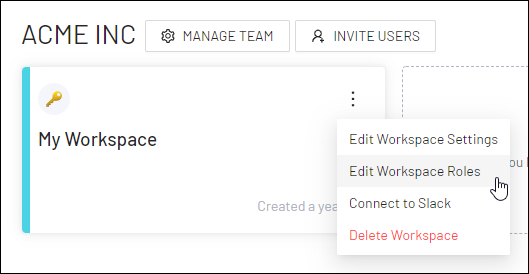
The Workspace Roles screen appears.
Under the Workspace Role column header, modify a user's workspace role as needed (see Role Details to learn more).
.png)
Navigate to Data Access Roles
In the Toolbar, hover your cursor over Settings and then select Data Access Roles.
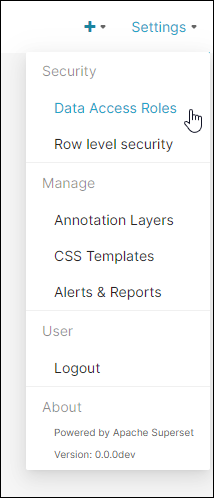
The Data Access Roles screen appears.
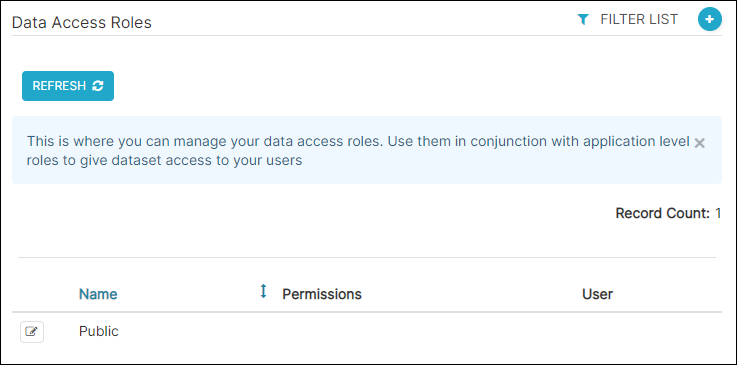
Add a Data Access Role
Select the plus icon to add a new access record.
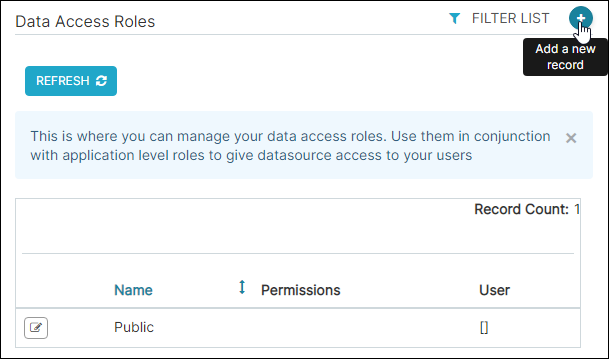
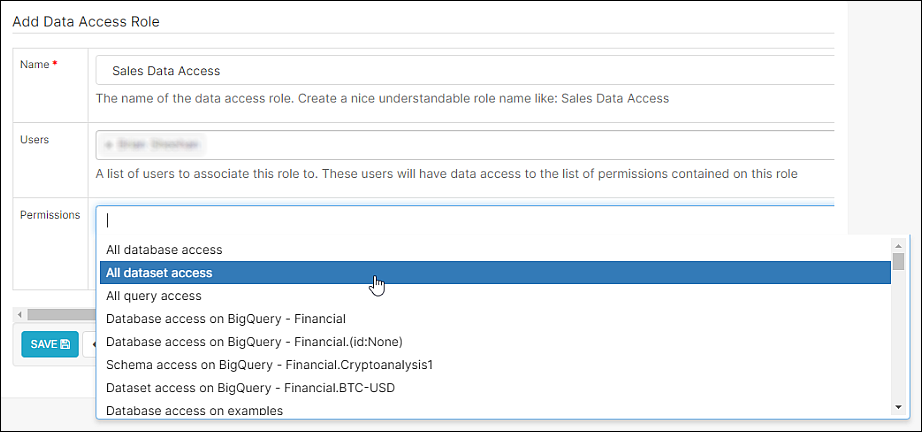
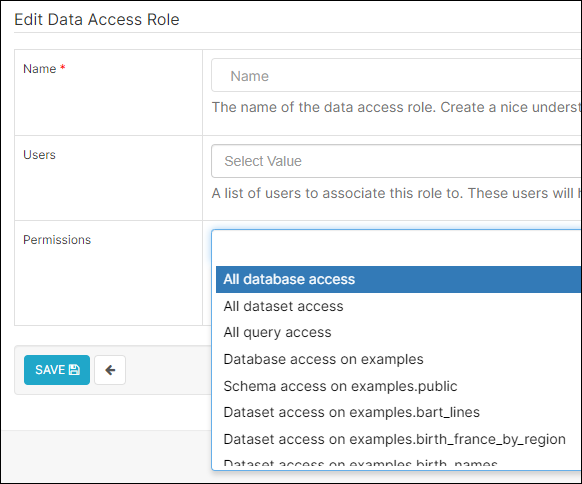
The Add Data Access Role screen appears.
In the Name field, enter a memorable name for the data access role.
In the Users field, select one or more users to assign to the data access role.
Lastly, in the Permissions field, select one or more data access permissions to associate with the role or leave this field blank if using Row Level Security to create more granular data access.
Types of Permissions
All database access
All dataset access
All query access
Database access on <DB Connection>
Catalog access on <DB Connection>.<Catalog>
Schema access on <DB Connection>.<Catalog>.<Schema>
Dataset access on <DB Connection>.<Dataset>
When done, select Save.
Levels of Data Access Role Coverage
By default, all limited roles (Secondary Creator, Limited Creator, Viewer, Dashboard Interactor, and Dashboard Viewer) have no access to data. To grant access to specific assets, users must be added to a Data Access Role (DAR).
Once added, the level of access depends on the user's role:
Viewer-type roles gain access to Dashboards and Charts powered by that data.
Creator-type roles can additionally build new assets using those datasets.
Users with SQL Lab access can also query the allowed data directly in SQL Lab.
Wide Access
All database access: This is the most permissive option. It grants access to all database connections in the Workspace. This includes all datasets, and also all tables for SQL Lab (for users with SQL Lab access).
All dataset access: Grants access to all datasets.
All query access: Grants access to the Query History.
Specific Permissions
More granular data access controls are also available:
Database Access: Grants access to an entire DB Connection, including all catalogs, schemas, and tables/datasets.
Catalog Access: Grants access to an entire catalog, including all schemas and table/datasets.
Schema Access: Grants access to all tables and datasets within the schema.
Dataset Access: This is the most restrictive access. It grants access to a specific dataset.
Control Data Access with Row Level Security
Row Level Security (RLS) is a powerful feature that enables you to exert a granular level of control over who can query—and view—specific data in selected datasets. This level of query-based access control empowers organizations to align data access permissions (via roles) with larger-scale business initiatives.
You can find more information and a walkthrough on the Row Level Security (RLS) page.