Overview
In this article we will explain how to connect an Amazon Redshift database to Preset.
Allowlist Preset IPs
Preset Cloud runs on four regions. For Preset to access your data, first thing you need to do is to add region based Preset IP addresses to your Inbound and Outbound firewall rules.
| Protocol | Port | Source |
|---|---|---|
| TCP | 5439 | Preset IPs |
Add Database
Let's start by selecting + Database — have a look at Connecting your Data if you need help wth this step.
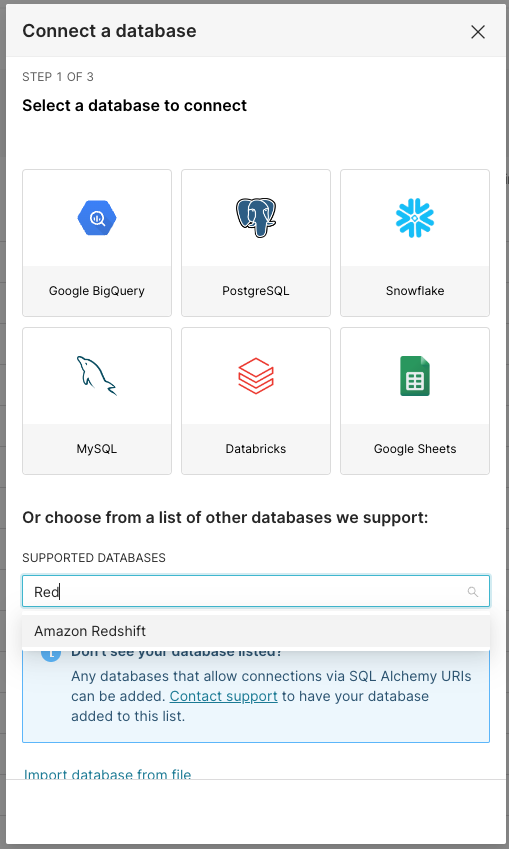
...then, in the Connect a database window, scroll down and select the Supported Databases field.
In the drop-down list, select Amazon Redshift.
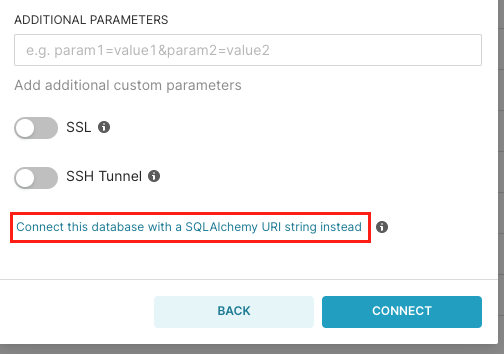
The default connector used does not support interacting with Spectrum tables. If this is a requirement to your team, please follow the steps under String URI Connection.
- In the Host field, enter the host for the database connection — this can be expressed as an IP address or as a domain.
- In the Port field, enter the port number for the connection. If you do not have one, then use the default port number of 5439 for Amazon Redshift.
- In the Database Name field, enter the exact name of the database that you are connecting to.
- In the Username and Password fields, enter the relevant credentials to connect to the database.
- In the Display Name field, enter a database nickname for display in the Preset environment.
- In the Additional Parameters field, enter any additional custom parameters, if needed.
- Lastly, enable the SSL switch if you wish to require SSL mode for the connection.
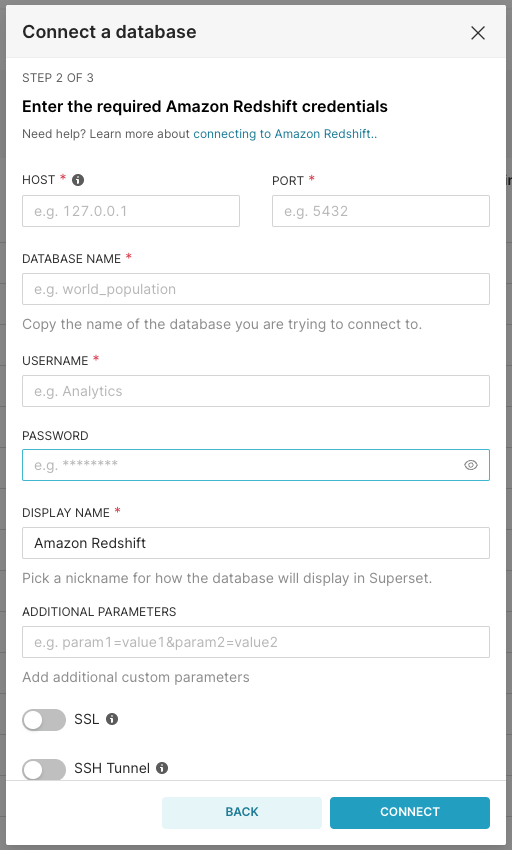
To finalize the connection, just select Connect.
If you're having difficulty establishing a connection to your Redshift databse, try to add adding sslmode=verify-ca to the ADDITIONAL PARAMETERS field or toggling on SSL in case the database requires an SSL connection.
After your Amazon Redshift database is successfully connected to Preset, you will be provided with an opportunity to make any additional configurations to your database, if needed.
To learn how to do this, please visit Advanced Connection Settings.
When done, just select Finish. Great work!
String URI connection (Spectrum Support)
To create a connection compatible with Spectrum tables:
- Scroll the dynamic form and click on Connect this database with a SQLAlchemy URI string instead.
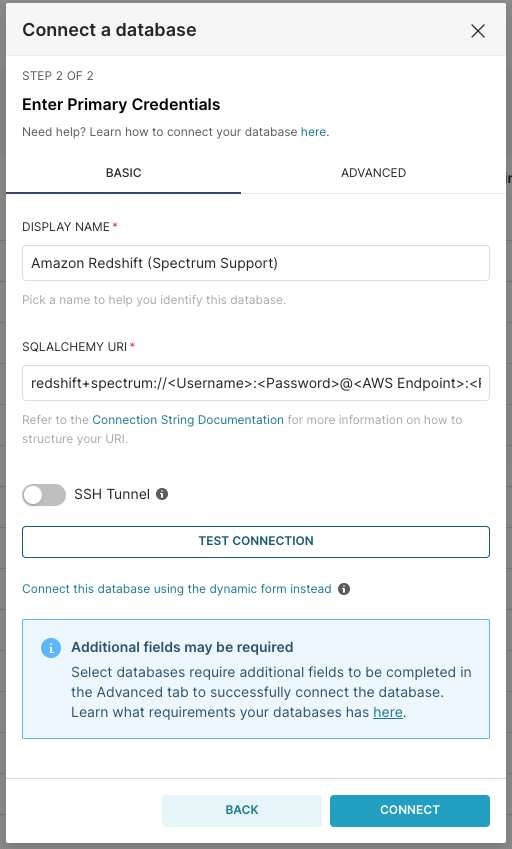
- Provide a DISPLAY NAME for this database connection.
- Use below connection string, replacing the placeholders with actual values:
redshift+spectrum://<Username>:<Password>@<AWS Endpoint>:<Port-default-5439>/<Database Name>?sslmode=verify-ca
- Click on TEST CONNECTION to validate the information provided.
- Click on CONNECT to save this connection.
Disabling Redshift connection driver from checking system tables
Currently, Preset's Redshift connection driver periodically runs queries to check system tables on your Redshift database.
If you would like to disable the above feature, please do so by adding the following string into the "Engine Parameters" section of your database configuration as seen below:
{"use_native_hstore":false}
.png)