l:::(Info) (This feature is available as an add-on to Enterprise plans.)
Trial users, Professional teams, and Enterprise teams have a limited amount of tokens available to try the feature. If you're interested in the full functionality with increased limits, contact us to upgrade.
Starter teams can reach out to our support team to enable a trial or contact us to upgrade
:::
Overview
What it is:
The Preset Chatbot is a built-in AI assistant embedded directly in your Preset workspace. It lets you find data and assets, ask questions about your data, generate charts, run SQL, and explore dashboards — all through natural language, without leaving Preset.
Unlike the Preset MCP Server, which connects Preset to external AI clients like Claude and ChatGPT, the Preset Chatbot lives inside Preset itself. No external tools or configuration needed — just open the chat window and start asking questions.
Who it's for:
- Analysts and chart creators can generate and iterate on visualizations faster by describing what they want in plain language.
- Viewers and business users can ask questions about their data and get answers directly, without needing to file requests with a data team.
Key value:
- Find the right datasets, charts, and dashboards across your workspace
- Ask questions and get answers from your data in natural language
- Generate charts and preview them right in the chat window
- Run SQL queries without writing them yourself
- Context-aware starter prompts — the Chatbot knows where you are in Preset and suggests relevant questions based on your current view
- All interactions respect your existing Preset roles and permissions
- No setup required for end users — it's built into the workspace
How to Enable the Preset Chatbot
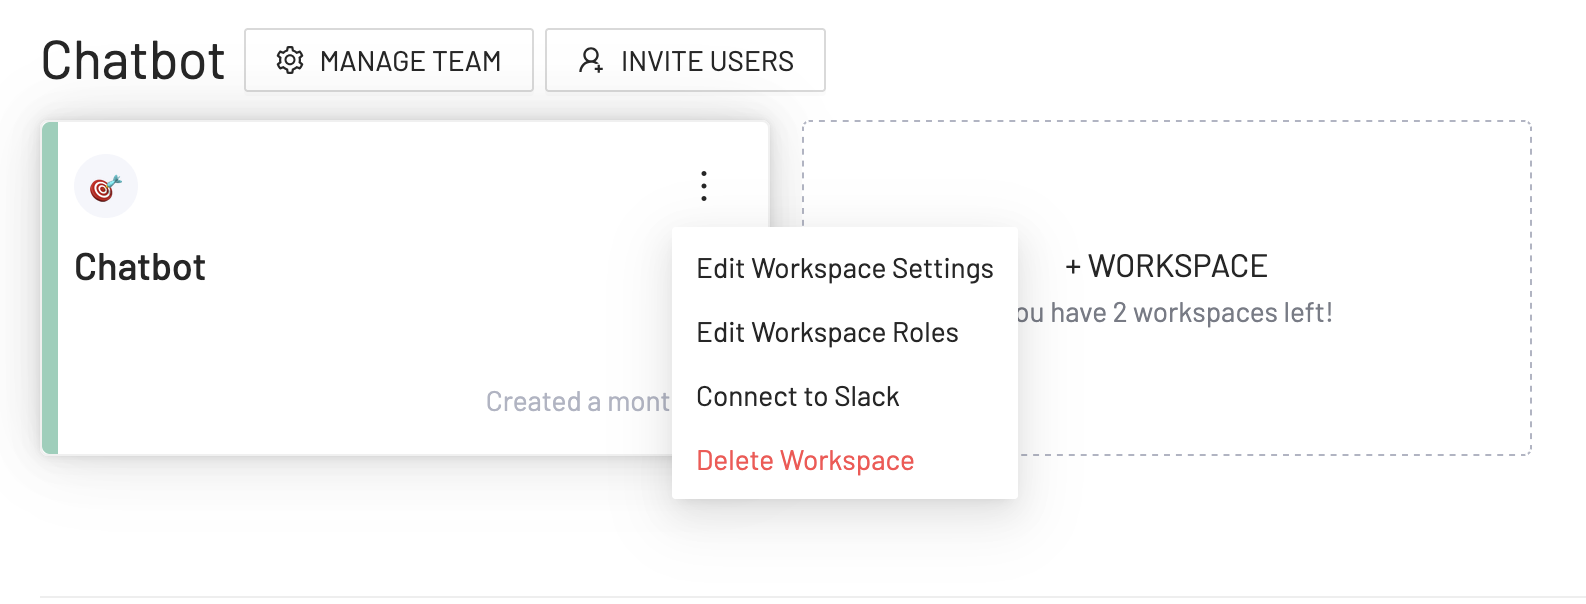
A Team Admin must enable both MCP and the Chatbot at the workspace level:
- Go to workspace settings and select Edit Workspace Settings
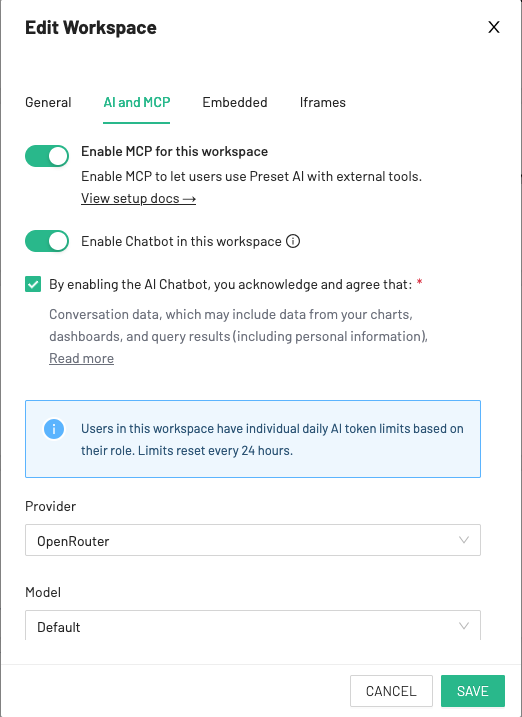
- Open the AI and MCP tab
- Toggle Enable MCP for this workspace on
- Toggle Enable Chatbot in this workspace on
- Optionally select an AI model and configure your API key
- Save your settings
Note: MCP is currently required to enable the Chatbot. While you're trying out Chatbot, MCP is included at no additional charge. This will change in the future and MCP will be available as a standalone feature with separate pricing.
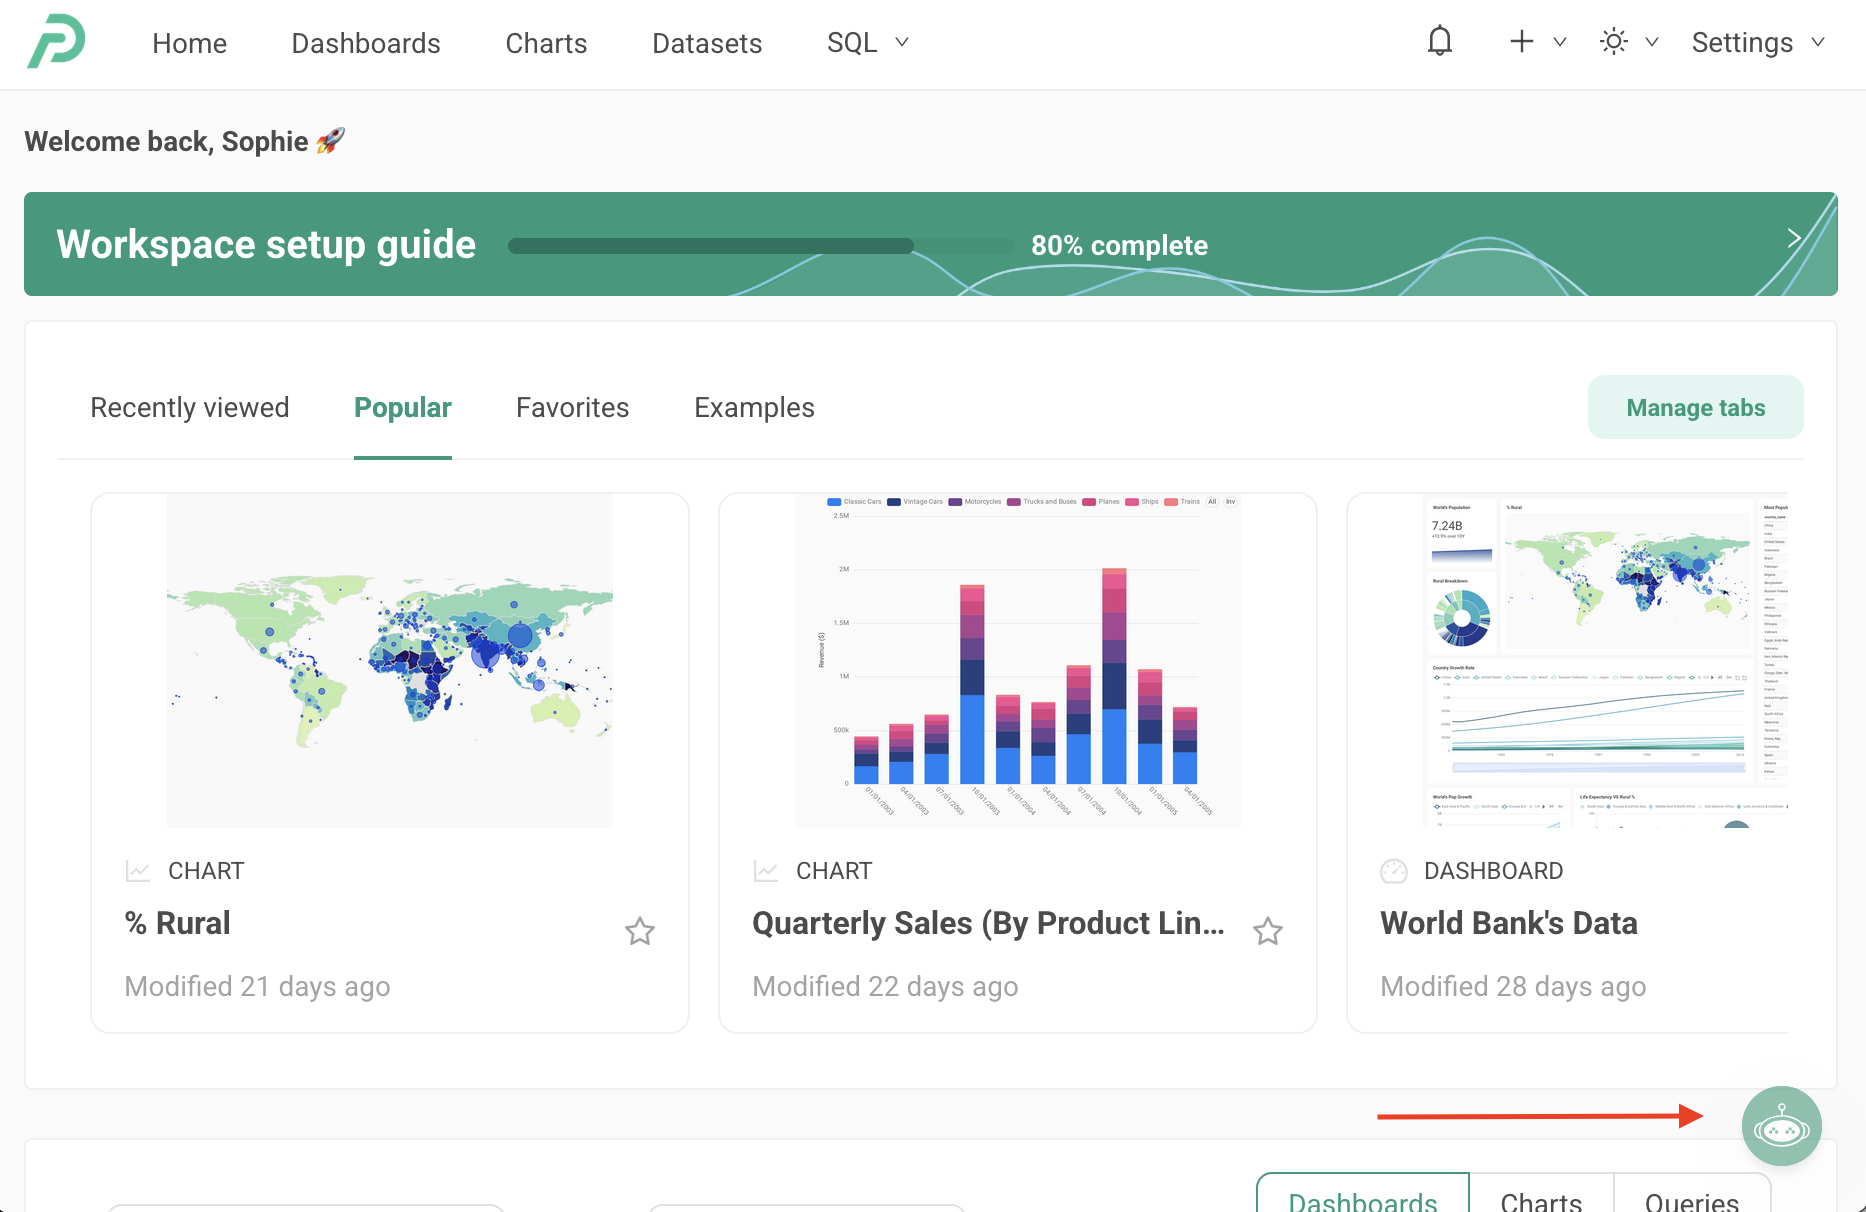
Once enabled, all users in the workspace will see the Chatbot icon in the bottom-right corner of the screen.
From the same Chatbot tab in Workspace Settings, Team Admins can also configure:
- Model selection — Choose which AI model the Chatbot uses
- OpenRouter API key — Optionally provide your own OpenRouter API key (BYOK) instead of using the default
- Custom system prompt — Add instructions that are appended to the chatbot's default system prompt, applied workspace-wide for all users.
Using your own OpenRouter API Key
By default, Preset Chatbot uses Preset's shared OpenRouter API key. You can instead bring your own OpenRouter key (BYOK) to:
- Use your own credit balance and billing
- Apply custom rate limits or usage policies for your organization
Setting up your OpenRouter API Key
Step 1: Create an OpenRouter Account
- Go to openrouter.ai and click Sign Up.
- Sign up for an account
Step 2: Add Credits
OpenRouter uses a credit-based system. Credits are consumed per API request across any model you use.
- After signing in, go to Settings → Credits (
openrouter.ai/settings/credits). - Purchase credits. Credits work across all models and providers on OpenRouter.
Step 3: Generate an API Key
- Go to Settings → Keys (
openrouter.ai/settings/keys). - Click Create.
- Give the key a name (e.g.,
preset-chatbot) and optionally set a credit limit. - Copy the key.
Step 4: Add the Key to Preset Chatbot
.png)
- In Preset, navigate to Edit Workspace Settings.
- Under the AI & MCP tab, find the API Key Source dropdown and select Team Custom Key.
- In the API Key field, pastee your OpenRouter API key.
- Save your settings.
Preset Chatbot will now route all requests through your OpenRouter account.
FAQ
What happens if I run out of credits?
Requests will fail until you top up your OpenRouter credits. Preset Chatbot will surface an error until credits are added.
Can I set a spending limit?
Yes. When creating your API key in OpenRouter, you can set a credit limit to cap total spending for that key. This is useful for controlling costs per team or project.
Is my key stored securely?
Yes. Preset encrypts and stores your API key securely and never exposes it in the UI after initial entry.
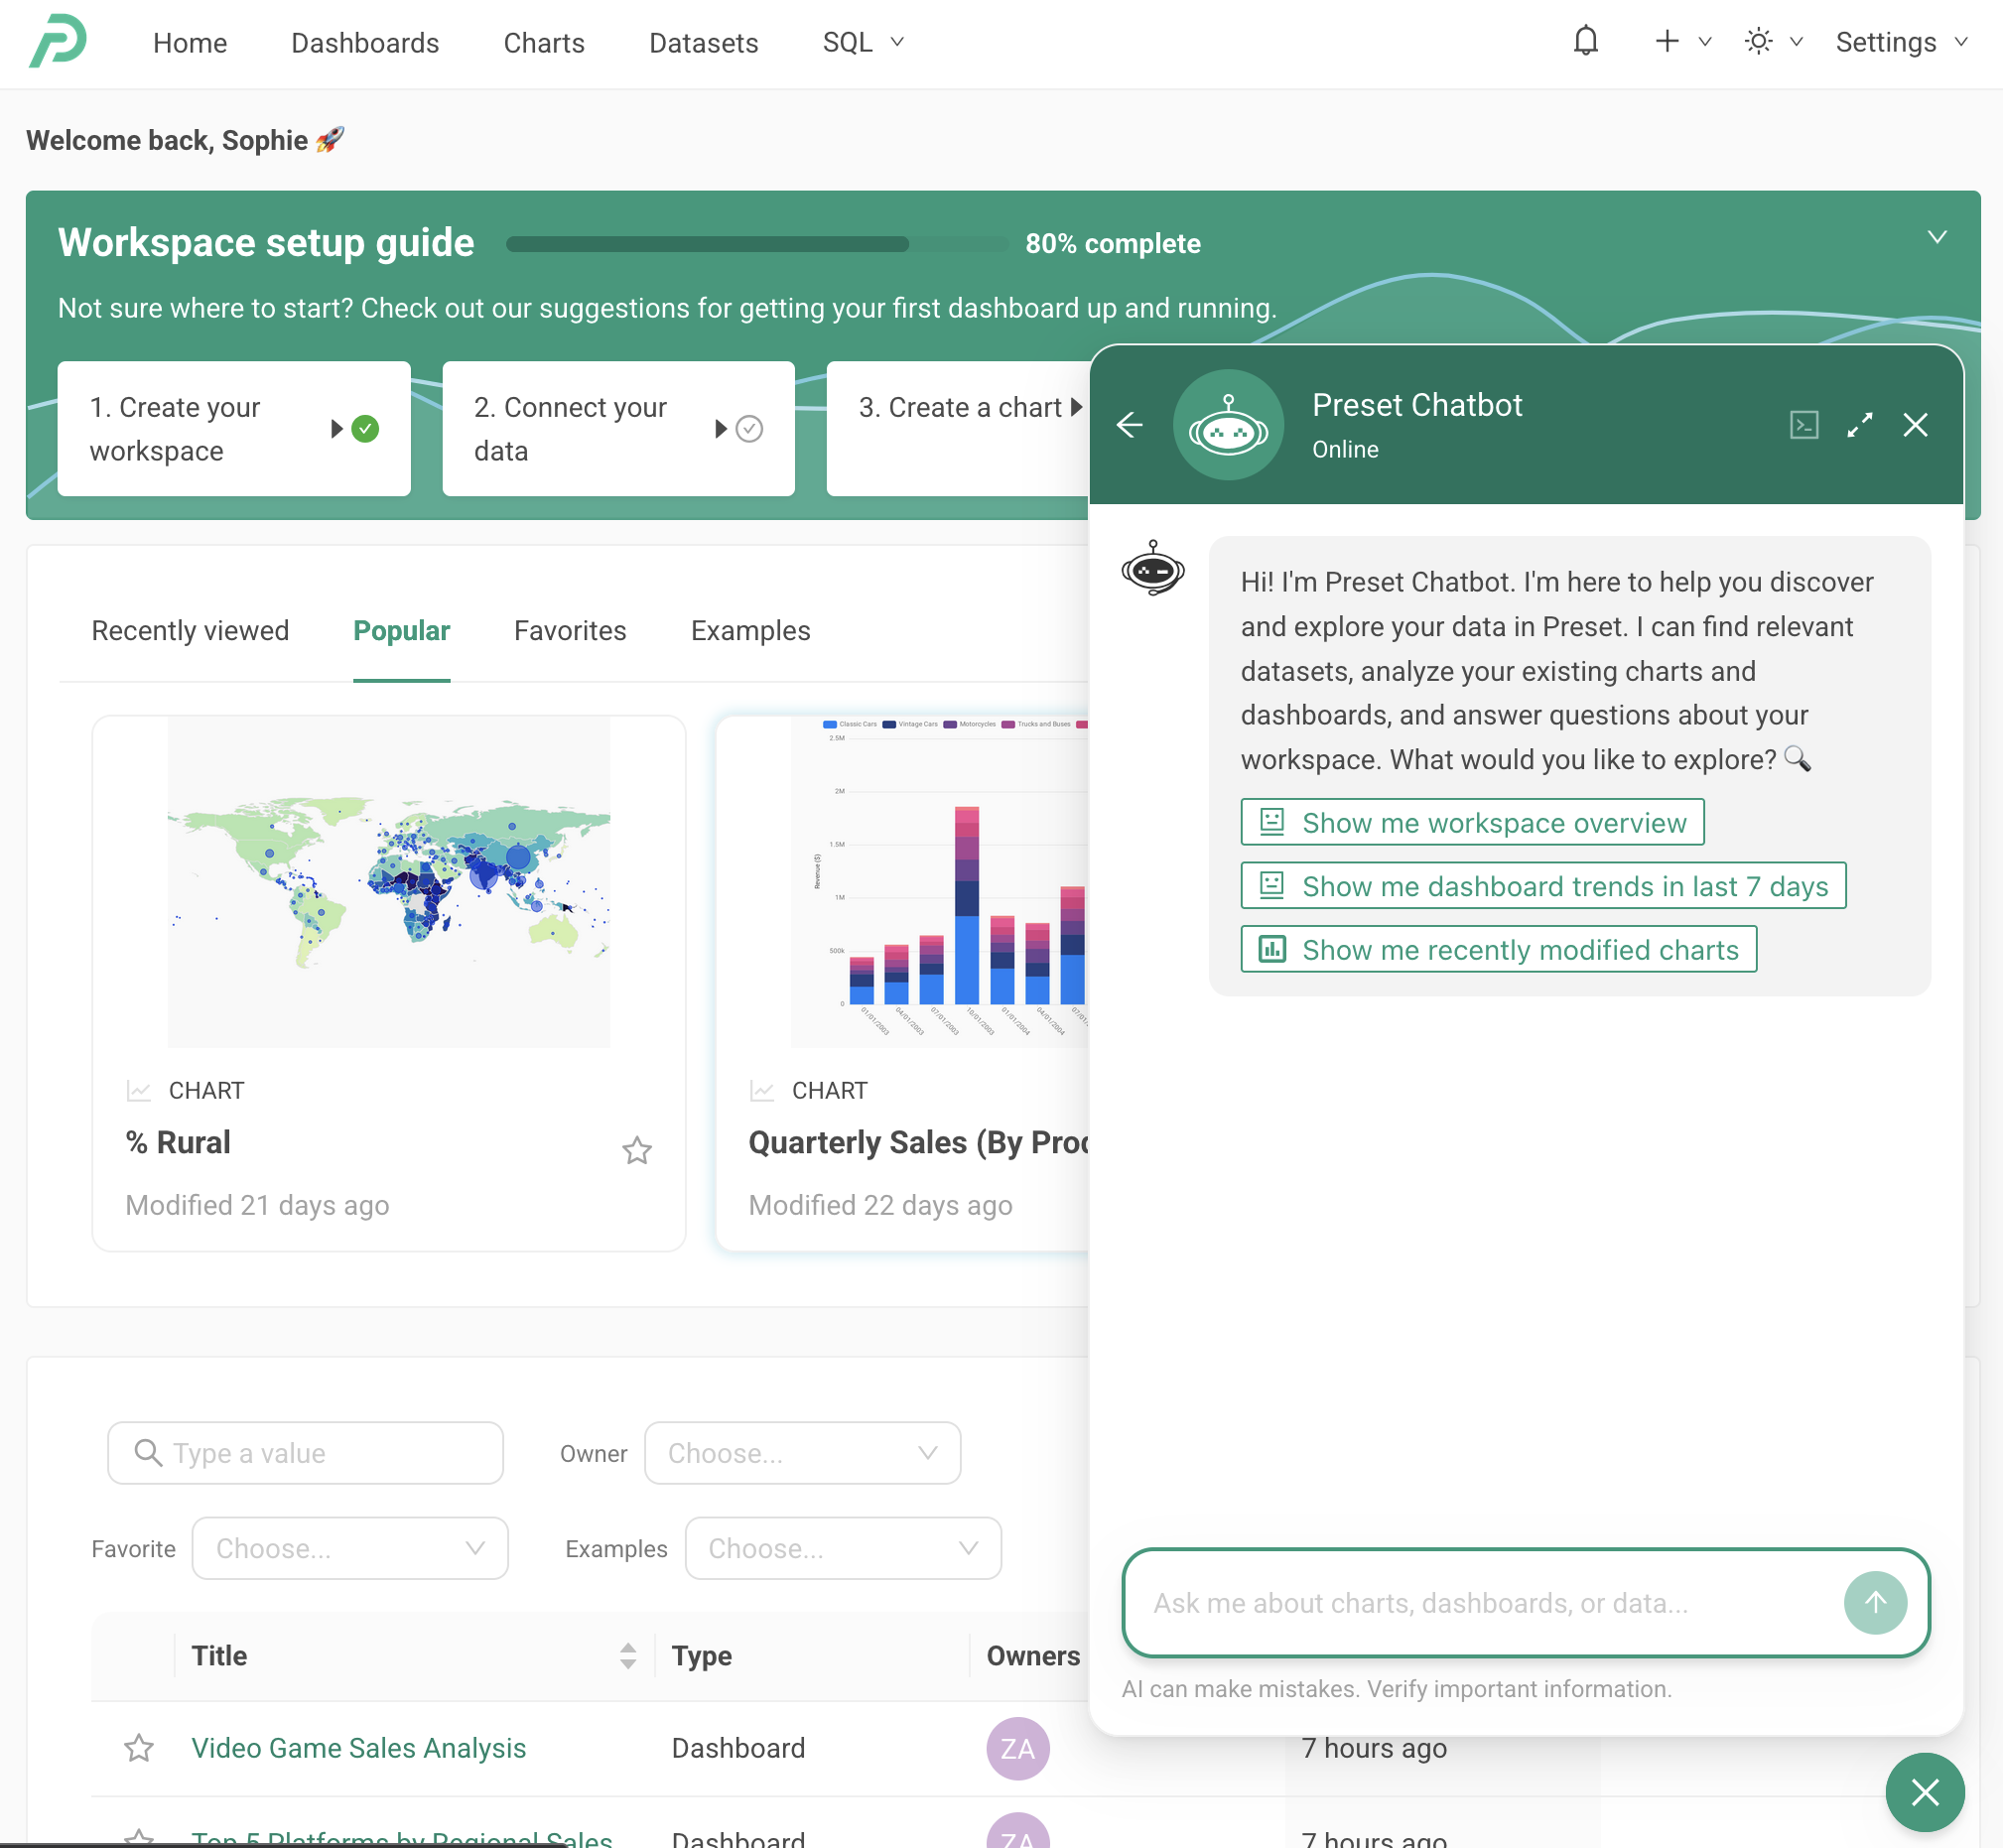
How to Use the Preset Chatbot
Opening the Chat Window
Click the Chatbot icon in the bottom-right corner of the screen to open the chat window.
Navigating the Chat Window
The chat window has a few layout options:
- Dock position — Drag the chat window to the left side of the screen if you prefer to dock it there
- Expand — Expand to a larger window for more space, or minimize it back to the compact view
- Conversation history — Access your past conversations from the chat window. In the minimized view, click the back button to see your history. In the expanded view, conversation history appears on the left-hand side and can be collapsed to hide it
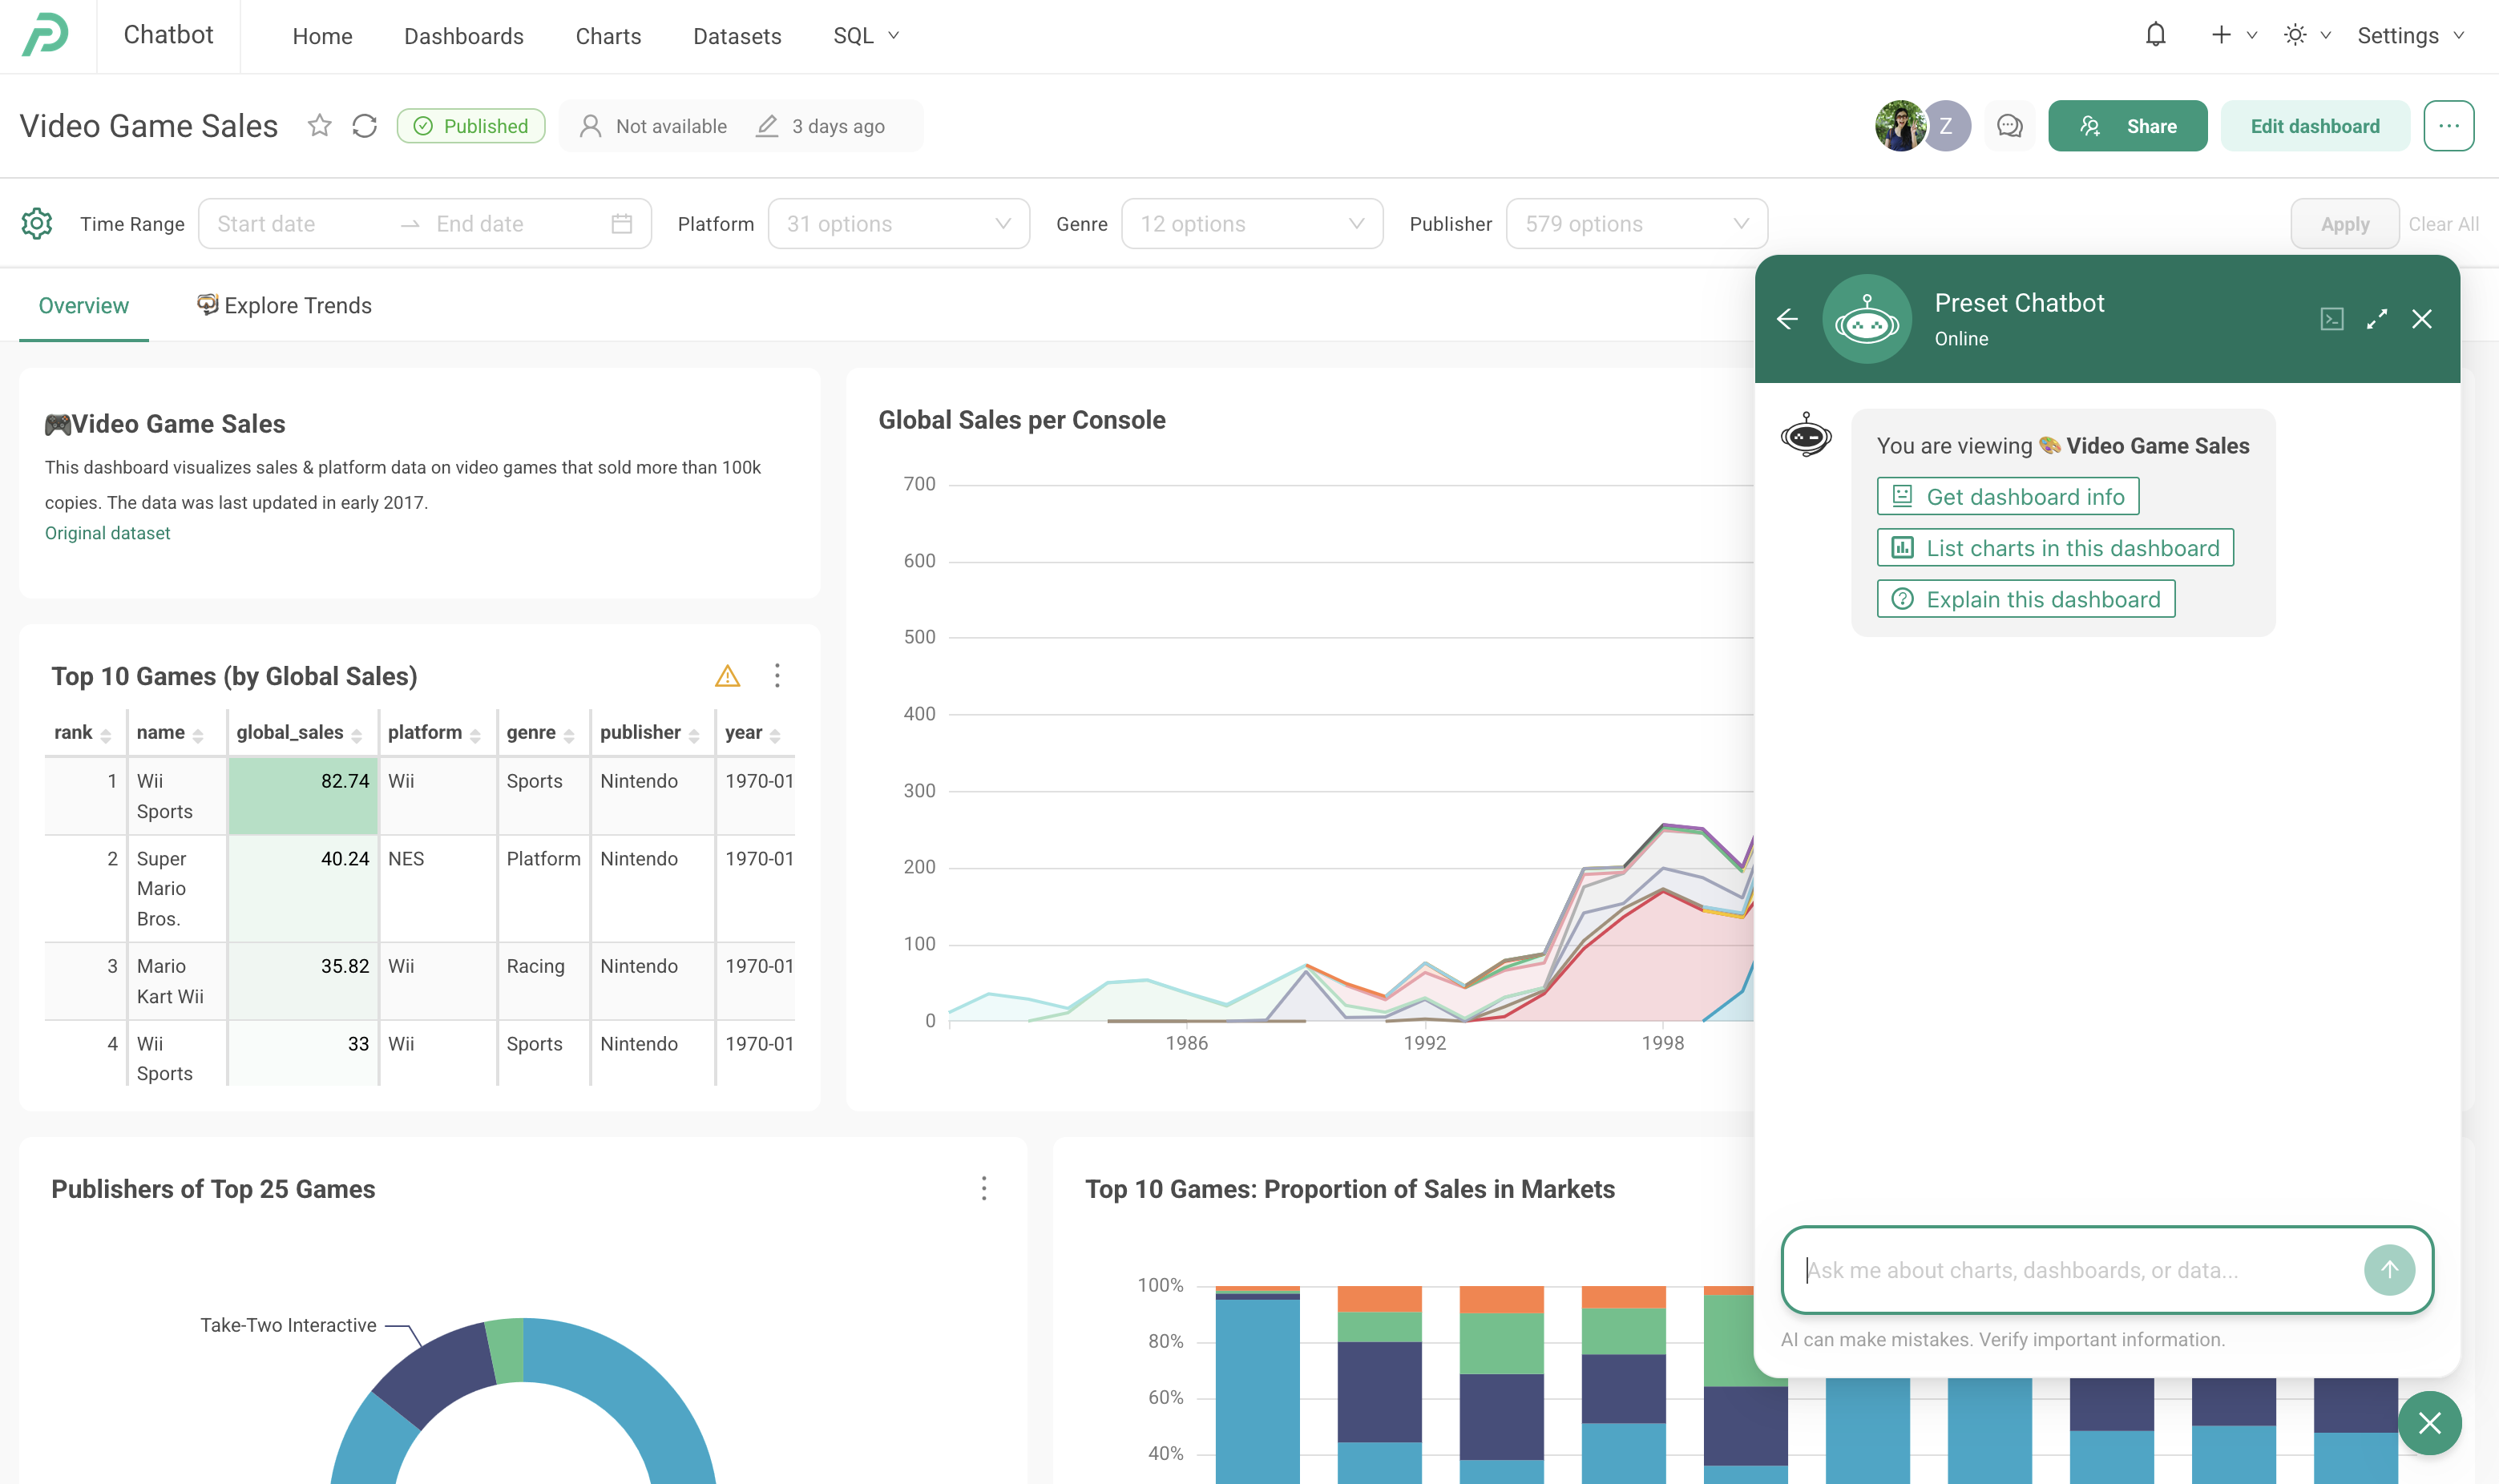
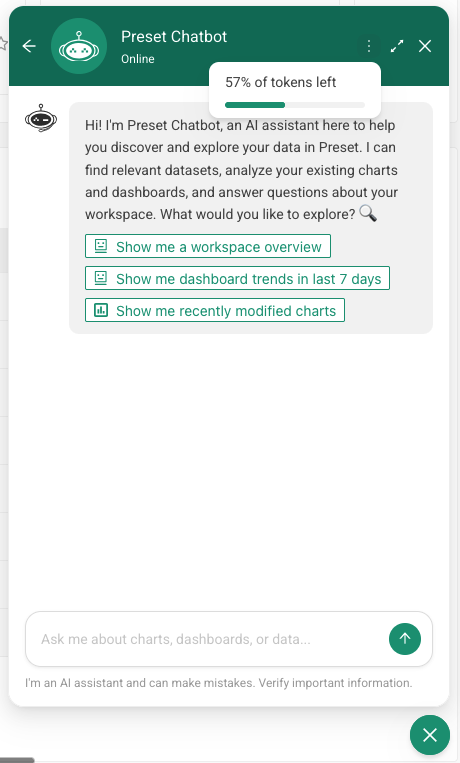
Starter Prompts
When you open the Preset Chatbot, it knows where you are in Preset and suggests relevant starter prompts based on your current context. This makes it easy to jump right into a conversation without needing to type out your question from scratch.
What You Can Ask
The Preset Chatbot can help with a range of tasks:
- Find data and assets: "What datasets do we have related to revenue?" or "Show me dashboards about marketing"
- Ask questions about your data: "What were our top 10 products by revenue last month?"
- Generate charts: "Create a bar chart showing monthly sales by region" charts are previewed right in the chat window
- Run SQL: "Write and run a SQL query to find duplicate customer records"
- Get explanations: "What does the 'churn rate' metric in our KPI dashboard measure?"
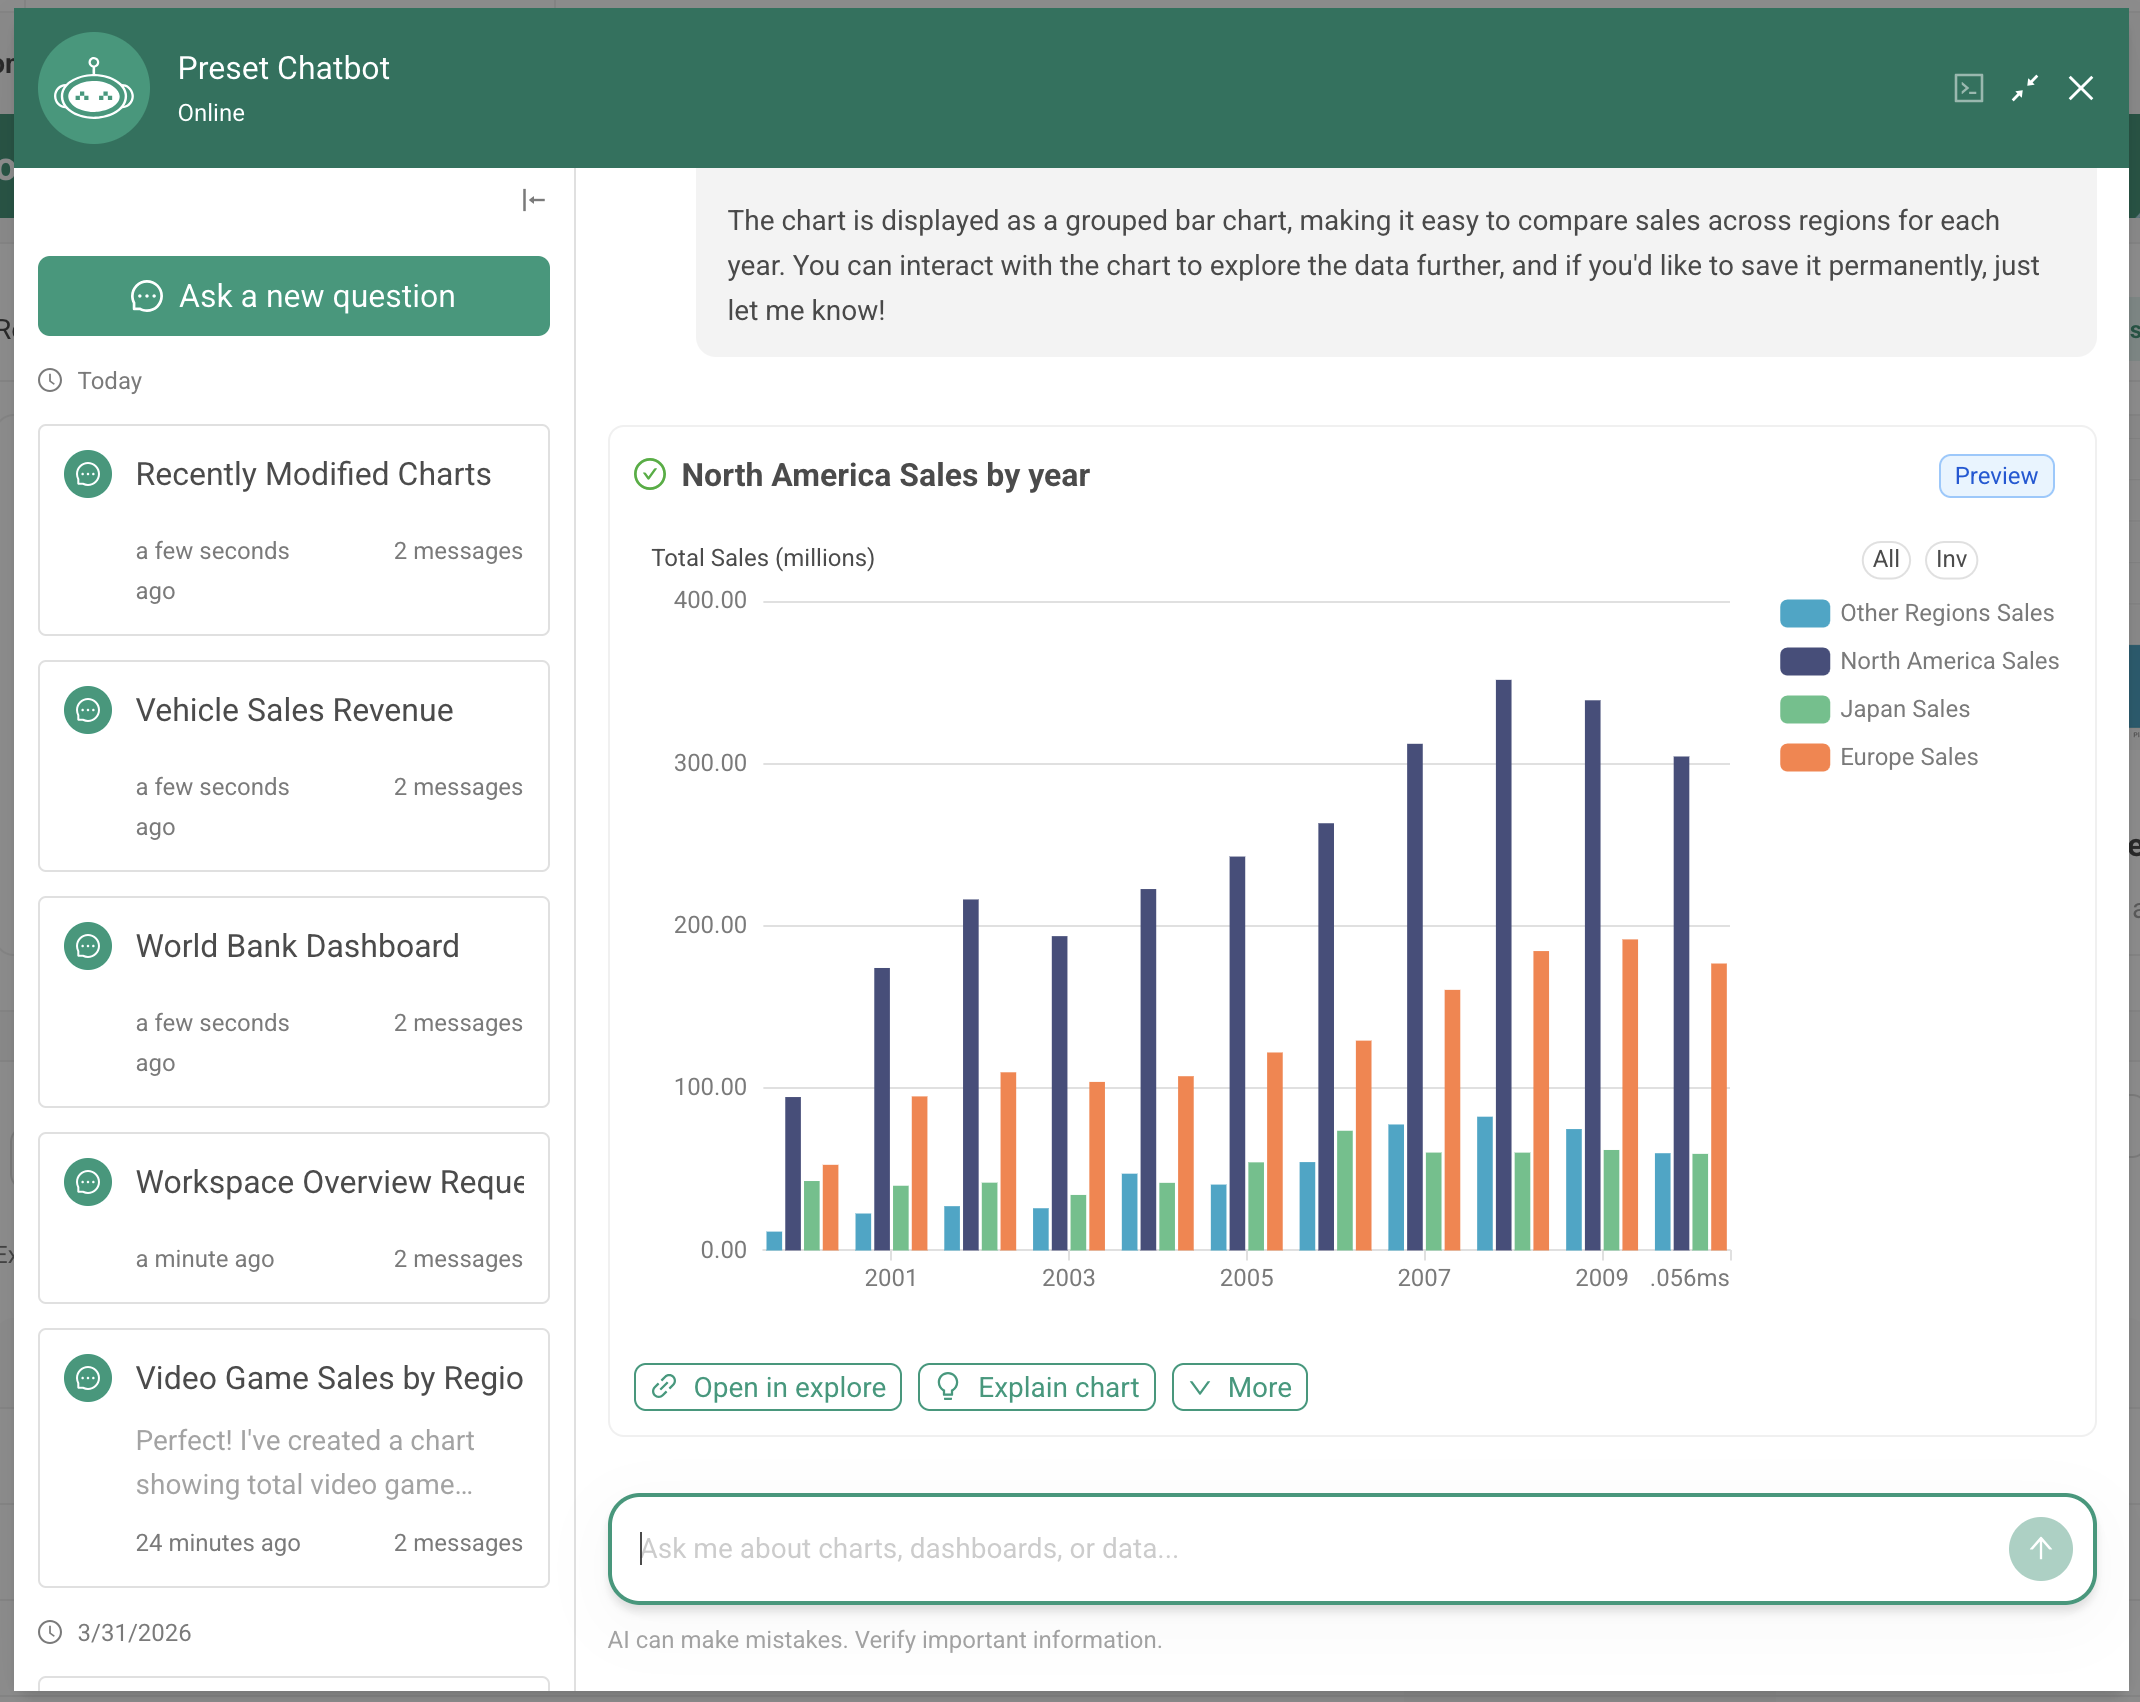
Working with Results
When the Preset Chatbot generates a chart, you can:
- Preview the chart directly in the chat window
- Open in Explore to refine the visualization further
- Show chart info to see metadata about the chart
- Show chart data to view the underlying data
- See dashboards the chart appears on
- Ask follow-up questions to iterate on the analysis

Token Limits & Usage
Preset Chatbot usage is subject to limits that vary by plan. Teams on Trial, Professional, and Enterprise plans that have not yet purchased the Chatbot feature have a limited token allocation to try the feature. Once that allocation is used, you'll need to contact sales to continue.
Limits apply to Preset-managed API key usage only. Teams with workspaces using their own OpenRouter API key are not subject to Preset's usage limits. Using your own OpenRouter API key is only available to teams that have purchased the Chatbot feature.
Understanding your usage
You can check your usage by hovering over the ... menu in the chatbot. A progress bar shows how much of your limit you've used. As you approach your limit, the progress bar will change color. Once your limit is reached, the chat input is disabled.
Admin usage visibility and controls
Team admins can view usage in the Team Settings → Chatbot tab, which shows each user's daily usage and usage over the last 30 days. At this time, admins cannot adjust usage limits directly. To increase limits for your team, contact Preset sales or support.
Permissions & Data Access
The Preset Chatbot respects your existing Preset permissions model. There is no separate access control layer — what you can see in Preset is what the Chatbot can access.
- The Preset Chatbot operates with the authenticated user's permissions — it can only query datasets, view charts, and access dashboards that the user already has access to
- Row-level security (RLS) is enforced — if RLS rules restrict your view of a dataset, the Chatbot's results will reflect those same restrictions
- Database permissions apply — the Chatbot can only execute SQL against databases the user has been granted access to
Current Limitations
The following actions are not currently supported via the Preset Chatbot:
- Creating, editing, or deleting database connections
- Creating, editing, or deleting physical datasets
- Uploading data
- Deleting charts or dashboards
- Creating, editing, or deleting individual native dashboard filters (cross-filter enablement, filter bar orientation, and refresh frequency can now be set with
update_dashboard) - Creating, editing, or managing alerts and reports
- Managing users, roles, or permissions
- Editing or deleting saved queries in SQL Lab
Chart creation is limited to the following chart types:
- Line, bar, area, scatter, and mixed charts
- Interactive tables and tables
- Pivot tables
- Pie charts
- Big Number charts
- Handlebars charts
Need help?
If you run into any issues with the chatbot, please contact support.