- 18 Oct 2024
- 2 Minutes to read
- Print
- DarkLight
- PDF
Oracle
- Updated on 18 Oct 2024
- 2 Minutes to read
- Print
- DarkLight
- PDF
Overview
In this article we will explain how to connect an Oracle database to Preset. So let's get started!
Allowlist Preset IPs
Preset Cloud runs on four regions. For Preset to access your data, first thing you need to do is to add region based Preset IP addresses to your Inbound and Outbound firewall rules.
| us-west-2 (us1a) | us-east-1 (us2a) | eu-north-1 (eu5a) | ap-northeast-1 (ap1a) |
|---|---|---|---|
| 35.161.45.11 | 44.193.153.196 | 13.48.95.3 | 35.74.159.67 |
| 54.244.23.85 | 52.70.123.52 | 13.51.212.165 | 35.75.171.157 |
| 52.32.136.34 | 54.83.88.93 | 16.170.49.24 | 52.193.196.211 |
If you are not sure where your Preset workspace is located, you can refer to the URL on your browser when accessing Preset. It should look like this: https://xxxxxxxx.us2a.app.preset.io/superset..., where us2a means it is in us-east-1.
Step 1: Retrieve Data from Oracle
You'll need the following details from your Oracle instance:
- The
tnsnames.orafile. - The
ewallet.pemkey. - The wallet password (if applicable).
If you are using an Oracle Cloud instance, these information is included in the wallet that can be downloaded from the UI, in the Database connection setting.
Step 2: Connect Database to Preset
Add Database
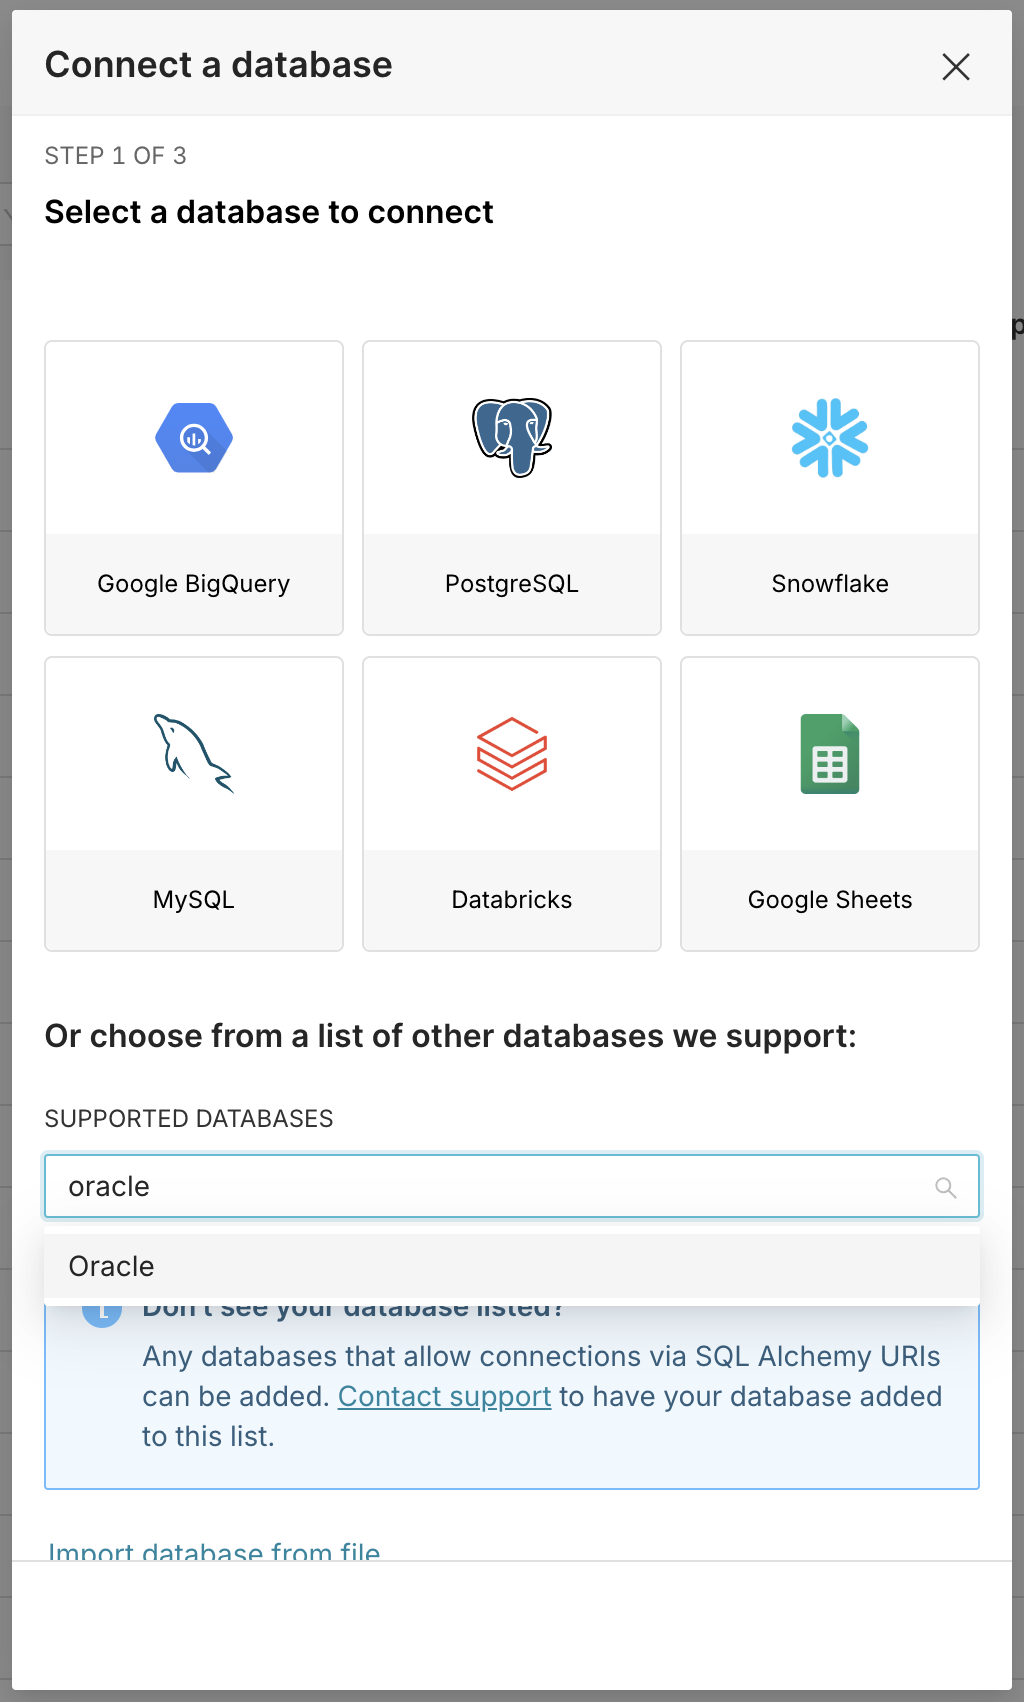
Let's start by selecting + Database — have a look at Connecting your Data if you need help with this step.
...then, in the Connect a database window, select Oracle in the Supported Databases field.

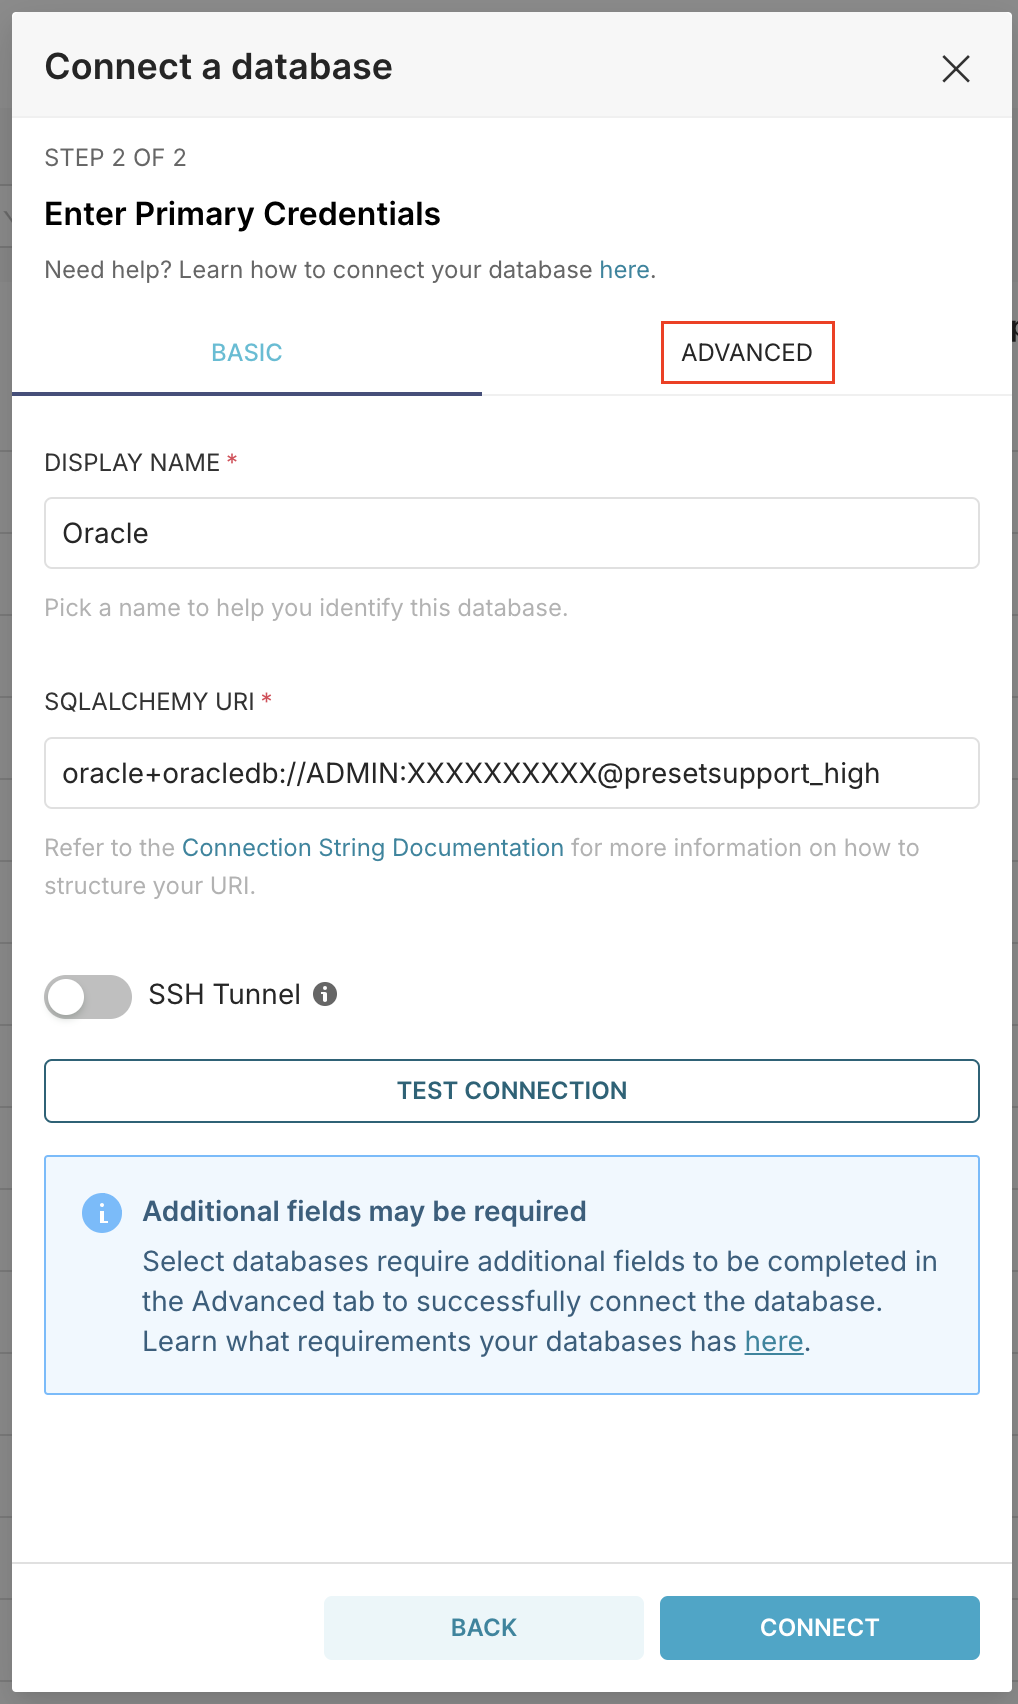
In the Display Name field, enter a meaningful name for the new connection to the Oracle database. In this example, we simply used the default Oracle.
In the SQLAlchemy URI field, customize your URI connection string using the following syntax:
oracle+oracledb://<User>:<password>@<TNSName>
Your tnsnames.ora file might include multiple TNS Names. Choose the one you're looking to connect to.
When done, select the Advanced tab.

Configure Advanced Tab
In Preset with the ADVANCED tab selected, expand the Security section. The additional connection configuration should be added to the SECURE EXTRA field:
{
  "configuration_files": {
    "tnsnames.ora": "<TSNames Content>",
    "ewallet.pem": "<Wallet Content>"
  }
}
If your wallet has a password set, use below configuration:
{
  "configuration_files": {
    "tnsnames.ora": "<tsnames.ora file content>",
    "ewallet.pem": "<ewallet.pem file content>"
  },
  "connect_args": {
    "wallet_password": "<Password>"
  }
}
Note that the content for each file should be a single string block. Line breaks can be replaced with \n (each).
You can also use below Python script to automatically generate this content (the Python script must be created inside the wallet directory):
import json

print(
    json.dumps(
        {
            "connect_args": {"wallet_password": "<Password>"},
            "configuration_files": {
                "tnsnames.ora": open("tnsnames.ora").read(),
                "ewallet.pem": open("ewallet.pem").read(),
            },
        }
    )
)
When done, return to the previous screen by selecting the Basic tab.
Test and Connect
To test your connection, select Test Connection. If successful, a notification message appears:

After a successful test, go ahead and select Connect to finalize the connection.
Congratulations, your Oracle database is now connected to Preset!
