👤 This documentation is intended for Primary Creators and Workspace Admins. Check with your Team Admin for additional access.
How to Create a Report
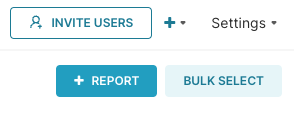
After navigating to the Alerts & Reports screen, you'll be taken to the Alerts interface by default. To navigate to the Reports screen, select the Reports tab and, to create a new report, select + Report.
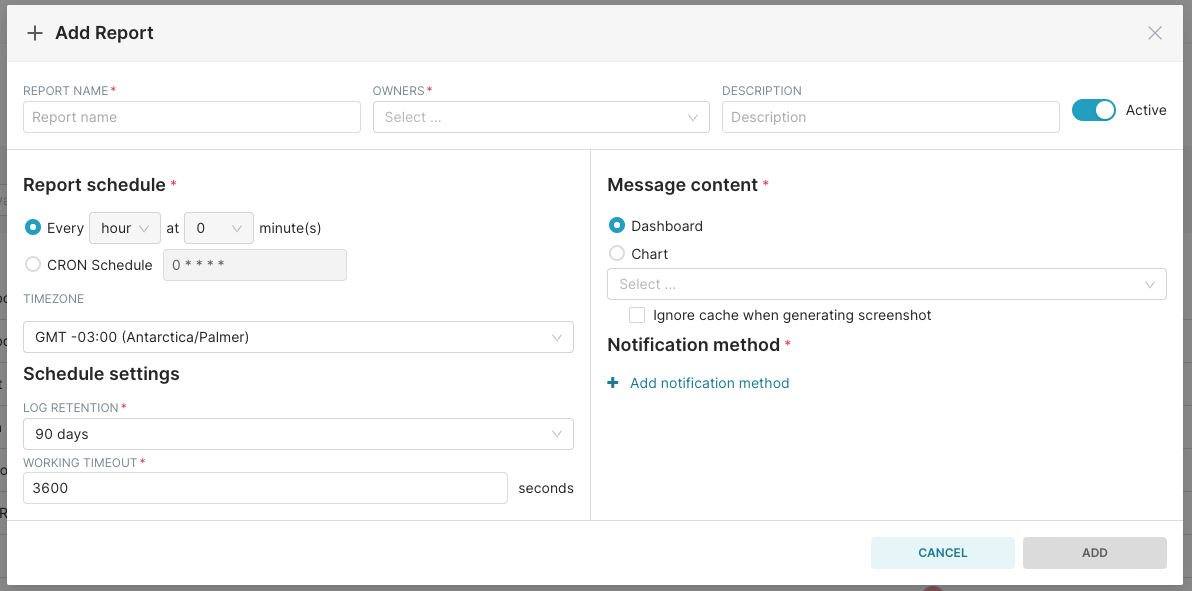
The Add Report panel appears.
Define Basic Report Details
To start, we need to define some basic details for your new report. In this walkthrough tutorial, we will create a report of a sales dashboard that is sent via e-mail every Monday at 9:00am. Let's start with the horizontal panel across the top of the Add Report panel.
- In the Report Name field (required), enter a name for your new report.
- In the Owners field (required), select one or more owners for the report. An owner has the ability to edit a report. They are also notified in case of any execution failures.
- In the Description field, enter a short but meaningful description of the report.
The Active toggle switch is automatically enabled. Our report's Basic Information looks as follows:

Define the Report Schedule
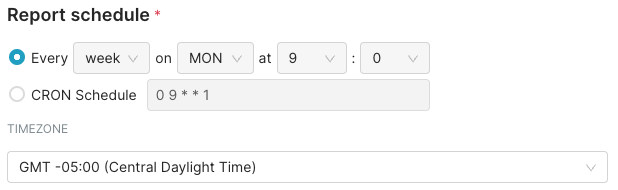
This panel is used to define how frequently the report will be sent to a defined notification channel(s).
Specify Time
The first schedule option enables you to specify a highly granular schedule based on your specific requirements. Data can be checked every minute, hour, day, week, month, or year, The day, week, month, and year options all allow you to define a schedule down to the hour & minute granularity.
Check or Enter CRON
After setting a schedule, the subsequent CRON field will automatically populate with an equivalent CRON expression that represents your defined schedule. Alternatively, you can also directly enter a CRON expression by selecting the secondary radio button and entering the expression in the CRON Schedule field.
Select Timezone
In the Timezone field, select the drop-down menu and choose your timezone.
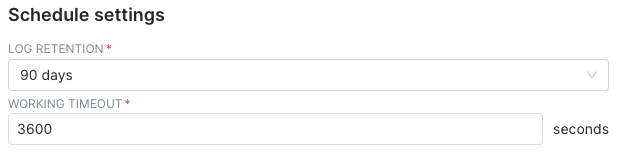
Define Schedule Settings
- In the Log Retention field (required), enter the number of days that the report will be stored in the execution log. By default, this is set to 90 days.
- In the Working Timeout field (required), enter the number of seconds that the report job is allowed to run before it results in an automatic timeout. By default, this is set to 3600 seconds.
Define Message Content
In the Message Content section, select either the Dashboard or Chart radio button. Then, in the drop-down field, select the relevant dashboard or chart — a screenshot of the dashboard or chart will be sent along with a link.
When sending a chart, be sure indicate whether a screenshot will be sent (in PNG format) or as a CSV file. For Table and Pivot Tables, you can also choose to include the chart on the email text (rather than as an attachment).
Screenshot Width is an optional parameter which allows you to customize the width (in pixels) for your dashboard / chart screenshot. Your custom width can be between 600 and 2400 pixels. The format is the plain number ( ex. 2000 ). Utilizing the custom screenshot width may allow you to show more columns in an wide table chart which would normally be cut off by the typical screenshot width; please note that tables wider than the maximum limit of 2400 pixels will be cut off.
Check the Ignore cache when generating screenshot checkbox to produce real-time data (invalidating cache).
.png)
Define Notification Method
In the Notification Method section, select Add notification method. The Select delivery method drop-down field appears.
Select this field and then select either Email or Slack, as needed. On selection, you will be prompted to enter an e-mail address or the channel name. In this example, we will send the dashboard to an e-mail address. You can also configure it to be sent to both recipient types:

Good job, your report is ready to go! To finalize your report, select Add.
How to Schedule from the Dashboard or Chart Interface
A report can be scheduled via a dashboard or via a chart.
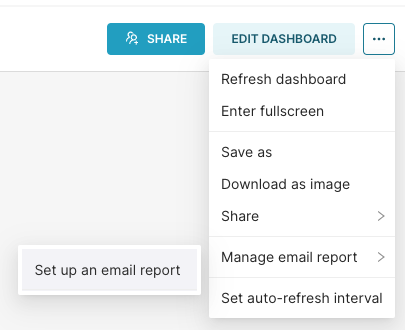
Via a Dashboard
View a dashboard and, in the top right corner, select the ellipsis icon and then Manage email report > Set up an email report.
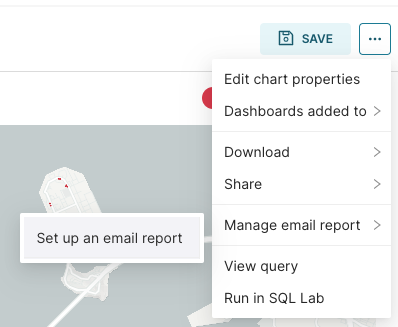
Via a Chart
View a chart and, in the top right corner, select the ellipsis icon and then Manage email report > Set up an email report.
Configure the Scheduled Report
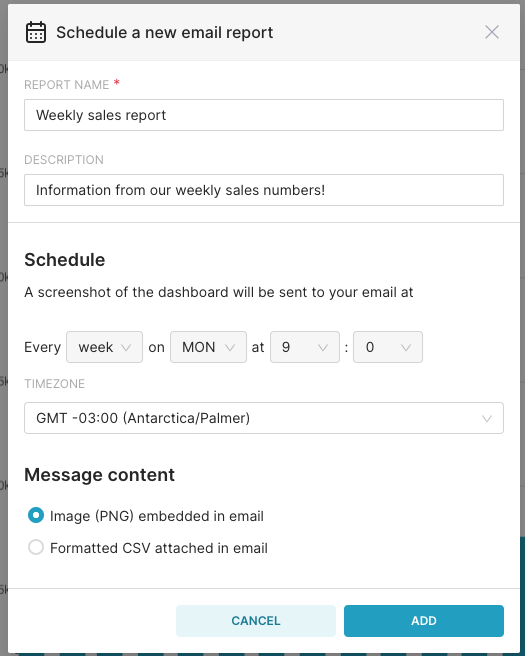
In the Report Name field (required), enter a memorable name for the new report and, in the Description field, enter a brief description of the report. Here's an example:
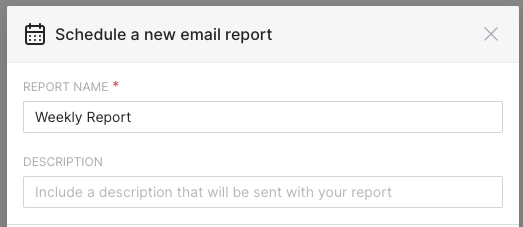
Scheduling a New Report
After the word Every, select the frequency of the report. Options include:
- Year
- Month
- Week
- Day
- Hour
- Minute
After you select one of the above, the scheduler will present options that are relevant to your choice.
Note that when you make a selection from a drop-down menu, it will not replace any existing content but, rather, produce an additional selection. Select the x icon to clear a field, as needed.
Here are some examples:
Daily Report
| Every day at 2pm | Every day at 6am and 2pm |
 |  |
Weekly Report
| Every Tuesday and Thursday at 10:30am | Every Friday at 4pm and 4:30pm |
 |  |
Monthly Report
| Every month on the 11th at 11am | Every month on the 11th and 22nd, and also on Fridays, at 4:30pm |
 | 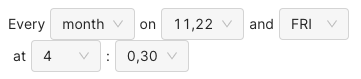 |
The Timezone field defaults to your current location — use the drop-down menu to change this value, if needed.
Define Message Content
For dashboards, only Image (PNG) is supported so this is automatically selected. For charts, choose between:
- Image (PNG) embedded in email field to receive the chart as an image that is directly embedded within the e-mail's message body.
- Formatted CSV attached in email field to receive the chart's raw data as a comma-separated value file that is attached to the e-mail.
In either case, you will also be provided with a link to view the asset within Preset.
Finalize the Scheduled Report
When done, select Save.
Great work! Your schedule has now been created. To verify, select Settings → Alerts & Reports → Reports tab.