- 13 Jan 2023
- 2 Minutes to read
- Print
- DarkLight
- PDF
Aurora MySQL (Data API)
- Updated on 13 Jan 2023
- 2 Minutes to read
- Print
- DarkLight
- PDF
Overview
In this article we will explain how to connect an Amazon Aurora MySQL database to Preset. So let's get started!
Allowlist Preset IPs
Preset Cloud runs on four regions. For Preset to access your data, first thing you need to do is to add region based Preset IP addresses to your Inbound and Outbound firewall rules.
| us-west-2 (us1a) | us-east-1 (us2a) | eu-north-1 (eu5a) | ap-northeast-1 (ap1a) |
|---|---|---|---|
| 35.161.45.11 | 44.193.153.196 | 13.48.95.3 | 35.74.159.67 |
| 54.244.23.85 | 52.70.123.52 | 13.51.212.165 | 35.75.171.157 |
| 52.32.136.34 | 54.83.88.93 | 16.170.49.24 | 52.193.196.211 |
If you are not sure where your Preset workspace is located, you can refer to the URL on your browser when accessing Preset. It should look like this: https://xxxxxxxx.us2a.app.preset.io/superset..., where us2a means it is in us-east-1.
Step 1: Create Database on AWS
To learn how to do this, please see Creating an Aurora MySQL Database Cluster  .
.
Step 2: Ensure Accessibility from Outside VPC
To learn how to do this, please see Connecting an Aurora Database Cluster from Outside a VPC  .
.
Step 3: Connect Database to Preset
Add Database
Let's start by selecting + Database — have a look at Connecting your Data if you need help wth this step.
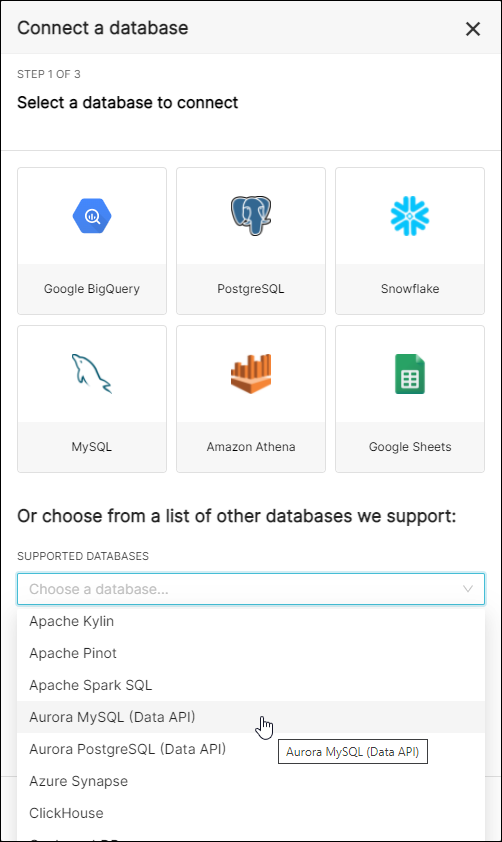
...then, in the Connect a database window, select Aurora MySQL (Data API) in the Supported Databases field.
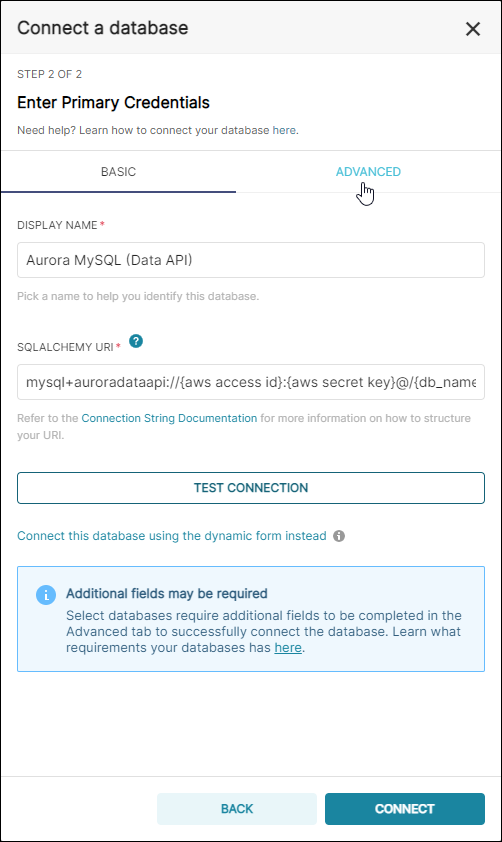
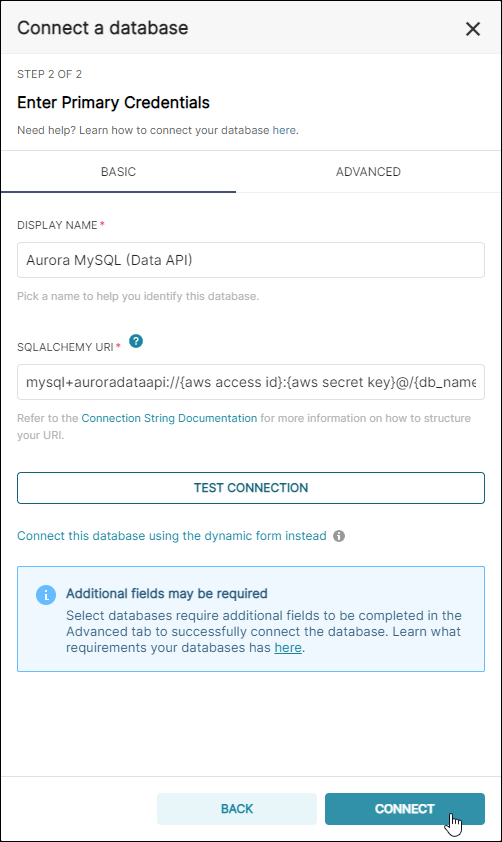
In the Display Name field, enter a meaningful name for the new connection to the Aurora MySQL database. In this example, we simply used the default Aurora MySQL (Data API).
In the SQLAlchemy URI field, customize your URI connection string using the following syntax:
mysql+auroradataapi://{aws access id}:{aws secret key}@/{db_name}
- aws access id: Amazon Web Services access identification number
- aws secret key: Amazon Web Services secret key
- db_name: The name of your database
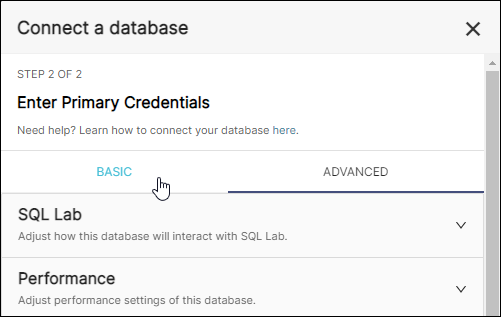
When done, select the Advanced tab.
Configure Advanced Tab
With the Advanced tab selected, expand the Other section.
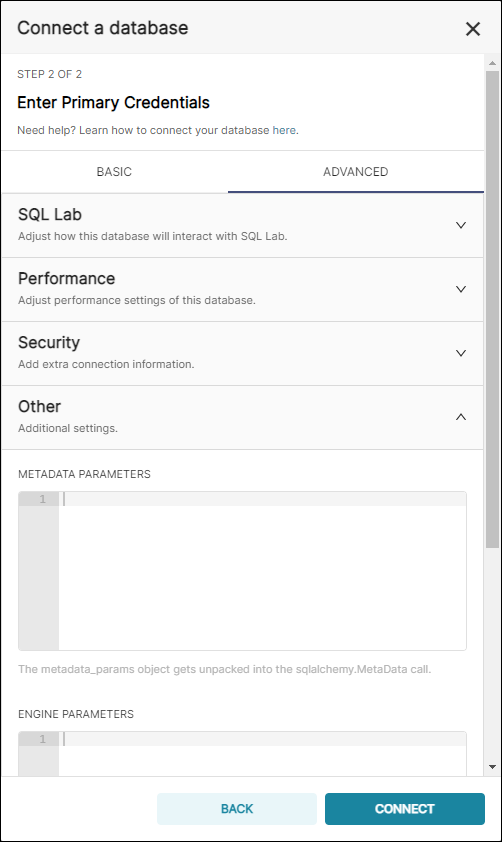
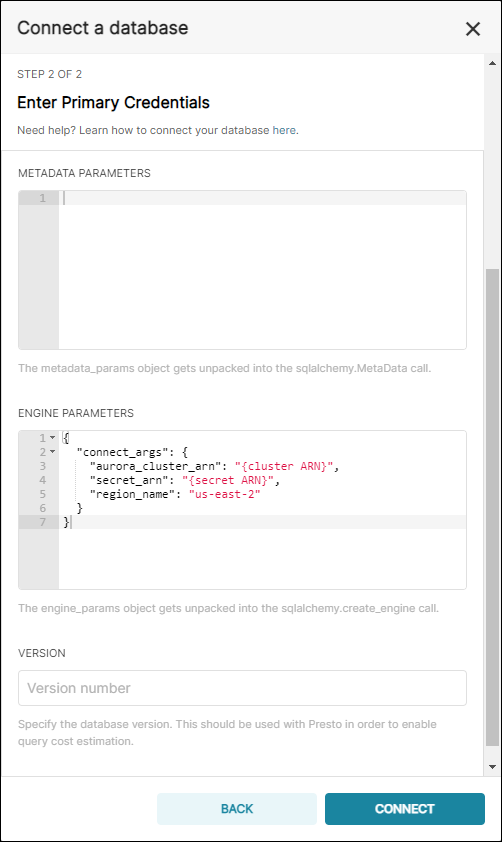
In the Engine Parameters section, customize the following parameters using the following syntax:
{
  "connect_args": {
    "aurora_cluster_arn": "{cluster ARN}",
    "secret_arn": "{secret ARN}",
    "region_name": "us-east-2"
  }
}
- aurora_cluster_arn: The Amazon Resource Name that identifies the cluster.
- secret_arn: The Amazon Resource Name for an encryption key (i.e., an AWS KMS key that Secrets Manager uses to encrypt and decrypt the secret value).
- region_name: The region that you are deployed in.
When done, return to the previous screen by selecting the Basic tab.
Test and Connect
To test your connection, select Test Connection. If successful, a notification message appears:

After a successful test, go ahead and select Connect to finalize the connection.
Congratulations, your Aurora MySQL database is now connected to Preset!
