Overview
In this article we will explain how to connect an Apache Druid (Imply) database to Preset. So let's get started!
Allowlist Preset IPs
Preset Cloud runs on four regions. For Preset to access your data, first thing you need to do is to add region based Preset IP addresses to your Inbound and Outbound firewall rules.
| us-west-2 (us1a) | us-east-1 (us2a) | eu-north-1 (eu5a) | ap-northeast-1 (ap1a) |
|---|---|---|---|
| 35.161.45.11 | 44.193.153.196 | 13.48.95.3 | 35.74.159.67 |
| 54.244.23.85 | 52.70.123.52 | 13.51.212.165 | 35.75.171.157 |
| 52.32.136.34 | 54.83.88.93 | 16.170.49.24 | 52.193.196.211 |
If you are not sure where your Preset workspace is located, you can refer to the URL on your browser when accessing Preset. It should look like this: https://xxxxxxxx.us2a.app.preset.io/superset..., where us2a means it is in us-east-1.
Step 1: Retrieve Data from Imply
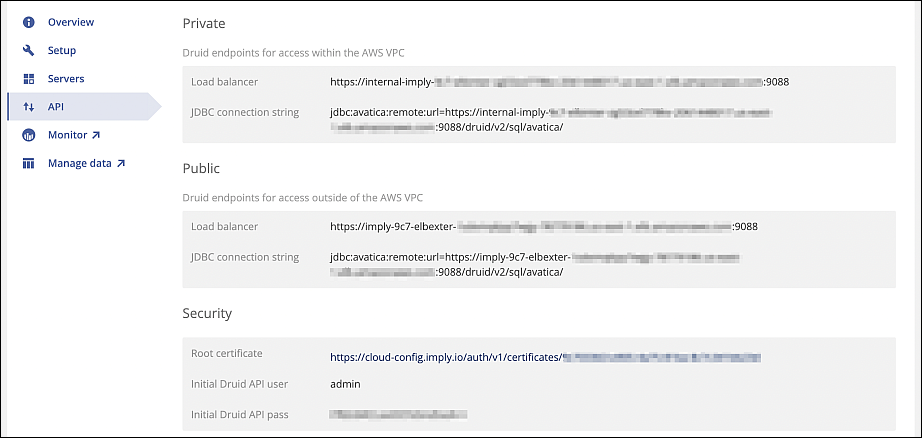
In order to connect Apache Druid (Imply) to Preset, we first need to retrieve some key data from the Imply environment:
- Required to Construct SQLAlchemy URI
- Initial Druid API User
- Initial Druid API Pass
- Public Load Balancer Endpoint
- Required Security for Preset
- Root Certificate
To start, let's navigate to your Imply cluster and then select Manage.

...then select API.
You will notice that this screen contains all of the required information for the subsequent connection steps below.
Step 2: Connect Database to Preset
Add Database
Let's start by selecting + Database — have a look at Connecting your Data if you need help wth this step.
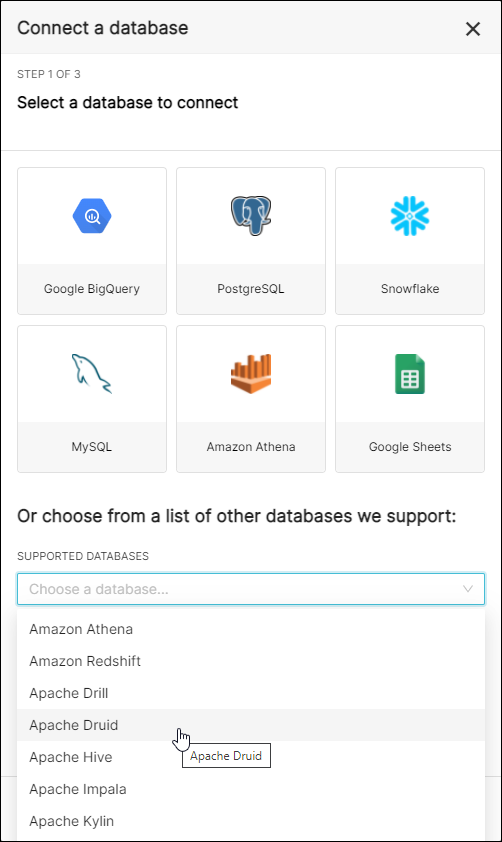
...then, in the Connect a database window, select Apache Druid in the Supported Databases field.
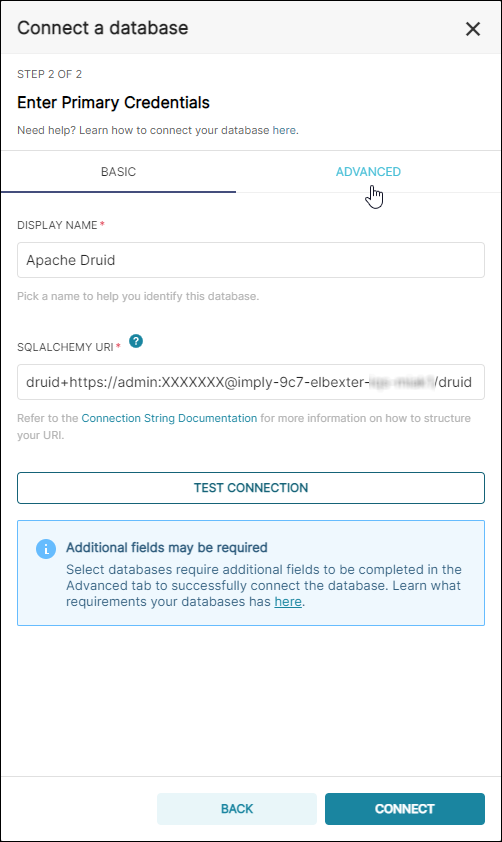
In the Display Name field, enter a meaningful name for the new connection to the Apache Druid database. In this example, we simply used the default Apache Druid.
In the SQLAlchemy URI field, customize your URI connection string using the following syntax:
druid+https://<User>:<password>@<Host>:<Port-default-8082>/druid/v2/sql
In the event that you do not have authorization set up, you can replace druid+https with druid+http and skip the username and password credentials.
Required elements retrieved earlier that will be used here include:
- Initial Druid API User
- Initial Druid API Pass
- Public Load Balancer Endpoint
When done, select the Advanced tab.
Configure Advanced Tab
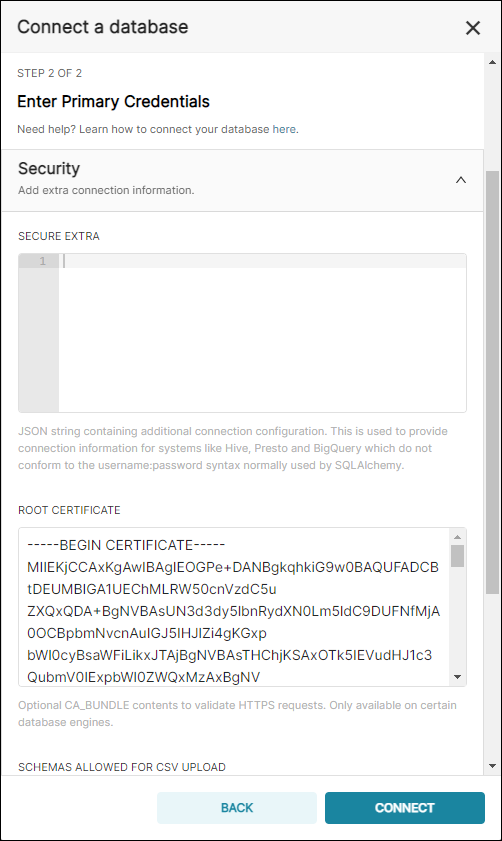
In the Imply API menu screen referenced in Step 1 above, navigate to the URL in the Root Certificate field and then copy the certificate.
In Preset with the Advanced tab selected, expand the Security section.
In the Root Certificate field, paste the certificate from your system's clipboard.
Next, expand the Other section.
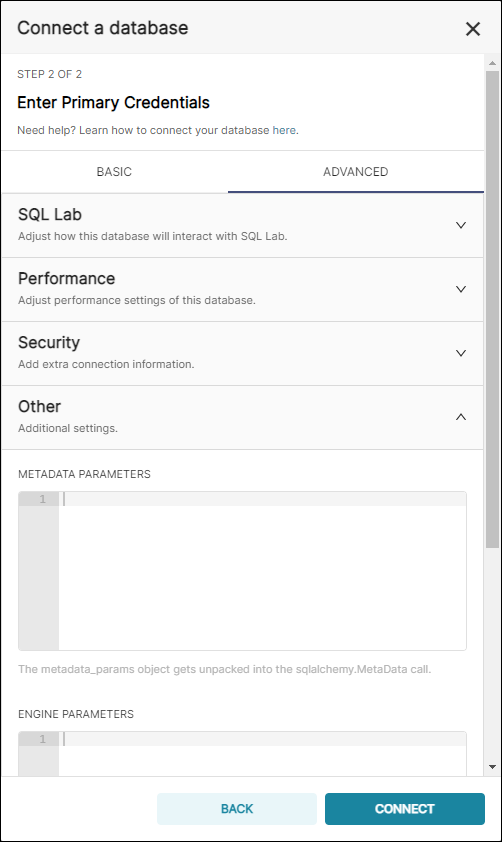
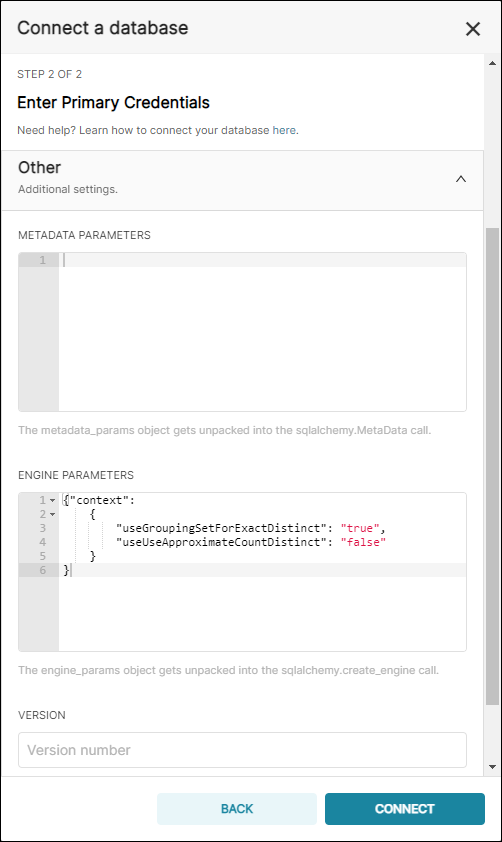
In the Engine Parameters section, enter the following parameters:
{"context":
    {
        "useGroupingSetForExactDistinct": "true",
        "useUseApproximateCountDistinct": "false"
    }
}
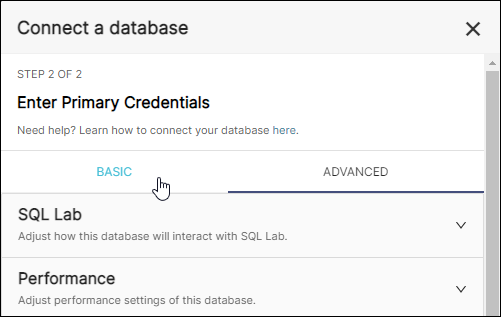
When done, return to the previous screen by selecting the Basic tab.
Test and Connect
To test your connection, select Test Connection. If successful, a notification message appears:

After a successful test, go ahead and select Connect to finalize the connection.
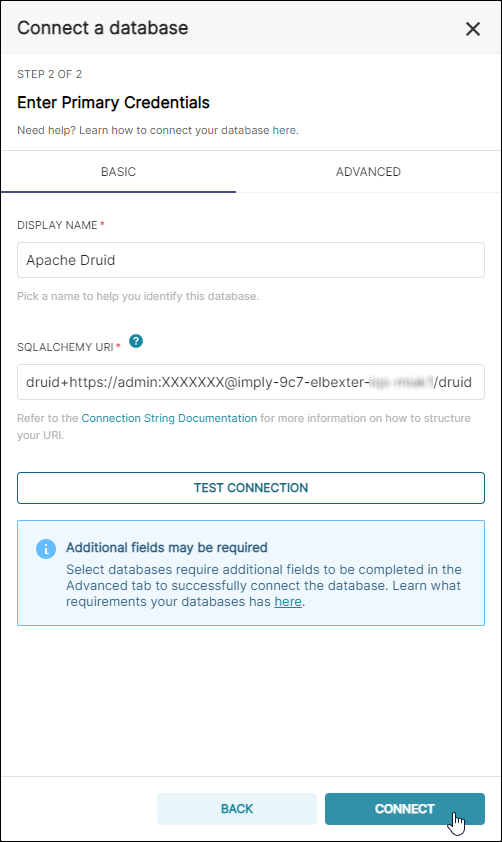
Congratulations, your Apache Druid database is now connected to Preset!
Alternative: Authenticating with a JWT (Bearer Token)
Some Apache Druid deployments, including managed Druid such as Imply, sit behind an OpenID Connect (OIDC) layer and expect requests to carry a JWT bearer token rather than a username and password. In this setup, Preset authenticates by attaching the token to every query as an Authorization: Bearer header, instead of embedding credentials in the connection string.
To connect this way, follow the same steps described above, with two changes:
1. Leave the credentials out of the SQLAlchemy URI
In the SQLAlchemy URI field, enter the connection string without a user or password:
druid://<Host>:<Port-default-8082>/druid/v2/sql
The scheme prefix (druid://) is fine as-is; the actual connection scheme (HTTP or HTTPS) is set alongside the token in the next step.
2. Add the token to the Secure Extra field
On the Advanced tab, expand the Security section, and in the Secure Extra field enter the following, replacing the placeholders with your values:
{
    "connect_args": {
        "scheme": "https",
        "jwt": "<JWT_TOKEN>"
    }
}
scheme: usehttpsfor a TLS-secured endpoint (the typical case), orhttpif the endpoint is unencrypted. Enter it in lowercase.jwt: the bearer token issued by your identity/OIDC provider. Preset attaches this token to every request; your Druid deployment is responsible for validating it.
- Masked display: Because Secure Extra is encrypted, the token will appear as
XXXXXXXXXXif you return to edit this connection later. This is expected; it doesn't mean the token was cleared or the connection is broken. - Token expiration: JWTs typically expire after a set period. Because the token is stored as a static string, Preset does not automatically refresh it; once it expires, the connection will begin failing until someone manually updates this field with a new, valid token.
- If the connection test fails: you'll see a generic database error indicating an unexpected 401 status code. The specific reason inside that error, for instance, an expired or malformed token, is generated by your cluster's JWT validator, not by Preset, so the exact wording will vary depending on how your Trino/Presto administrator has configured authentication. If you're unsure how to interpret it, check with them directly.
- If you also need to pass Druid query context options: add those separately in the Engine Parameters field of the Other section, as described in Configure Advanced Tab above. The context block is not sensitive, so it does not need to go in Secure Extra.
After this, you can test the connection to check that everything is working as expected.